Table of contents
|
Note: If you don’t see labels after publishing them, or if they appear incorrectly, it may be due to third-party plugins that modify your theme’s UI, causing incompatibility. Please contact us at help-center@amasty.com so we can fix it for your case. |
With Automatic Product Labels for BigCommerce, you can easily add eye-catching labels, badges, and ribbons to your products — automatically based on set conditions or manually by selection. Highlight new, sale, or low-stock products, showcase materials, brands, promotions, or any key feature to grab customer attention.
Settings
We recommend starting your app configuration on the Settings page. To do this, click the gear icon in the top left corner and fill in the following fields:
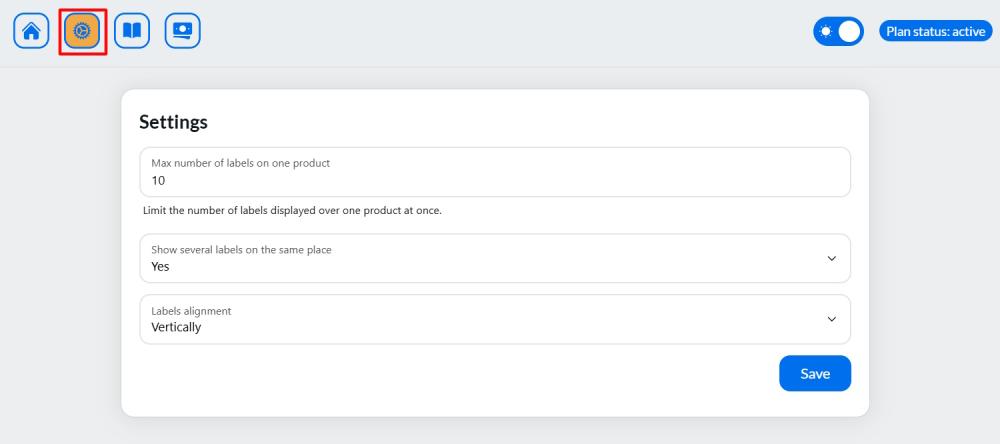
Max number of labels on one product - set the maximum number of labels that can be displayed on a single product.
Note:
- If a product qualifies for more labels than the specified number, labels will be displayed according to priority set in Label settings. For example, if you set the maximum to 2 labels but the product qualifies for 3, only the 2 highest-priority labels will be displayed.
- If the number of labels exceeds the image size, they will be cropped at the edge.
Show several labels in the same place - set it to Yes if you want to display multiple labels in the same location on the image (based on the label position settings).
Note:
If set to No, only one label will be shown per position.
For example, if a product has two labels assigned to the top-left position and one label assigned to the bottom-left, then only one label will appear in each position — one at the top-left and one at the bottom-left.
Labels alignment (available only if "Show several labels on the same place" is set to Yes) - choose whether the labels will be aligned vertically or horizontally.
Note:
The default spacing between labels is 8px on desktop and 6px on mobile.
Click Save to apply the changes.
Create and Manage Labels
To open the Labels grid, click the House icon in the top left corner.
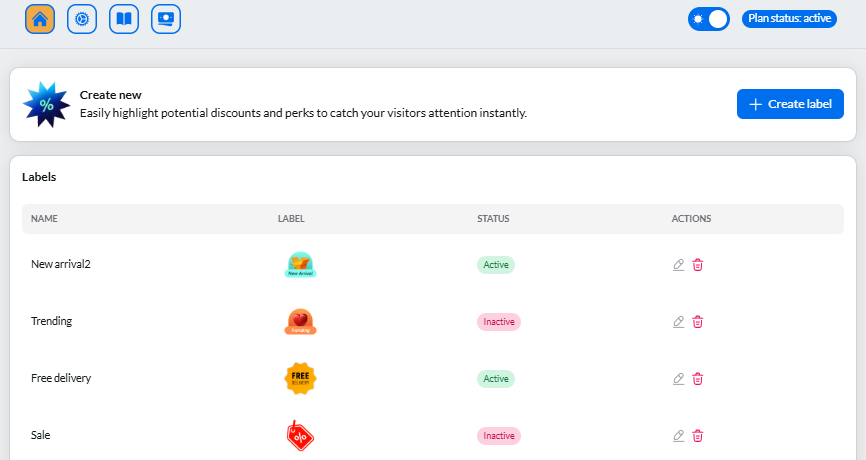
Here, you can create, edit, and delete your labels, as well as view their status (active, inactive, or scheduled).
Click the + Create label button to start.
On the right, you'll see a live preview (you can switch between desktop and mobile views), and on the left, you'll find the settings. There are two tabs for configuring your label: Settings and Assignment.
Settings tab
Specify the following settings:
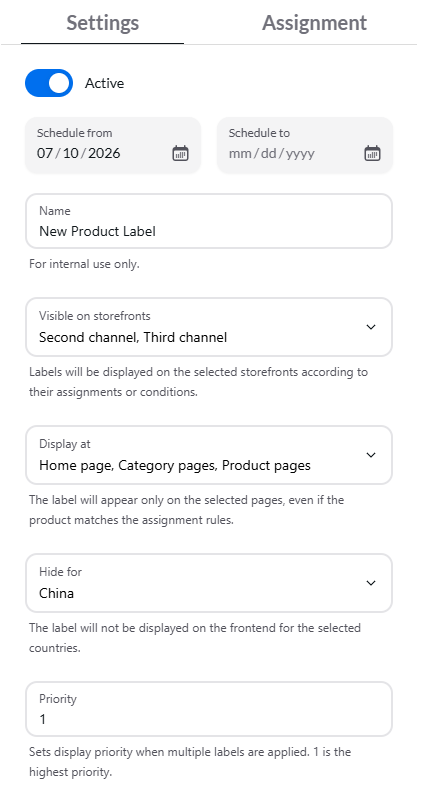
Active - use the toggle to activate or deactivate the label.
Schedule - set the start and end dates to schedule when the label will appear.
Name - give your label a name for internal use only. Customers won’t see this - choose a name that’s clear for you.
Visible on storefronts - if you have multiple storefronts, you can specify which ones this product label will appear on.
Display at - specify which pages the product label will be visible on.
- Home Page
- Category page
- Product pages
- Related product blocks
- Search results
- Brand pages
Hide for - You can now control which countries see specific product labels. This is useful if certain labels or promotions are only relevant to specific regions.
If you leave this field empty, the label will display for all customers worldwide (as long as the product meets your other label criteria).
When you select one or more countries, the label is immediately blocked for shoppers browsing from those locations. The setting overrides all other display rules. Even if a product perfectly matches all other label criteria
Priority - set the label’s priority. A priority of "1" is the highest. This is used when multiple labels are applied to one product.
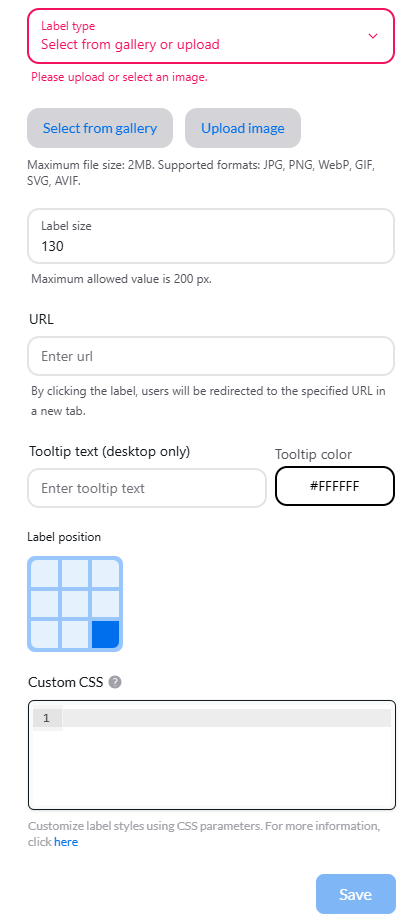
Label type:
- Select from gallery or upload: Upload your own image or choose from our gallery. Note: Use the search or filter to quickly find the labels you need in our gallery. Set the size and position of the label on the image. Note: The maximum size for uploaded images is 2 MB. Image formats supported: .png, .jpg, .webp, .gif., .svg, .avif.
- Shape and text: The label will display text with a background shape. Choose the shape, size, color, and position.
- Text only: The label will display text without a background.
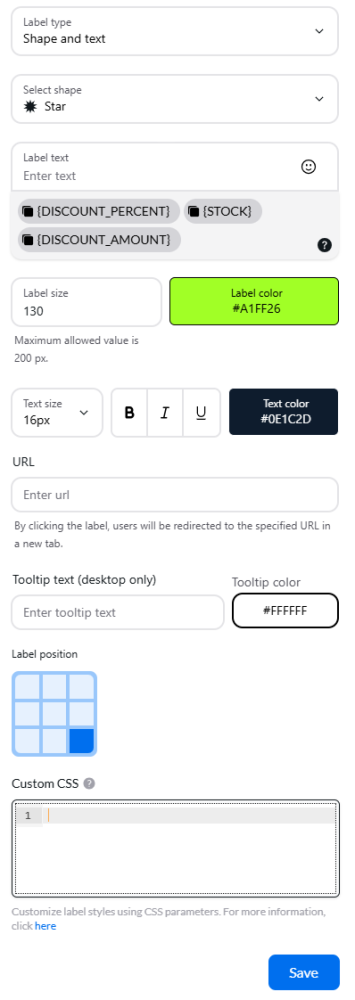
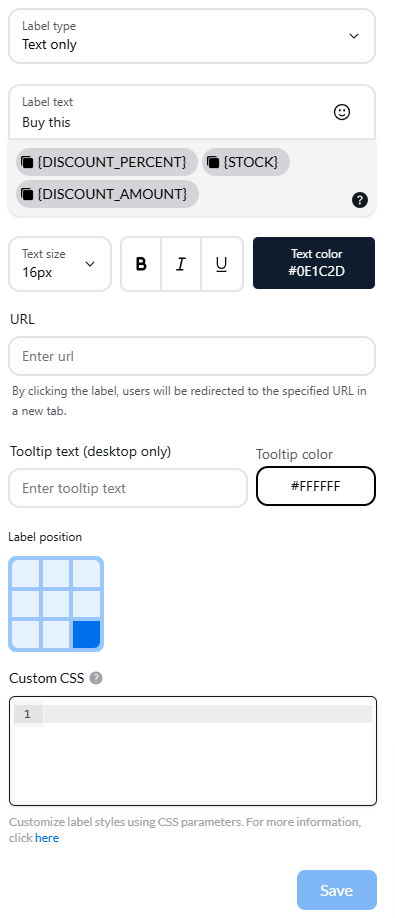
Label text - you can manually enter label text, use emojis, and adjust the size, color, and position on the image. Optionally, insert the following variables directly into the Label Text field:
- {DISCOUNT_PERCENT} Displays the product discount as a percentage. Example: 30%.
- {DISCOUNT_AMOUNT} Displays the monetary value of the discount. Example: 30 $.
- {STOCK} Displays the current stock quantity for the product.
Note: Inventory tracking must be enabled in your store settings for the stock variable to work.
Variables are replaced with actual values automatically wherever labels are displayed. Labels update dynamically when prices or stock levels change. After publication, no further manual edits are required to keep the label data up to date.
URL - add a custom URL to make your product labels interactive, redirecting customers to specific pages, collections, or external links. Clicking the label opens the specified page in a new tab.
Note: To ensure the label is clickable on your Product Pages, the store's "Image Zoom" feature must be disabled. If zoom is active, clicking the image will enlarge the photo instead of triggering the label link.
Note: To disable image zoom for your theme:
- Go to the Bigcommerce store admin-panel Home page and click Custom Theme.
- Select the Theme Style (palette icon in the sidebar) and click Product.
- In the menu, find the Zoomed image and change the setting to Specify dimensions.
- Enter 1 for Max width and 1 for Max height.
- Click Publish.
Tooltip text (desktop only) – Enter the text to display in the tooltip (up to 50 characters). Leave this field empty to disable the tooltip.
Tooltip color - Choose the tooltip background color. The text color is always black.
Note: Tooltips are supported for all label types
The tooltip appears when customers hover over the label on the desktop.
The tooltip is displayed on product pages only if the store's product image zoom is disabled.
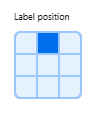
Label position - You can control where the label appears on the product image using a 3×3 position grid. The grid is displayed as a square divided into nine sections. Selecting a section determines the label’s placement on the product image — top, bottom, left, right, center, or any corner.
Custom CSS - Use Custom CSS to apply your own styles and customize the appearance of a label beyond the available design settings.
Note: The label preview updates immediately as you edit the CSS.
The CSS rules will entirely override the settings made in the Appearance tab.
Clear the Custom CSS field, to return the label to its default appearance.
Click Save and then proceed to the Assignment tab.
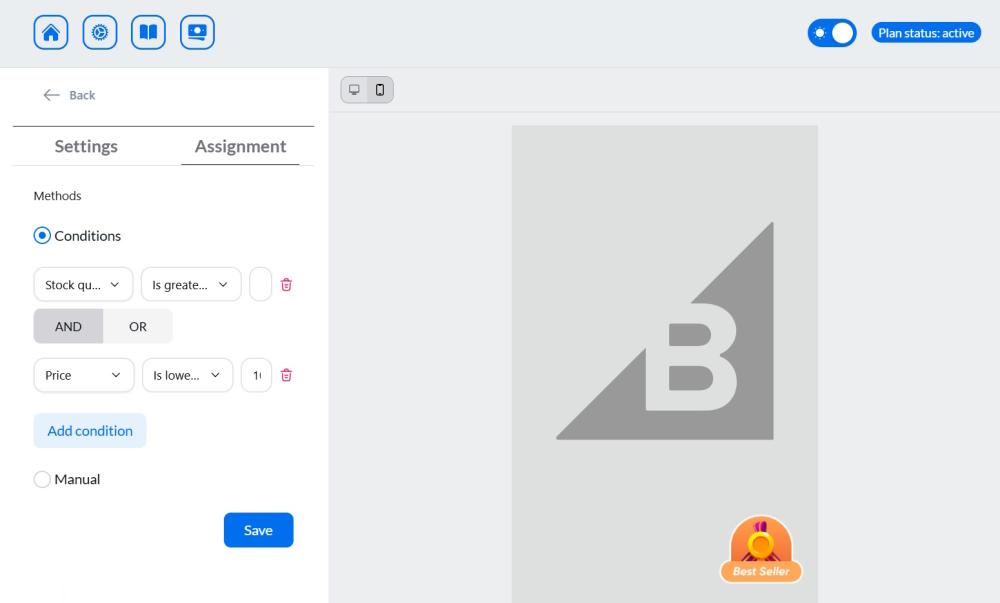
Assignment tab
In the Assignment tab, you can choose how and when the label will be applied to products. You have two main options for assigning labels:
- Conditions - define the criteria that must be met for the label to apply. You can choose from several conditions such as:
- All Products: Apply the label to all products in your catalog.
- Stock Quantity: Apply the label based on the quantity of the product in stock. For example, you could set a label to appear on products with fewer than 10 items in stock.
- Price: Set conditions based on the product price. For example, apply a label to products that cost more than $50.
- Category: Apply the label to products from a specific category (e.g., "Electronics" or "Clothing").
- Title: Apply the label when the product title contains a certain word or phrase (e.g., "Sale," "New," etc.).
- Creation Date: Apply the label to products created within a specific date range (e.g., products created in the last 30 days).
- Product on Sale: Apply labels to all products on sale, products with a specific discount, or products within a specific discount range.
- Brand: Apply the label to products related to a specific brand (e.g., "Nike" or "Lays").
- Customer groups: Use the condition to show or hide labels based on the customer group a shopper belongs to.
When you choose Customer groups from the condition dropdown, a new rule line appears.
Choose an operator:
Is – Display the label only for the selected customer groups.
Is not – Display the label for everyone except the selected customer groups.
Click + Add group and select one or more customer groups.
Save your changes.
You can combine multiple conditions using AND or OR to create complex rules.
Check out the use cases to inspire your conditions.
This method is particularly useful if you want labels to automatically apply to new products or disappear when product details change.
- Manual - select individual products from your catalog to manually assign the label. Use the search to quickly find products by name.
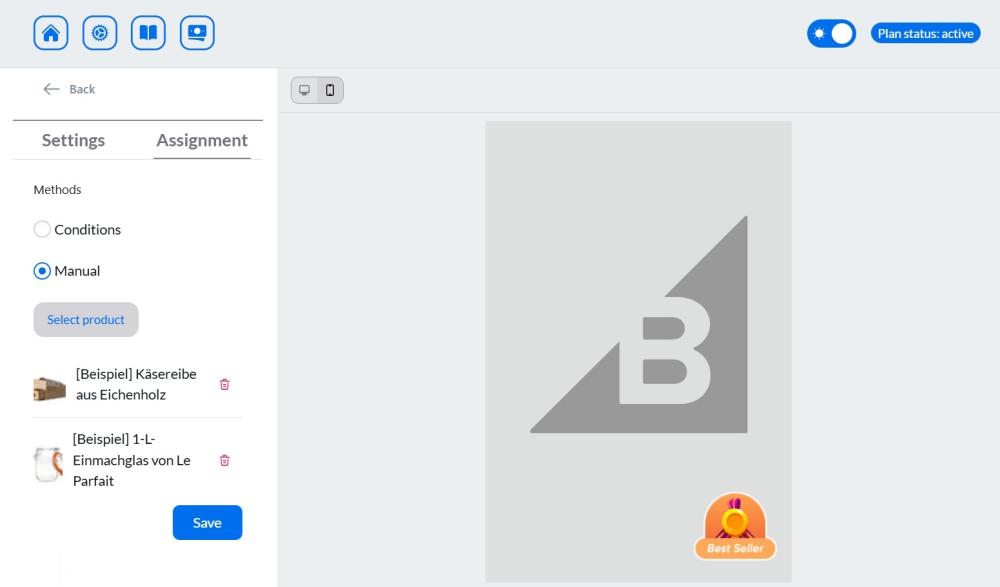
Once done, click Save to apply the settings.
Use cases
These use cases demonstrate how you can display badges or labels on your products based on various conditions.
1. Display label for products priced between $50 and $100:
Price is lower than $100
AND
Price is greater than $50
2. Display badge on products with a discount greater than 50%:
Product on sale - Yes, and discount above 50%
3. Display badge on all products except those in the Food category:
All products
AND
Category is not Food
4. Display badge on new products added in the last 7 days:
Creation date is 7 last days
5. Display badge for out-of-stock products (also useful for "Coming Soon" badge in demand research):
Stock quantity is lower than 1
6. Display badge on products that contain "bag" in the title:
Title contains bag
7. Display badge on products with no common features:
Use the Manual Method to select specific products when they don’t meet shared conditions.
8. Display badge for product created by “Sony”:
Brand is Sony.