Automatic Product Labels for Ecwid lets you easily create and assign product labels, badges, and ribbons to your products, either manually or automatically based on specific conditions. These labels help grab customers' attention, quickly informing them if a product is new, on sale, low in stock, and more.
Settings
We recommend starting your app configuration on the Settings page. To do this, click the gear icon in the top left corner and fill in the following fields:
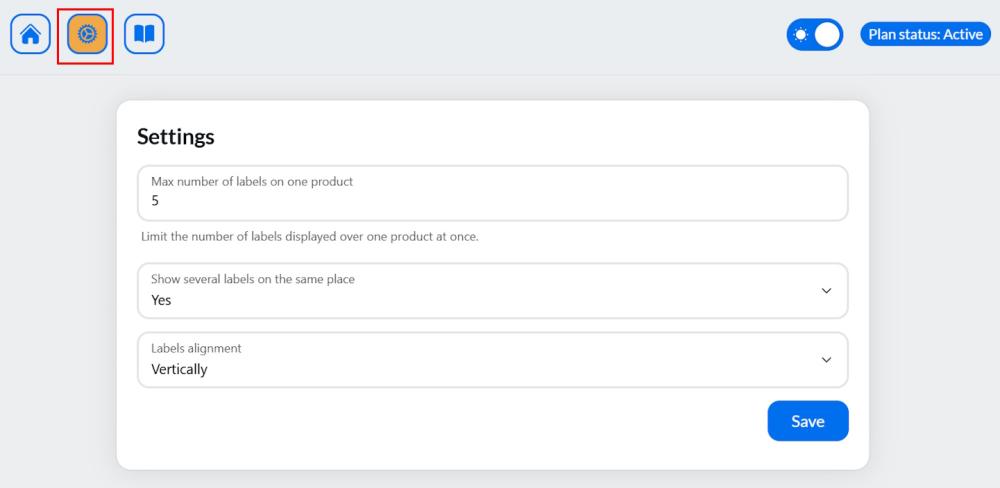
Max number of labels on one product - set the maximum number of labels that can be displayed on a single product.
Note:
- If a product qualifies for more labels than the specified number, labels will be displayed according to priority set in Label settings. For example, if you set the maximum to 2 labels but the product qualifies for 3, only the 2 highest-priority labels will be displayed.
- If the number of labels exceeds the image size, they will be cropped at the edge.
Show several labels on the same place - set it to Yes if you want to display multiple labels in the same location on the image (based on the label position settings).
Note:
If set to No, only one label will be displayed, regardless of the number specified in the "Max number of labels on one product" field.
Labels alignment (available only if "Show several labels on the same place" is set to Yes) - choose whether the labels will be aligned vertically or horizontally.
Note:
The default spacing between labels is 8px on desktop and 6px on mobile.
Click Save to apply the changes.
Create and Manage Labels
To open the Labels grid, click the House icon in the top left corner.
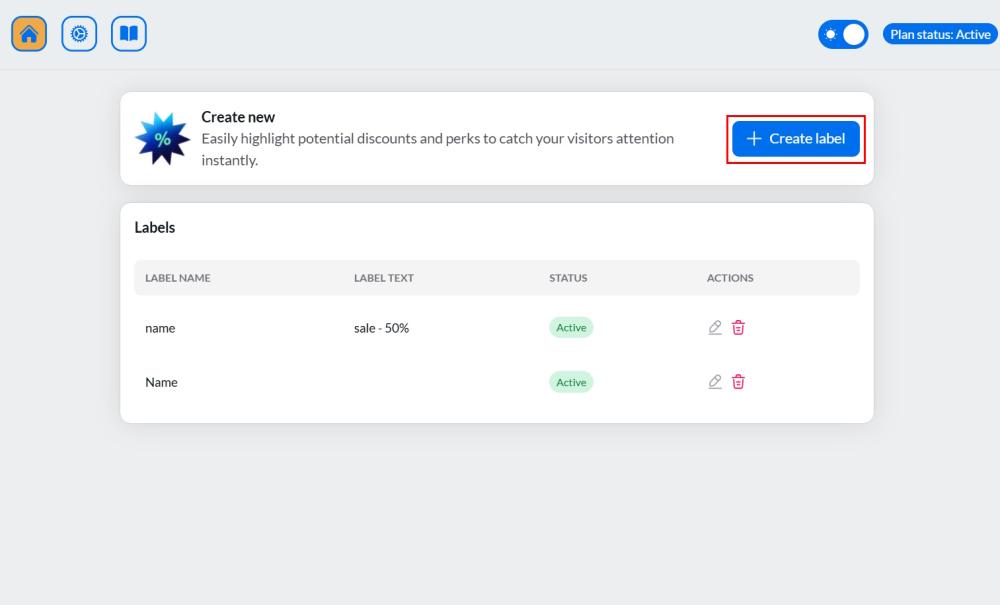
Here, you can create, edit, and delete your labels, as well as view their status (active, inactive, or scheduled).
Click the + Create label button to start. On the right, you'll see a live preview, and on the left, you'll find the settings. There are two tabs for configuring your label: Settings and Assignment.
Settings tab
Specify the following settings:
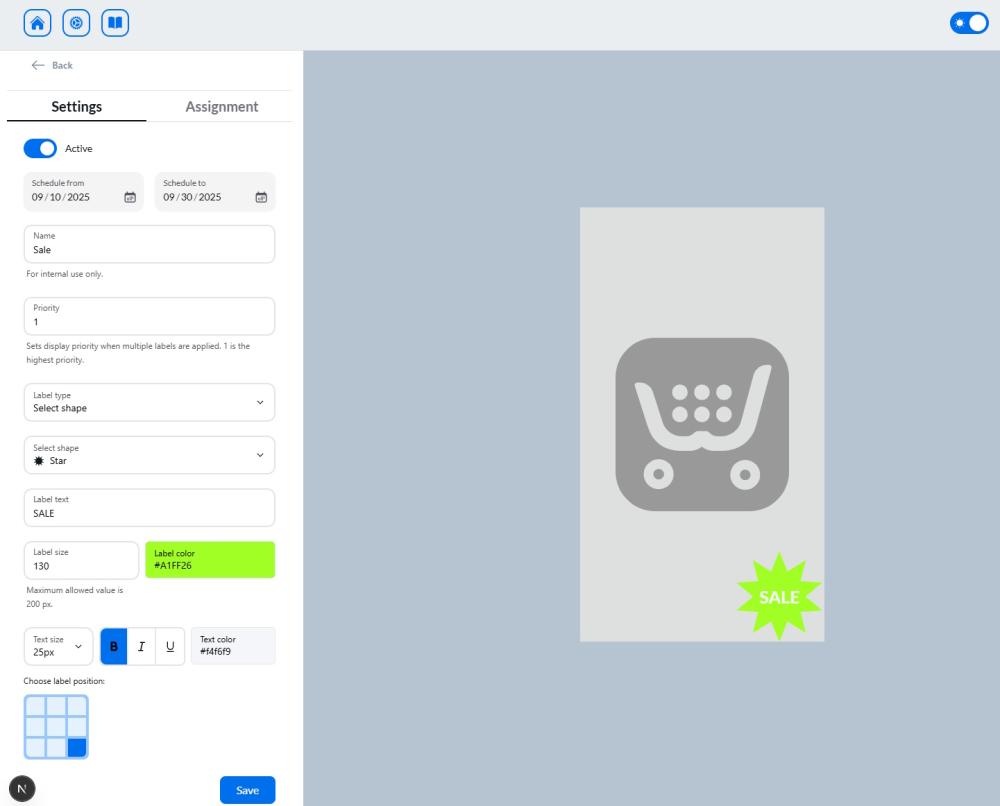
Active - use the toggle to activate or deactivate the label.
Schedule - set the start and end dates to schedule when the label will appear.
Name - give your label a name for internal use only. Customers won’t see this - choose a name that’s clear for you.
Priority - set the label’s priority. A priority of "1" is the highest. This is used when multiple labels are applied to one product.
Label type:
- Text Only: The label will display text without a background. Specify the text, adjust the size, color, and position on the image.
- Select Shape: The label will display text with a background shape. Choose the shape, size, color, and position, and configure the text.
- Upload Image: Upload your own image or choose from our gallery. Set the size and position of the label on the image.
Note:
- The maximum size for uploaded images is 2 MB.
Image formats supported: .png, .jpg, .webp, .gif., .svg, .avif.
Click Save and then proceed to the Assignment tab.
Assignment tab
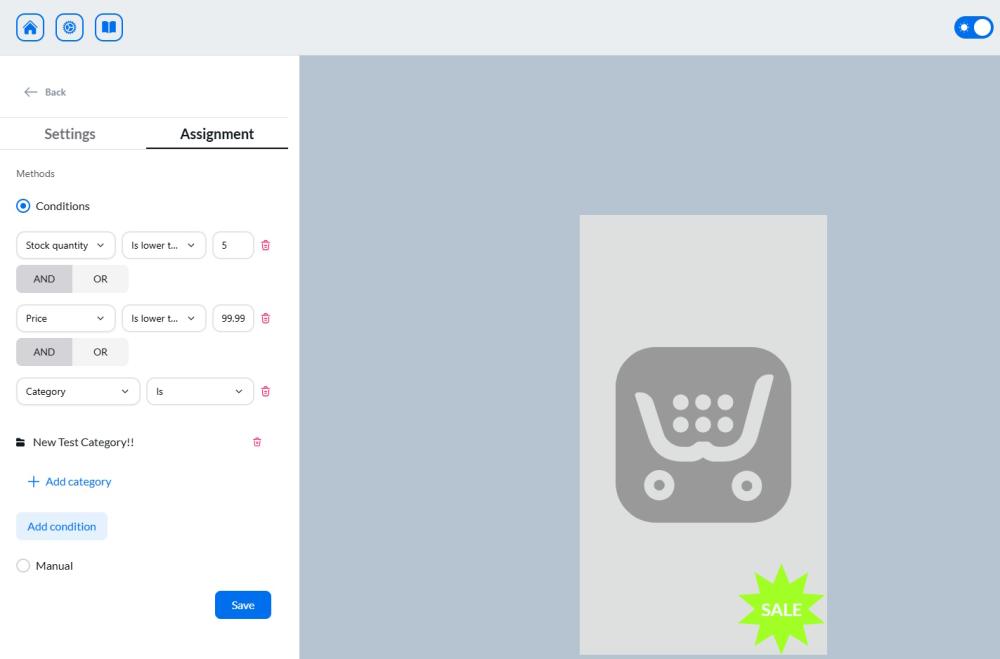
In the Assignment tab, you can choose how and when the label will be applied to products. You have two main options for assigning labels:
- Conditions - define the criteria that must be met for the label to apply. You can choose from several conditions such as:
- All Products: Apply the label to all products in your catalog.
- Stock Quantity: Apply the label based on the quantity of the product in stock. For example, you could set a label to appear on products with fewer than 10 items in stock.
- Price: Set conditions based on the product price. For example, apply a label to products that cost more than $50.
- Category: Choose products from a specific category (e.g., "Electronics" or "Clothing").
- Title: Apply the label when the product title contains a certain word or phrase (e.g., "Sale," "New," etc.).
- Creation Date: Apply the label to products created within a specific date range (e.g., products created in the last 30 days).
You can combine multiple conditions using AND or OR to create complex rules.
This method is particularly useful if you want labels to automatically apply to new products or disappear when product details change.
- Manual - select individual products from your catalog to manually assign the label.
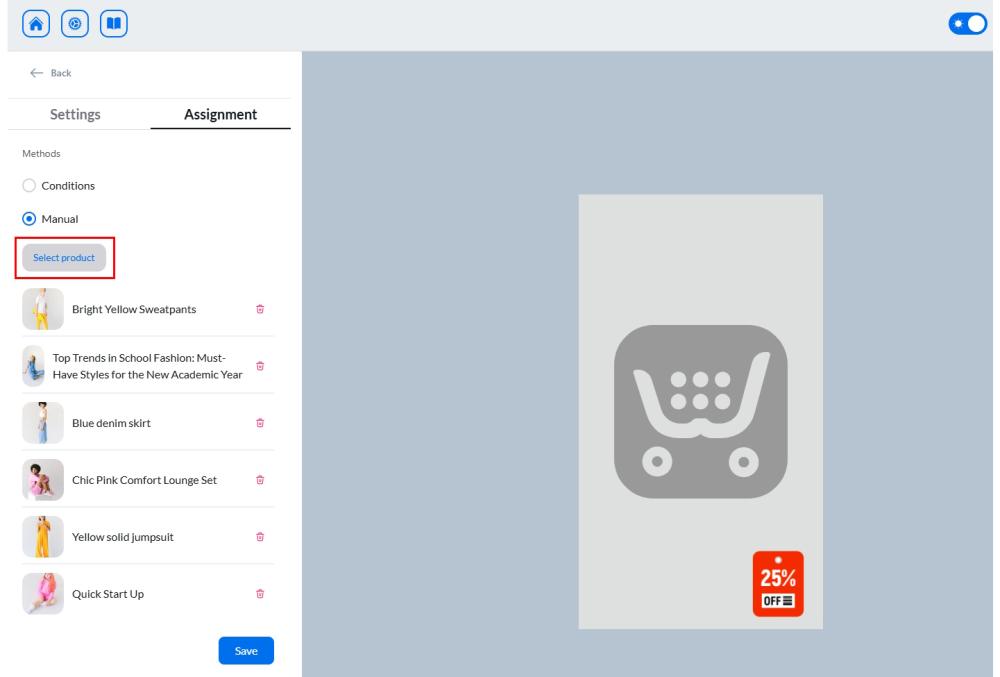
Once done, click Save to apply the settings.