Table of contents
- Home page and navigation
Overview of the home page and how to navigate through the app. - General settings
Recommended before content generation. - Products content generation
Generate product descriptions and metadata.- Generate product content in bulk
Generate descriptions or metadata for multiple products at once. - Generate product content individually
Generate descriptions or metadata for products individually.
- Generate product content in bulk
- Categories content generation
Generate category descriptions - individually only. - Custom prompt templates
Save your prompts in templates and access default ones - for more precise content. - History
Check content generation history and restore previous version. - Pricing plans
Learn how pricing is built and how to buy extra credits. - FAQ
ChatGPT AI Content Generator: AI Product Descriptions is an Ecwid app that lets you create compelling product descriptions, meta titles, and meta descriptions for products and collections using the power of ChatGPT.
Home page and navigation
After installing the app, you'll land on the Home page, where you’ll find quick links to pricing, onboarding, the change log, and the support form.
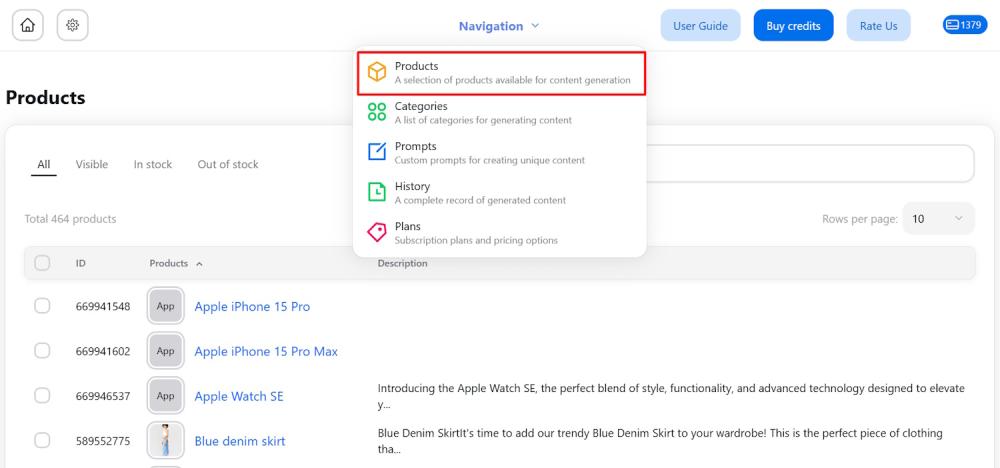
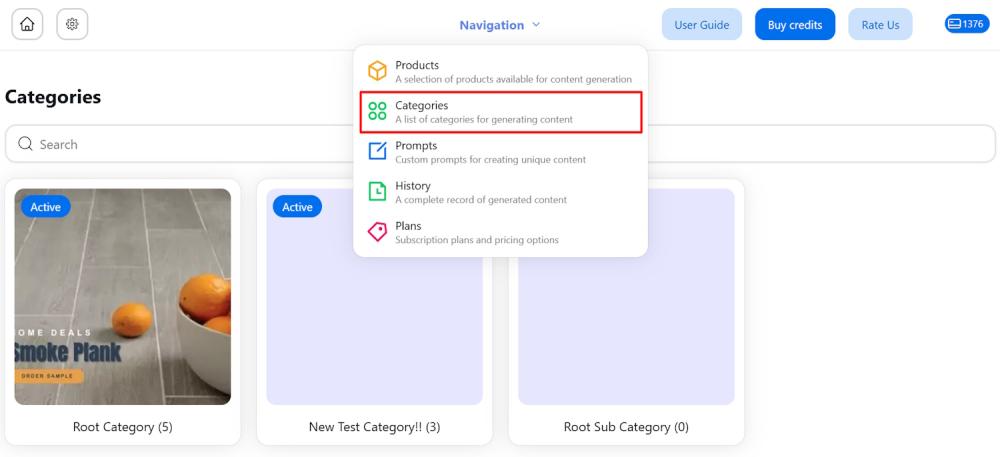
Use the Navigation dropdown at the top center to navigate through the app:
- Products: For generating product content
- Categories: For generating category content
- Prompts: For creating custom prompt templates
- History: To view your generation history
- Plans: To manage your pricing plan
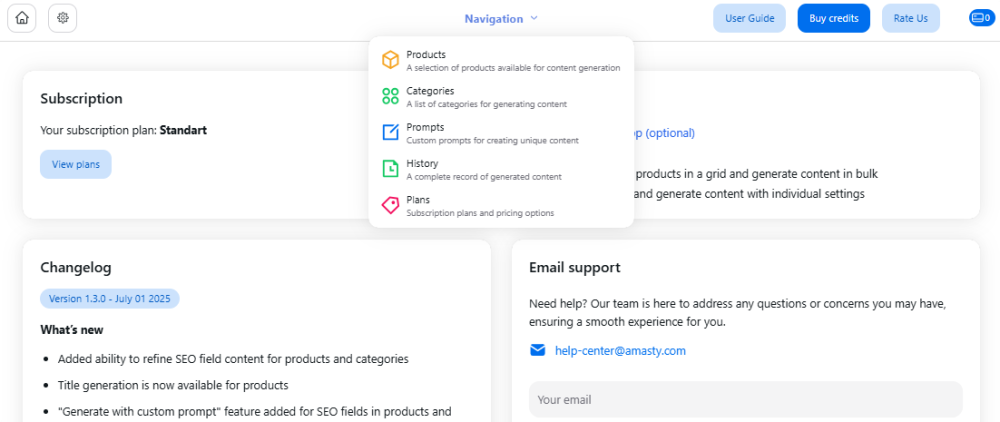
We recommend starting with the Settings. To access it, click the gear icon in the top left corner.
General Settings
Before you start generating content, we recommend customizing the app to fit your preferences on the Settings page.
Note: These settings are used to generate both individual and bulk content. If needed, you can adjust them for specific products or categories by opening the item and modifying the settings in the right section.
- Click Settings in the navigation menu or click the Settings icon in the top left corner of the app.
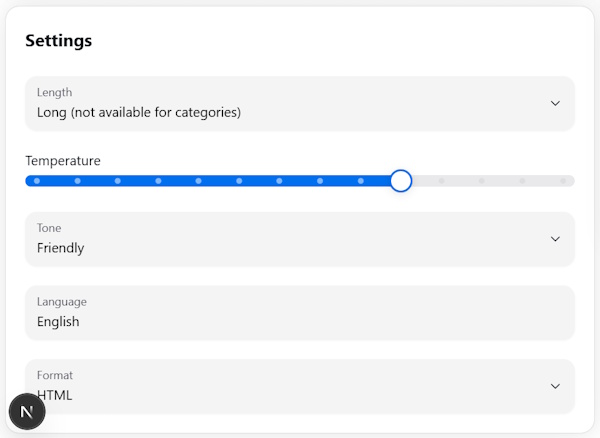
- Configure the following fields:
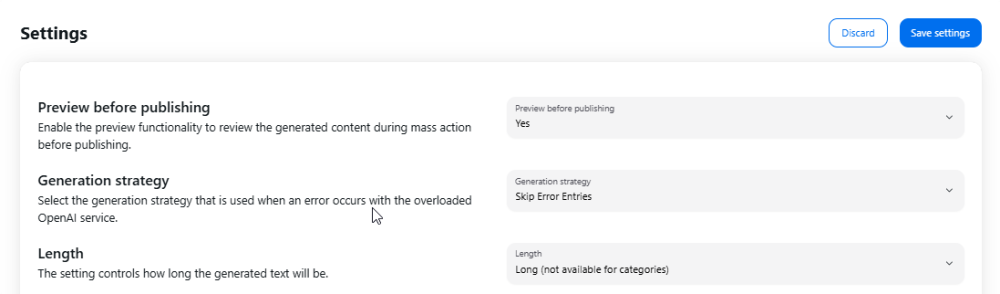
Preview before publishing - enable the preview functionality to review the generated content during mass action before publishing.
Generation strategy - select the generation strategy that is used when an error occurs with the overloaded OpenAI service.
Length - the setting controls how long the generated text will be.
- Short
- Standard (not available for categories)
- Long (not available for categories)
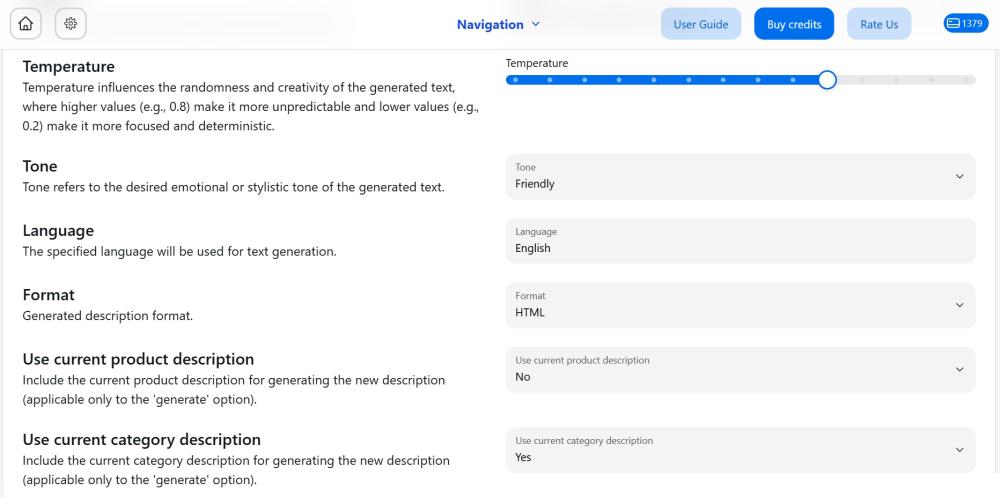
Temperature - temperature influences the randomness and creativity of the generated text, where higher values (e.g., 0.8) make it more unpredictable and lower values (e.g., 0.2) make it more focused and deterministic.
- Higher Temperature: Setting a higher temperature, such as 0.8 or 1.0, makes the output more random and creative.
- Lower Temperature: Setting a lower temperature, such as 0.2 or 0.5, makes the output more focused and deterministic
Tone - tone refers to the desired emotional or stylistic tone of the generated text.
Language - the specified language will be used for text generation.
Format - choose generated description format.
- By selecting the "Plain text" option, the content generator will produce unformatted text without any styling or markup. This simple text format does not include styles, fonts, or external elements.
- By selecting the "HTML" option, the content generator will create text that adheres to the HTML markup language. This enables the creation of structured content, including headings, paragraphs, lists, links, images, and other web page elements.
Use current product description – Set to "Yes" if you want to include the current product description when generating a new one.
Note: This option only applies to the 'Generate' action.
Use current category description – Set to "Yes" if you want to include the current category description when generating a new one.
Note: This option only applies to the 'Generate' action.
Once you've configured the settings, go to Products or Categories to generate content for individual items or in bulk.
Note: Here’s how credit usage is calculated for generation:
1 product description = 1 credit
1 SEO = 2 credits (1 for SEO title and 1 for SEO description)
1 refine = 2 credits
Products content generation
From the Navigation dropdown, open the Products page.
Generate Product Content in Bulk
You can generate product content in bulk directly from the grid, which includes sorting, searching, and filtering by status for your convenience.
1. Navigate to the Products page, where you’ll find the product grid.
2. Select Products for which you want to generate content. Use a search function to quickly find specific products.
3. Choose Action:
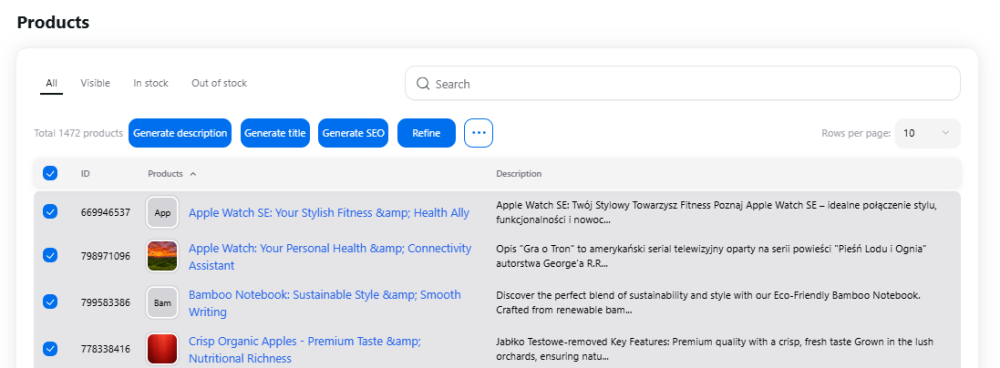
- Generate Title - create title for selected products;
- Generate Description - create descriptions for selected products.
- Generate SEO - produce meta titles and descriptions for selected products (available from Basic plan).
- Refine - improve the grammar, syntax, and wording of your existing product descriptions.
- … > Generate descriptions with custom prompt - use this option to provide your specific instructions to ChatGPT for product description generation - either add your own prompt manually or select custom prompt template from the dropdown.
- … > Generate SEO title with custom prompt - use this option to provide your specific instructions to ChatGPT for SEO title generation - either add your own prompt manually or select custom prompt template from the dropdown.
- … > Generate SEO descriptions with custom prompt - use this option to provide your specific instructions to ChatGPT for SEO description generation - either add your own prompt manually or select custom prompt template from the dropdown.
When using a custom prompt, make sure to use the global.input variable. You can find and copy it by going to Prompts > Add New Prompt in the app’s admin panel. This step ensures that ChatGPT accesses information about your product from your product settings. If you're looking for ideas for custom prompts, check out our blog post.
Note: Here’s how credit usage is calculated for generation:
1 product description = 1 credit
1 SEO = 2 credits (1 for SEO title and 1 for SEO description)
1 refine = 2 credits
4. Wait for the process to complete. If needed, you can stop the generation at any time.

5. If preview before publishing is enabled, review the content and make any necessary edits. Once you’re satisfied, click Publish to apply the content to your products.
Generate product content individually
For a more customized generation experience, create content for products individually.
1. Navigate to the Products page, select and open the product by clicking its link in the Products column.

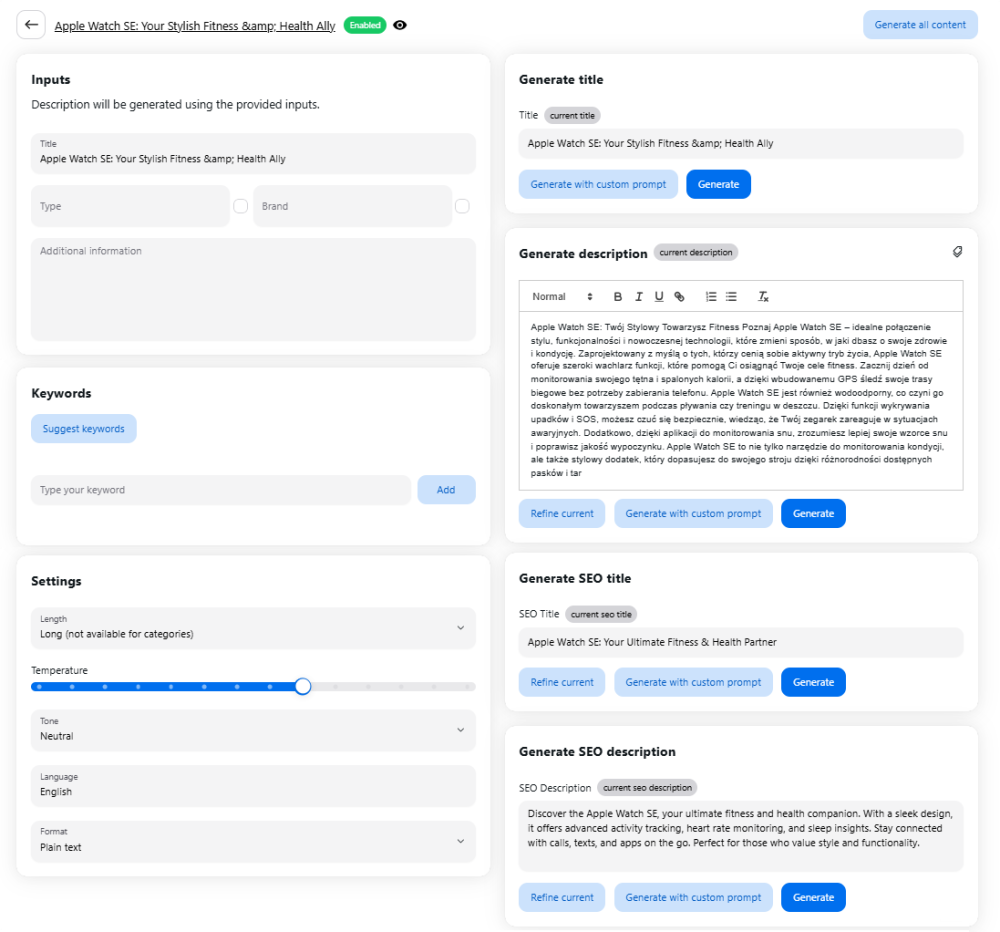
2. Understand the Product Page Layout
The product page is divided into two sections:
- Left Section: Input and settings
- Right Section: Content generation options
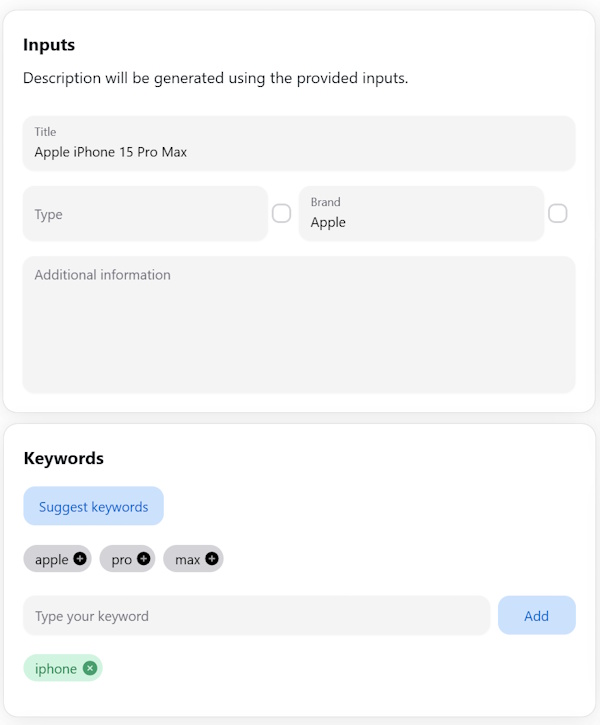
3. (Optional) In the left column, add or adjust product details that the AI will use to generate the description:
- Product title
- Type
- Brand
- Additional information - add details to include in the generated content and keywords to enhance your SEO.
- Keywords - click Suggest keywords to let the AI suggest relevant keywords for your product, or add your own.
Note: Keyword generation = 1 credit
4. Below, configure the Settings for this individual product. If you don’t need custom settings, simply skip this section, and the general settings will apply by default.
5. Generate product descriptions, SEO titles, and SEO descriptions by clicking the desired action:
- Generate - create content with default prompt. Click the label icon if you want AI to consider the current product description. This is especially helpful if you're using supplier descriptions and want a more appealing variant while preserving important details.
- Refine - improve the grammar, syntax, and wording of your existing content.
- Generate descriptions with custom prompt - use this option to provide your specific instructions to ChatGPT for content generation - either add your own prompt manually or select custom prompt template from the dropdown.
- Use the Generate All Content button to generate AI content for all four key fields at once: product title, product description, SEO title, and SEO description. Clicking this button will trigger the generation for all these fields.
Note: Using the feature will consume credits based on the total number of content units generated in this single action. This provides a convenient way to quickly populate all essential content fields for a product.
Note: When using a custom prompt, make sure to use the global.input variable. You can find and copy it by going to Prompts > Add new prompt in the app’s admin panel. This step ensures that ChatGPT accesses information about your product from your product settings. If you're looking for ideas for custom prompts, check out our blog post.
6. After generating the content, you can regenerate it, edit it using the advanced HTML editor, or publish it.
Categories content generation
Generating content for categories works the same way as generating content for individual products. Here’s how you can do it:
1. Go to the Categories page in the app. Select and open a category from the list.
2. In the left column, customize the settings for this category to use during content generation:
- Category title
- Additional information
- Keywords (click Suggest keywords and AI will generate keywords for you or add your custom keywords)
Note: Keyword generation = 1 credit
3. Below, you can specify any custom Settings for this category. If you don’t need custom settings, simply skip this section, and the general settings will apply by default.

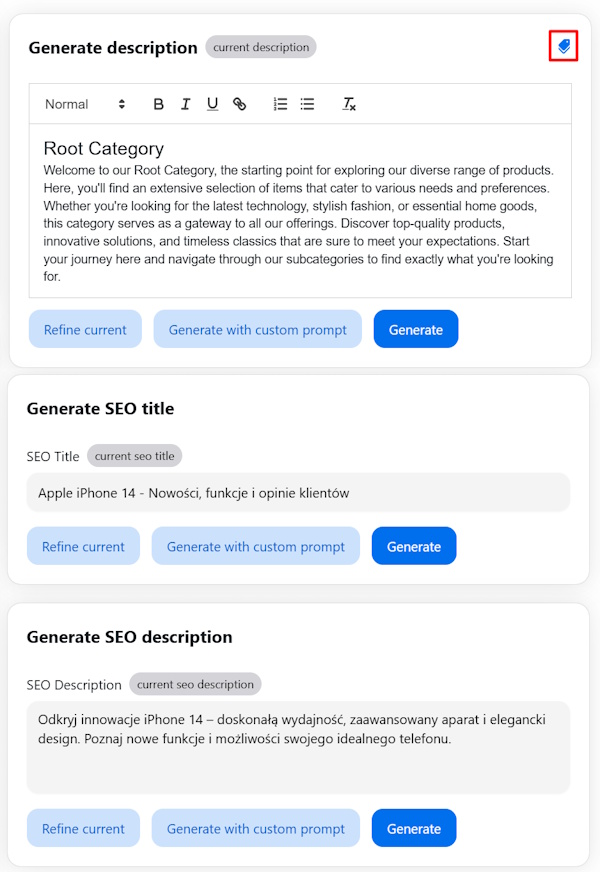
4. In the right column, generate description, SEO title and SEO description by clicking the desired action:
- Generate - create content with default prompt. Click the label icon if you want AI to consider the current category description.
- Refine - improve the grammar, syntax, and wording of your existing content.
- Generate descriptions with custom prompt - use this option to provide your specific instructions to ChatGPT for content generation - either add your own prompt manually or select custom prompt template from the dropdown.
- Use the Generate All Content button to generate AI content for all four key fields at once: product title, product description, SEO title, and SEO description. Clicking this button will trigger the generation for all these fields.
Note: Using the feature will consume credits based on the total number of content units generated in this single action. This provides a convenient way to quickly populate all essential content fields for a product.
Note: When using a custom prompt, make sure to use the global.input variable. You can find and copy it by going to Prompts > Add new prompt in the app’s admin panel. This step ensures that ChatGPT accesses information about your product from your product settings. If you're looking for ideas for custom prompts, check out our blog post.
5. After generating the content, you can regenerate or edit it using the advanced HTML editor. Make sure to Publish the content after making any adjustments.
Custom prompt templates
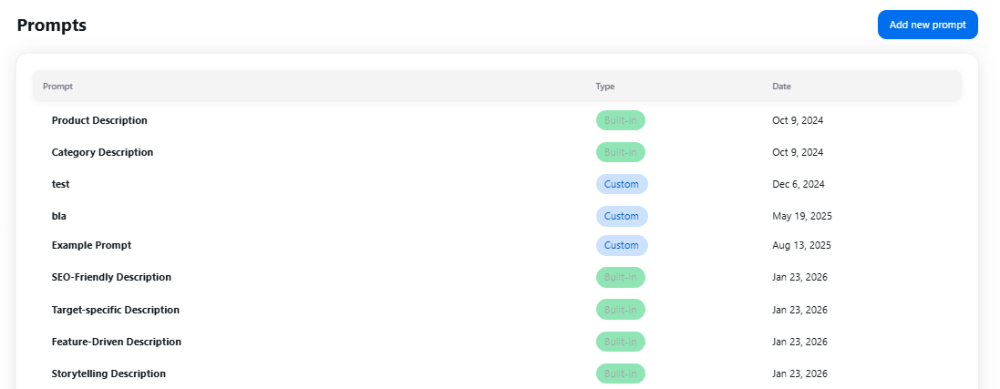
If you prefer using custom prompts for content generation, you can save frequently used prompts as templates to easily reuse them. Using the Navigation dropdown, open Prompts.
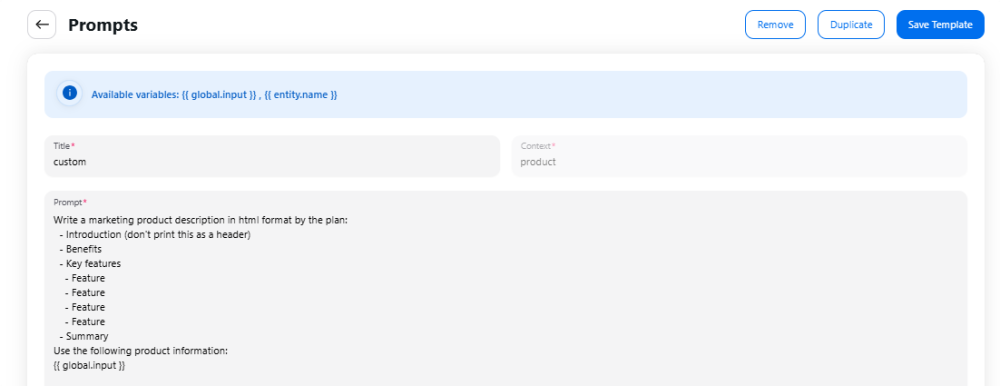
To create a new template, simply click the Add new prompt button.
Fill in the details, and write your prompt. You can specify the text structure, the type of content you want, key information to include, and any other details you want the AI to consider.
Use available variables to enhance your content generation results.
Available Variables:
- all.product.data – inserts all available product data (previously global_input)
- item.title – adds the product title
- item.description – adds the existing product description, if any
- product.variants – adds product variants, when available
- item.price – adds the product price in the store currency
- keywords – adds keywords, if they exist
- categories – adds assigned product categories
- store.name – adds your store name from Settings
These variables are visible in the template editor and can be combined freely within your prompt text.
Note: Need ideas for custom prompts? Check out our blog post for inspiration!
Note: Default prompt templates are not editable. Please use the Duplicate function to create a new template and make the necessary changes.
How to use custom prompts or custom prompt template
1. Go to Products (or any other resource you want to generate content for).
2. Select the item you want to work with.
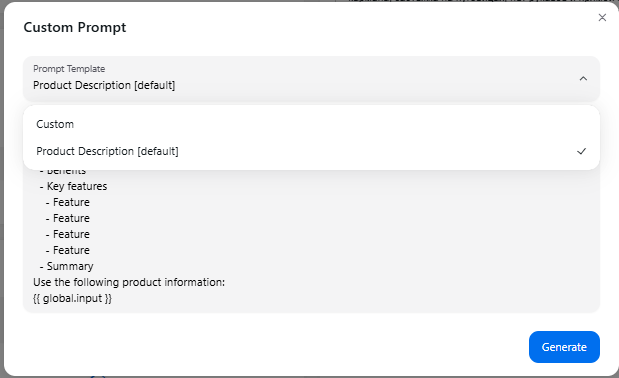
3. Click Generate with Custom Prompt.
A popup window will appear. You can either:
- Type your custom prompt directly, or
- Click the dropdown under Prompt Template to choose one of default or saved custom prompt templates.
4. Once ready, click the Generate button to create the content.
History
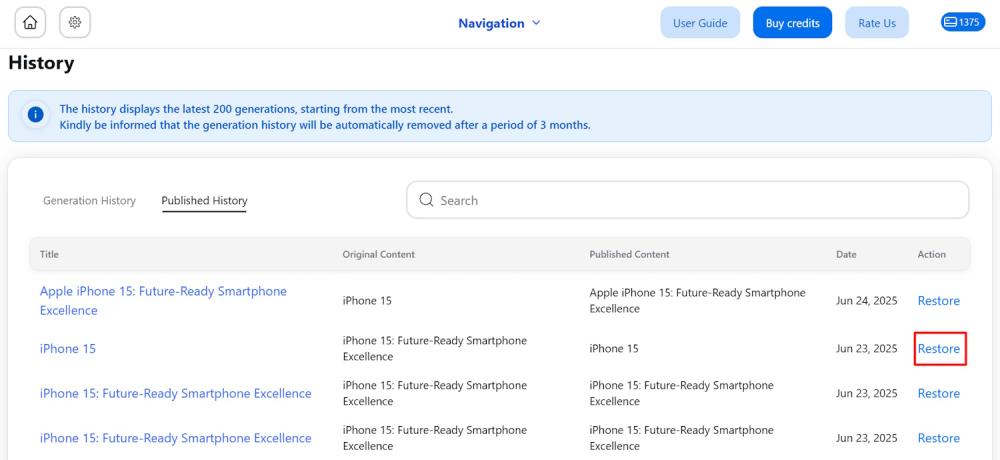
If you want to restore the original content or revert to a previous version, simply go to the History page.
On the History page, you can view a timeline of your generation's history.
The search is conducted based on the generated content rather than the object for which the generation was performed. The history grid is sorted into Generation history and Published history. It allows you to effortlessly revert all publications back to their original versions. You can also filter by date for quicker access.
Restore - click the link to recover previous versions of any content if needed.
Note: To ensure content isn't published without your approval, go to the Settings page and enable Preview before publishing. This way, during bulk content generation, you can review and choose what to publish directly from the preview window.
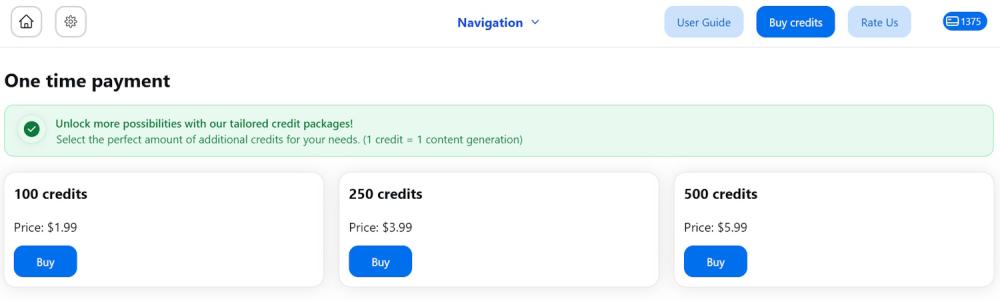
Pricing plans
When selecting a tariff plan, you will have a certain number of credits that will be deducted first. If you need additional credits for content generation, you can purchase them anytime.
Subscription credits do not expire.
Note: There is no need for additional confirmation from the customer to buy extra credits.