Admin Notifications is a Wix app that allows you to send important alerts about products, orders, stock updates, and more to the relevant staff members.
After installing the app, you’ll arrive at the Home page. Here, you’ll see a Dashboard with stats on alerts sent today, this week, and this month. You’ll also find the Changelog to track the latest app updates and a form to contact our support team.

Create and Manage Alerts
Click the Get Started button or navigate to Alerts page to begin setting up the alerts you want to receive.
The Alerts page is where you can find all your configured notification rules.
Create a New Alert
To create a new rule, click Add New +. This will take you to the Alert Create page.
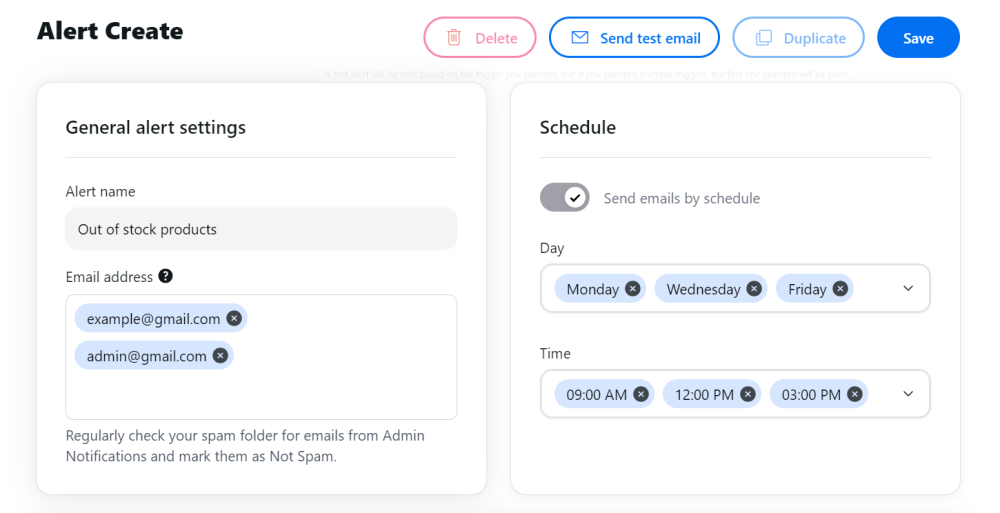
Alert name - enter the name that will appear in the notification, helping you easily understand what the alert is about.
Email address - add the emails address the notification will be sent to. After typing an address, press Enter to add it. You can then enter additional addresses by repeating this process. This allows you to send alerts to multiple staff members.
Note
After saving the alert, a confirmation email will be sent to the specified email address. Follow the link in the email to agree to receive notifications. If the alert is set to multiple email addresses, the confirmation email will be sent to each one.
If you don’t see the email, please check your Spam folder. In case the email address has already been verified for this store, no additional verification is required.
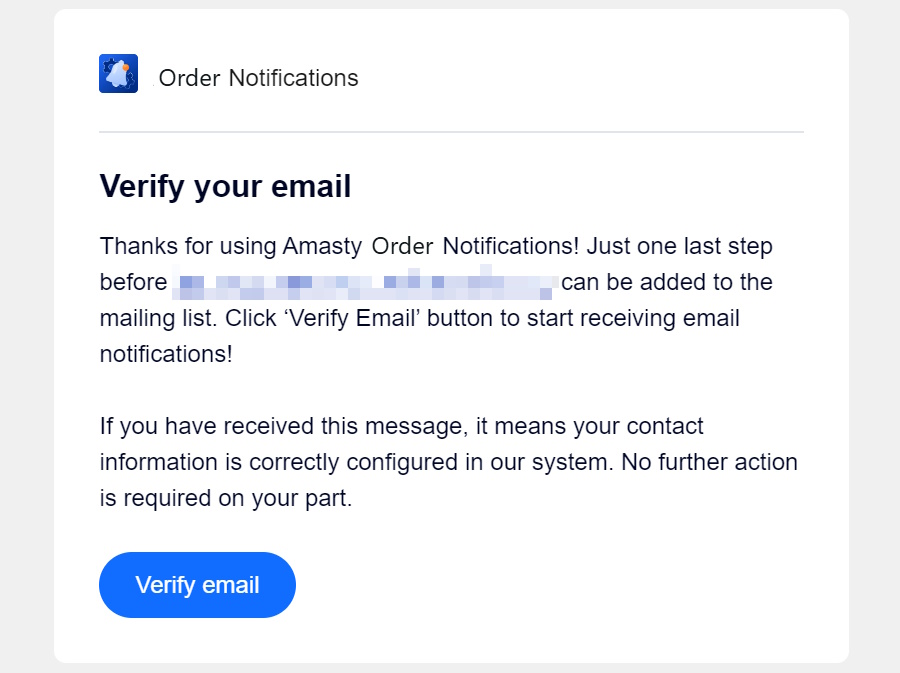
Once the email is verified, its status in the Alerts grid will change from "No" to "Yes". Notifications will then be sent to this email address based on the selected triggers.
Schedule - enable this toggle if you want to receive emails on a set schedule. Otherwise, they’ll be sent in real-time.
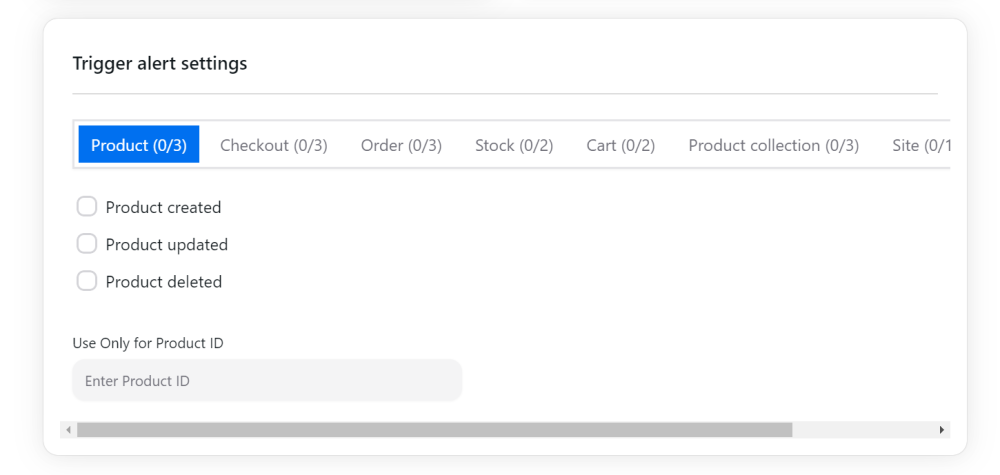
Trigger alert settings - choose the events that will trigger the alert. Events are grouped by resource type, and you can click through the tabs to select the ones you need. You can choose multiple events for each alert.
Use only for Product ID - enter the ID of the product that will trigger this alert. This feature is applicable only for events in the following categories:
- Product
- Checkout
- Order
- Stock
- Cart
Note
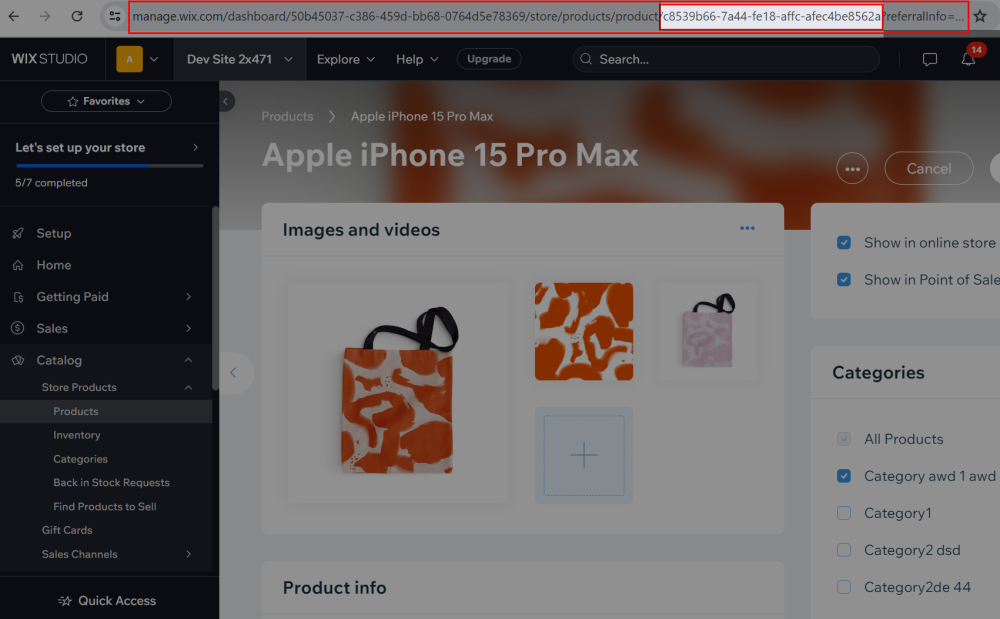
You can find the Product ID by following these steps:
- Open Products in your site's dashboard and select the product whose ID you want to find.
- Look at the URL for the selected product. The URL contains two long strings of numbers and letters separated by hyphens. The second string is the product ID.
Save your changes. You can also send a test email or duplicate the alert.

Note
The test email notification help you visualize the alert, that’s why it displays variables instead of actual data. Live notifications will show the real data when the trigger is activated.
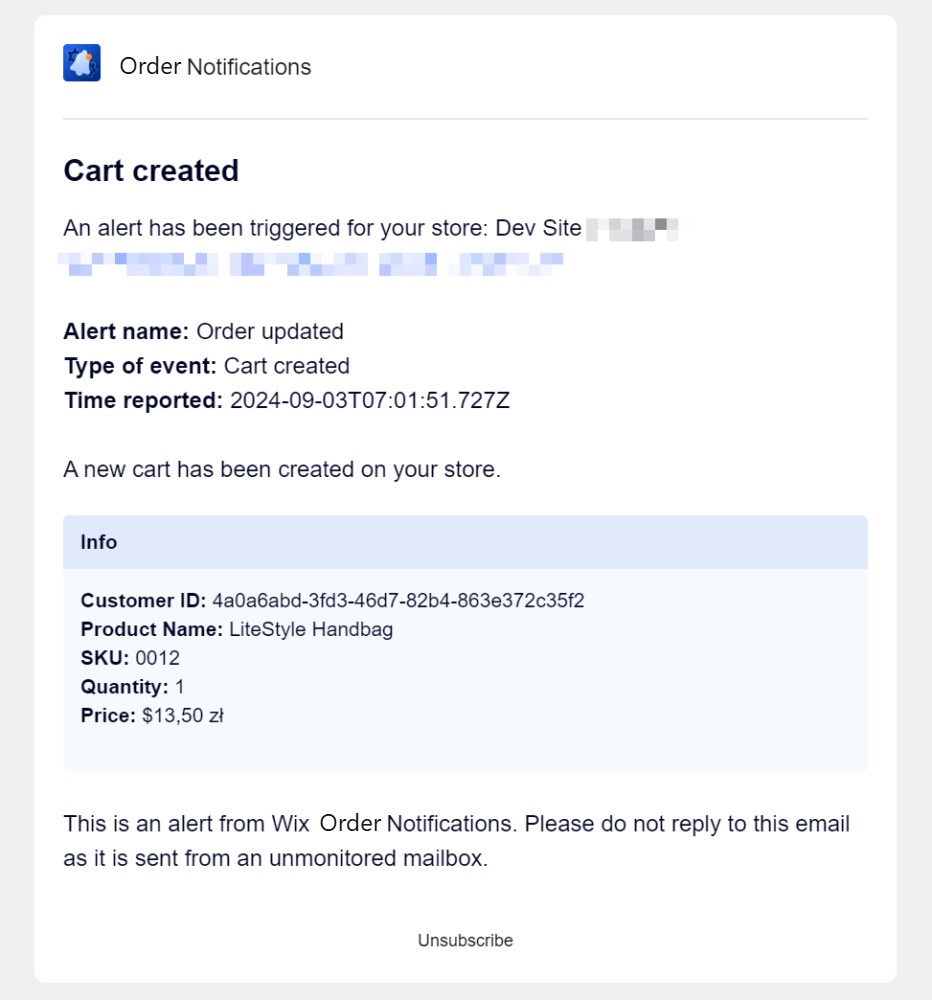
Note
If you don’t see the email, please check your Spam folder.
Manage Existing Alerts
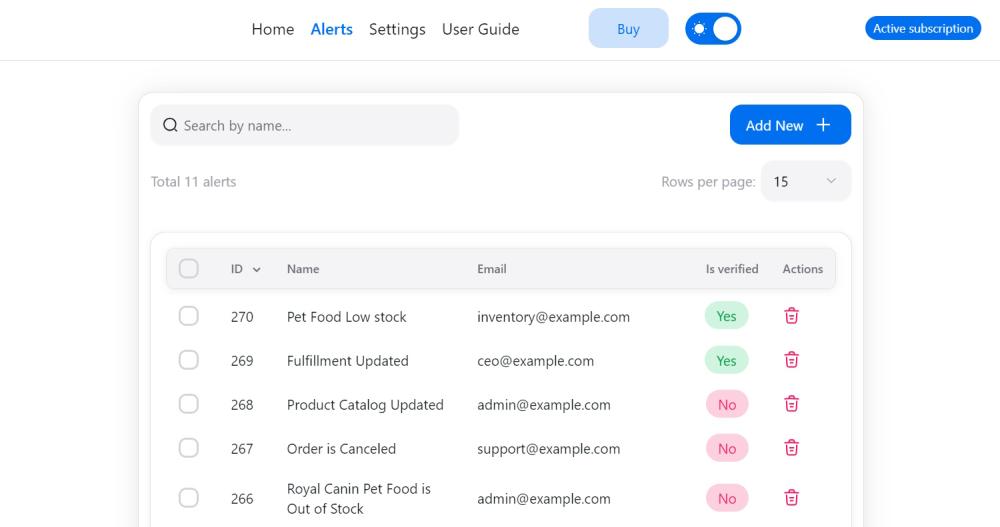
When the rule is saved, it’ll appear in the Alerts grid. The grid consists of the following columns:
- ID - the unique identifier for the rule.
- Name - the name assigned to the rule.
- Email - the email address that will receive notifications upon a trigger.
- Is Verified - this indicates the verification status of the email. If an email isn't verified, the notification won't be sent. If it's partially verified, only the verified email addresses will receive the alert, while unverified ones will be excluded.
- Action - option to delete the rule.
Set Threshold for Low Stock Alert
To specify the threshold for your low stock alert, open the Settings page.
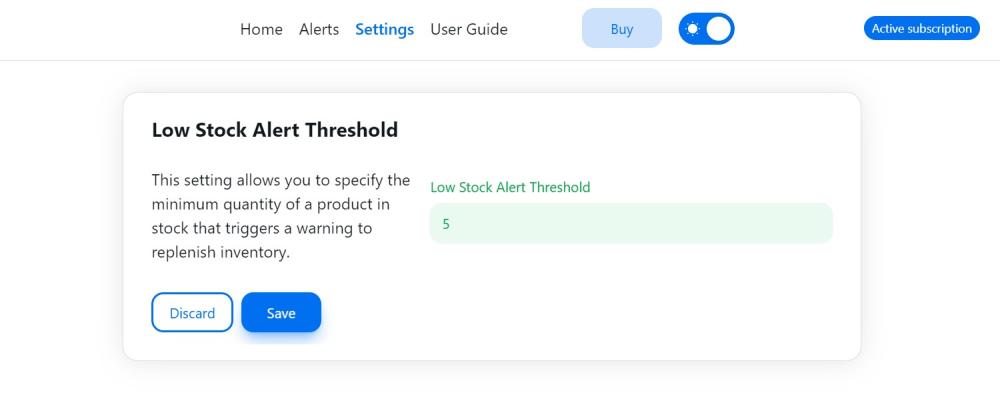
In the Low Stock Alerts Threshold field, specify the minimum quantity of a product in stock that triggers a warning to replenish inventory.
For example, if you set the threshold to 5, the admin or any other staff specified in the rule will receive a Low Stock alert when there are 5 or fewer items left in stock.