Table of contents
This guide will walk you through the process of setting up your countdown timers.
Create a Countdown Timer
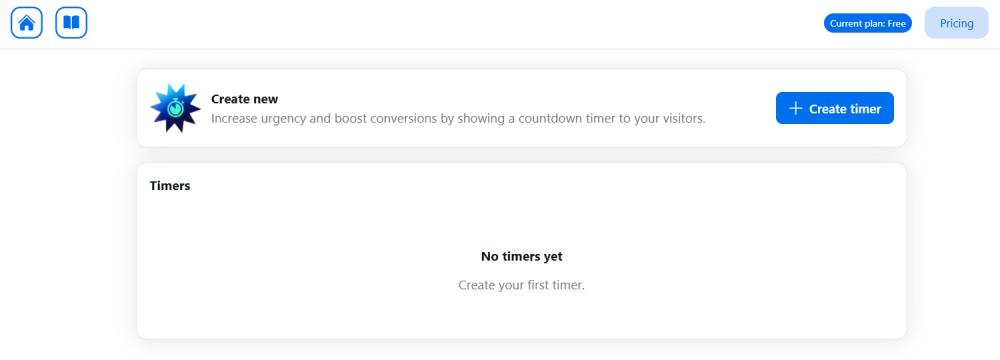
To create and configure a countdown timer, click + Create timer on the home page.
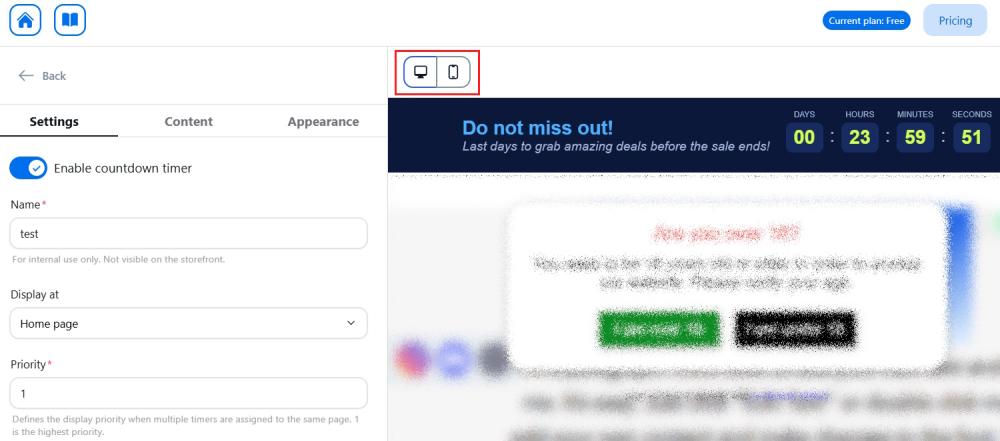
Confire your timer. On the left side of your screen, you'll find a vertical sidebar divided into three main tabs: Settings, Content, and Appearance. Each tab contains settings related to the timer's functionality, content, and visual style, respectively. On the right-hand side, you'll see a preview of how your timer will look based on the settings you've selected, with options to check both desktop and mobile views.
Set Up Your Timer
Step 1: Specify Settings
Navigate to the Settings tab and configure the following options:
1. Enable countdown timer - toggle this to activate the timer.
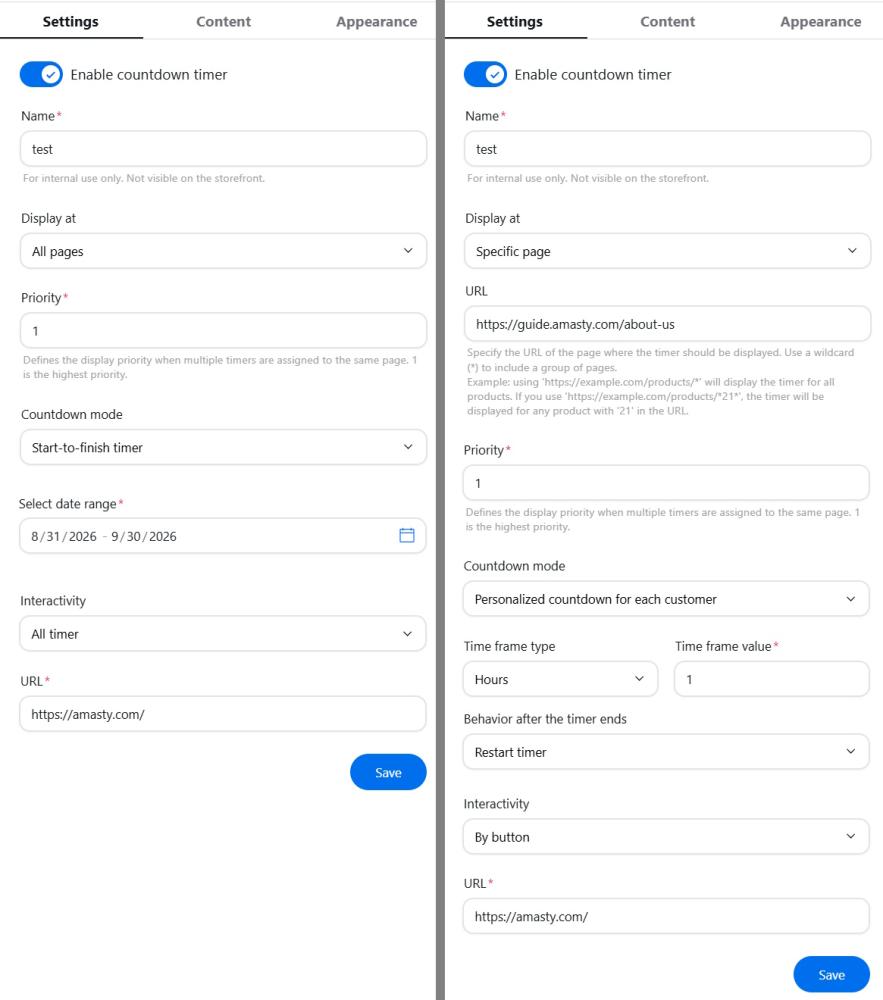
2. Set its Name – this is for internal use only and won’t be visible on the storefront.
3. Display at - choose where to display the timer:
- Home page
- All pages
- Category pages (select categories)
- Specific pages (insert the URL or multiple URLs and press 'Enter').
4. Priority – specify the timer's priority (1 is the highest). This is important when multiple timers are assigned to the same page, and determines which timer will be displayed.
5. Countdown mode:
- Start-to-finish timer - set the From and To dates using the provided calendars.
- Personalized countdown for each customer - create a unique countdown for each user session. Choose a Time frame type (days, hours, minutes, or seconds). Enter the desired Time frame value in the numerical input field. In Behavior after the timer ends specify what happens when the timer finishes: hide it, restart from the beginning, or display a custom message.
6. Set up Interactivity:
- All timer - make the entire timer clickable and provide a URL for redirection.
- By button - add a button to the timer bar and set a URL for redirection.
7. After configuring, click the Save button and move on to the Content tab.
Step 2: Customize the Timer's Content
1. Go to the Content tab.
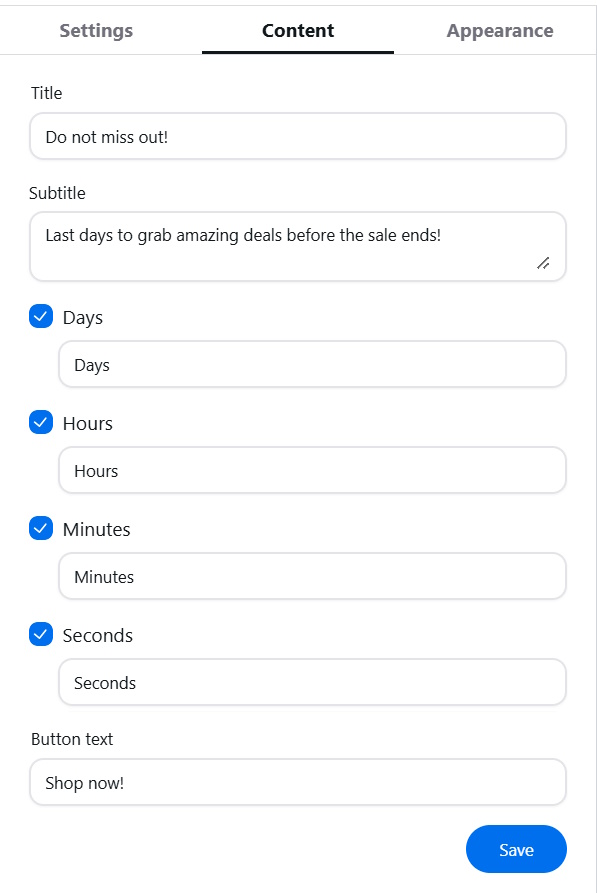
2. Customize the following elements using the provided text fields and checkboxes:
- Title: The main title of the timer.
- Subtitle: A subheading to provide additional context.
- Days, Hours, Minutes, Seconds: Customize the labels for each time unit.
- Button text: The text displayed on the button (if enabled).
- Click the Save button on the Content tab.
Step 3: Fine-Tune the Appearance
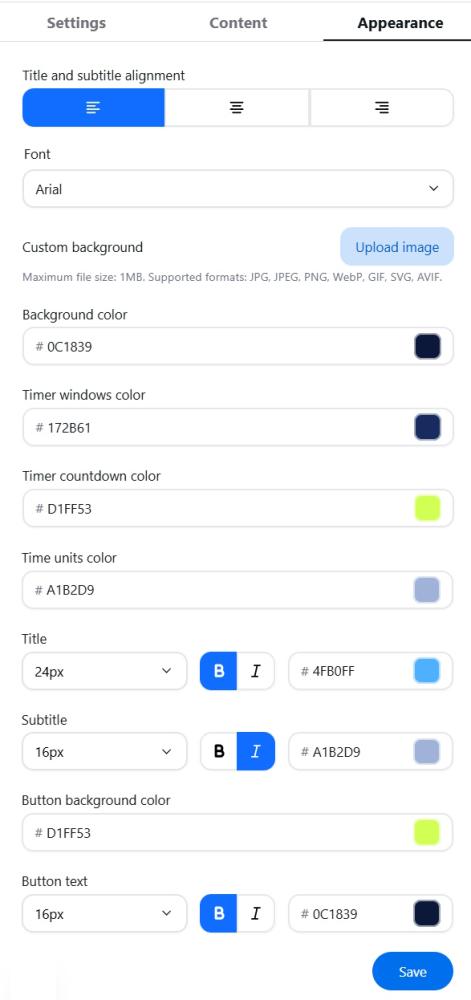
- Switch to the Appearance tab.
- Specify Title and subtitle alignment.
- Adjust the visual style of your timer using the following options:
- Font: Select a font from the dropdown list.
- Colors: Choose colors for the background, timer window, countdown, time units, title, subtitle, and button.
- Sizes and styles: Adjust the font size, weight, and style for the title, subtitle, and button text.
4. Optionally, upload your image as a Custom background for your timer.


Click the Save button on the Appearance tab.
Congratulations! You've successfully configured your countdown timer. Feel free to experiment with the different settings to create a timer that perfectly suits your needs.