ShopAlert: Admin Notifications is a Shopify app that automatically sends email notifications when various events happen in your store, allowing you to take timely action. You can specify different email addresses for each alert, so notifications can be sent to the relevant staff members as well as the store admin.
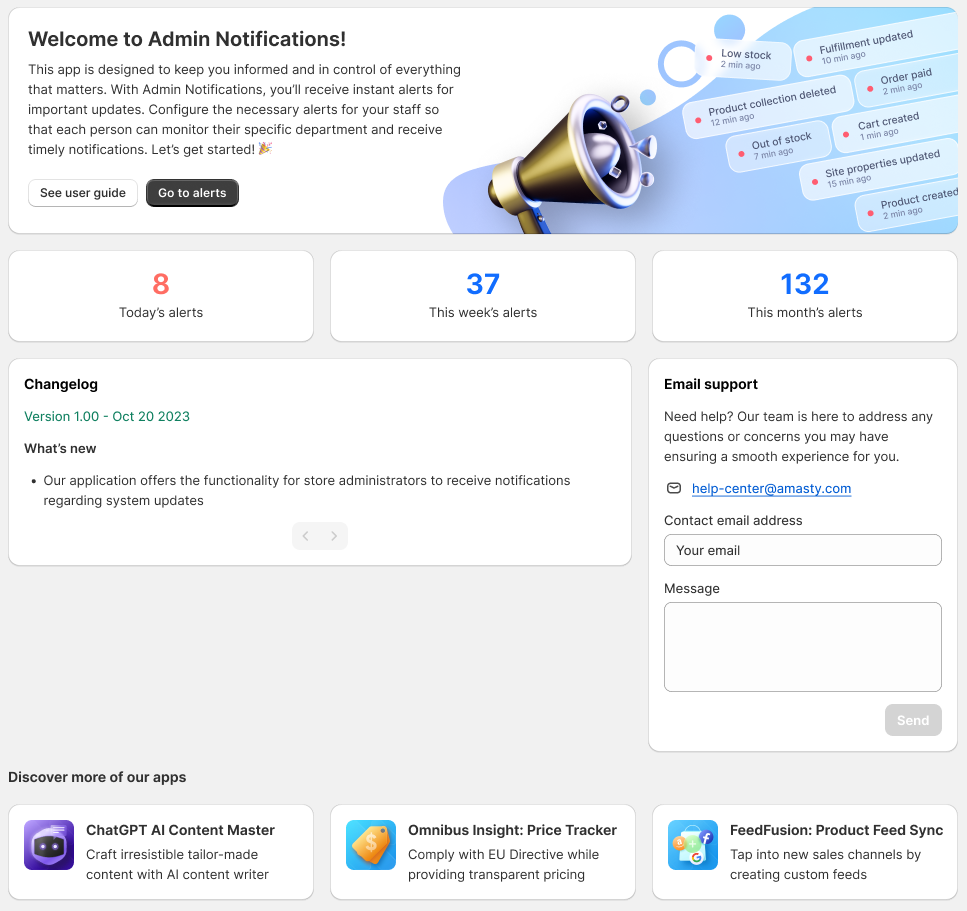
After installing ShopAlert: Admin Notifications, you'll land to the Home page. Here, you can find a description of How app works, the Email support form, and the Changelog to track the latest updates of the app. Additionally, the Home page features a Dashboard displaying key metrics of application usage, including the number of notifications sent per day, per week, and per month. Below, you can also find other apps developed by Amasty.
Settings
Low stock alerts threshold - specify the minimum quantity of a product in stock that triggers a warning to replenish inventory.
For example, if you set the threshold to 5, the admin or the staff member specified in the alert will receive a Low Stock notification when there are 5 or fewer items left in stock.
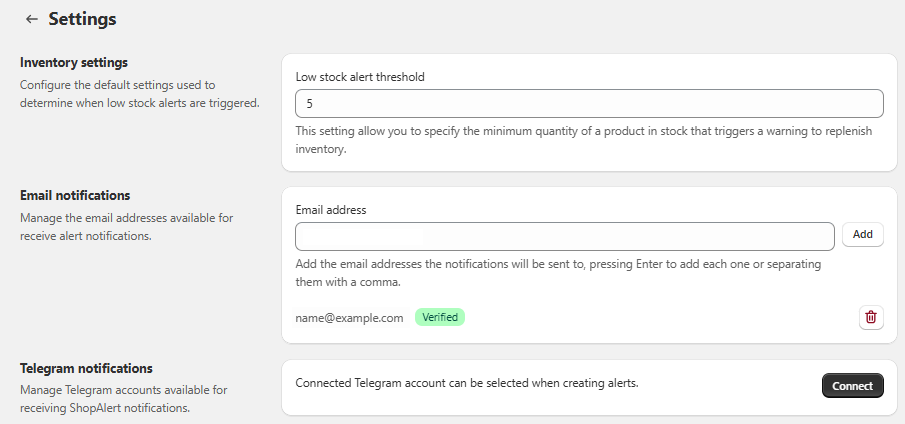
Email address - Add the email addresses the notifications will be sent to, pressing enter to Add each one or separating them with a comma. You can add multiple email addresses to ensure all relevant administrators or employees receive the alerts.
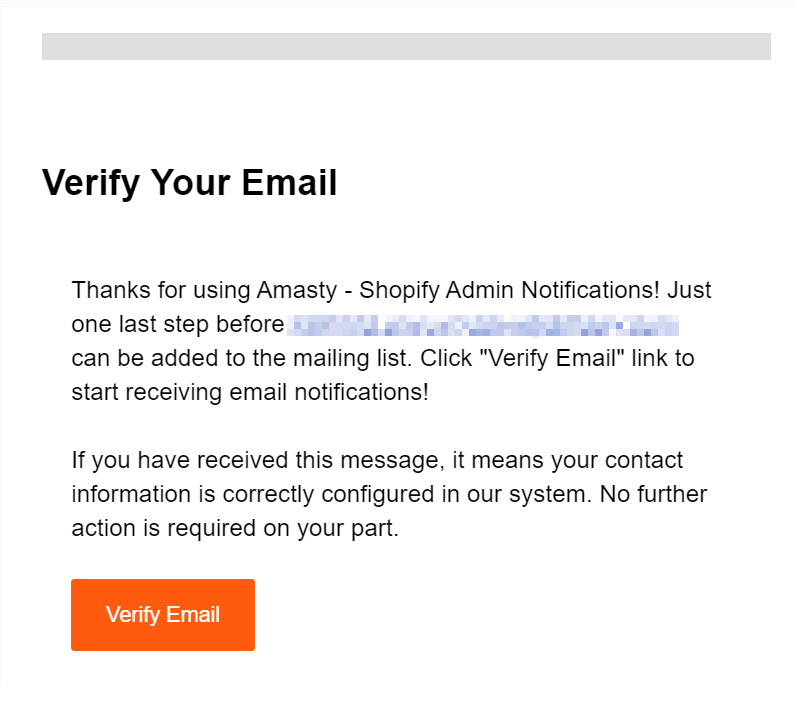
Note: After saving the alert, a confirmation email will be sent to the specified address. You’ll need to verify the email to start receiving notifications. If you don’t see the email, please check your Spam folder. If the email address is already verified, no further action is needed.
Telegram notifications - Receive instant Shop Alert notifications directly in Telegram by connecting one or more Telegram accounts.
How to connect Telegram:
- In Telegram notifications, click Connect to link a Telegram account to your store.
- In the new browser tab that opens, click /Start in the Shop Alert bot.
- When prompted by the bot, reply with your Shopify store domain (e.g., your-store.myshopify.com).
- Return to Shop Alert to view your 6-digit verification code.
- Send the code to the Telegram bot before the 60-second timer expires.
- Once the connection is successful, the Telegram account will appear with the Connected status.
Adding Multiple Telegram Accounts - Click Add account below your connected accounts to authorize additional team members.
Removing an Account: Click the Trash icon next to an account to disconnect it.
Note: If a user blocks the bot in Telegram, their status in Shop Alert updates to Disconnected and notifications pause. Unblocking the bot automatically resumes alert delivery.
Click Save.
Connected recipients appear immediately with their current status (such as Verified or Connected). Use the Delete (trash) button to remove an email address or Telegram account from the store.
Note: When a recipient is removed, it becomes unavailable for selection in alerts and will no longer receive notifications.
Alerts
Creating a new alert
On the Alerts page, you can create and view existing notification rules.
To set up a new rule, click the Create button, which will take you to the Create Alert page.
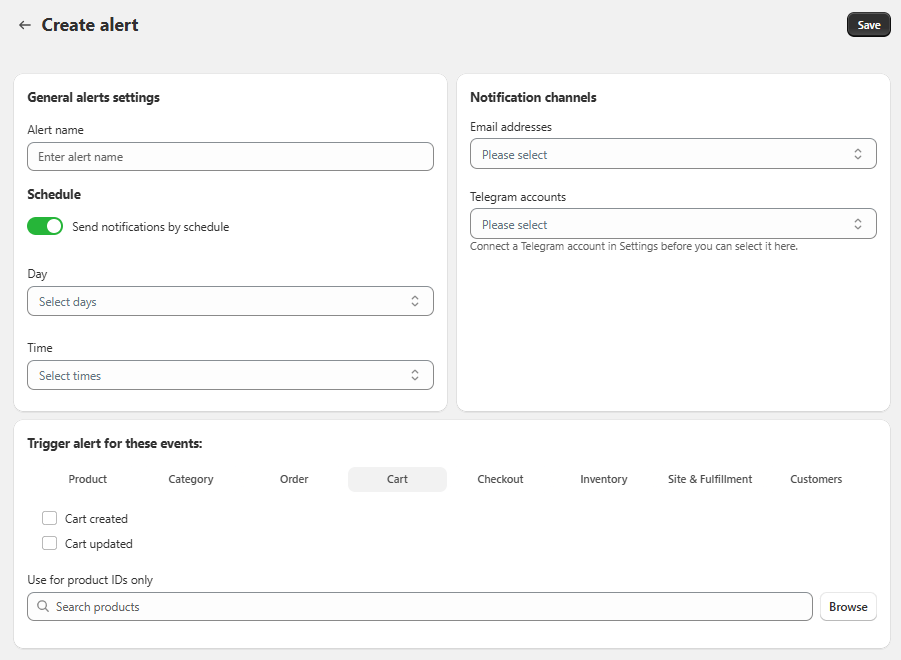
Alert name - the name that will appear in the notification, helping you easily understand what the alert is about.
Managing Alert Notification Channels
Choose where and to whom your Shop Alert notifications are delivered using the Notification channels block when creating or editing an alert.
Email Address: the dropdown to select one or more verified email addresses.
Telegram Account: Click the dropdown (located below the email setting) to select one or more connected Telegram accounts.
The dropdowns display all active, verified email addresses and connected Telegram accounts configured on your Settings page.
You can select multiple emails, Telegram accounts, or a mix of both. When an alert triggers, notifications are sent simultaneously to every selected recipient across both channels.
Note: An alert must have at least one notification channel selected to deliver alerts. If left unselected, notifications for that alert will not be sent.
Schedule - You can schedule when your notifications are sent.
- Select the specific days of the week (e.g., Monday, Wednesday, Friday) when you want notifications to be sent.
- Set the time of day when the notifications should be delivered.
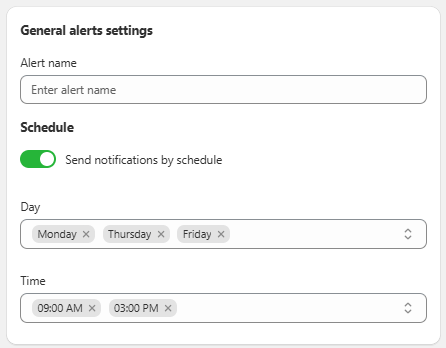
This feature allows you to control the timing of your notifications, ensuring they arrive when they are most relevant.
Trigger alert for these events - select the events that will trigger the alert. The following events are available:
| Trigger’s location | Triggers |
| Product | Product created, Product updated, Product deleted |
| Category | Product collection created, Product collection updated, Product collection deleted |
| Orders | Order created, Order cancelled, Order edited, Order paid, Order refunded, Order delivered, Order picked up |
| Cart | Cart created, Cart updated |
| Checkout | Checkout created, Checkout updated, Checkout marked as completed |
| Inventory | Low stock, Out of stock, Back in stock |
| Site & Fulfillment | Site properties updated, Fulfillment updated, Fulfillment created |
| Customers | Customer created, Customer deleted |
Use only for Product ID - enter the ID of the product that will trigger this alert. This option applies only to events in the following categories: product, checkout, order, stock, inventory and cart.

Notification frequency - The notification limit applies per product, not per alert. Each product has its own notification counter for the selected time period. Applicable only for ‘Product updated’ event: product, category, inventory.

Minimum checkout amount - You can trigger checkout alerts based on the total value of the checkout. Enter the minimum checkout total that should trigger the alert. The alert is triggered when the checkout total is equal to or greater than the specified amount. The setting is optional.

Note: The amount is based on the total checkout value, including applicable taxes, discounts, and shipping. Currency conversion is not applied.
Click Save.
Once the event is saved, you can edit it, Duplicate, Send test email, or Delete.

Note
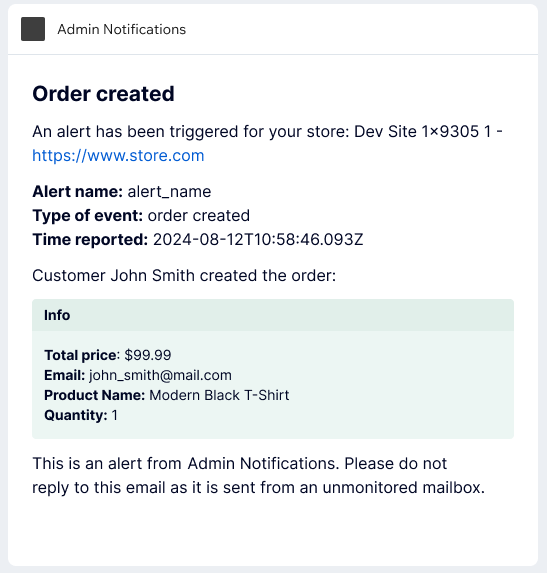
The test email notification help you visualize the alert, that’s why it displays variables instead of actual data.
Live notifications will show the real data:
Note
If you don’t see the email, please check your Spam folder.
Alerts grid
When the rule is saved, it’ll appear in the Alerts grid.
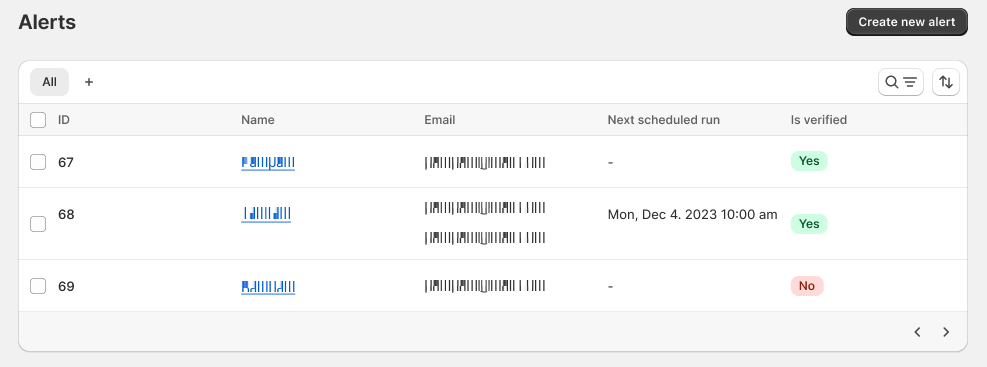
The grid consists of the following columns:
- ID - the unique identifier for the rule.
- Name - the name assigned to the rule.
- Email - the email address that will receive notifications upon a trigger.
- Next scheduled run - The date and time of the next scheduled notification sent for this rule.
- Is Verified - the verification status of the email (if it’s not verified, the notification won’t be sent).
- Action - option to delete the rule.
You can monitor and manage alerts with search and pagination.