Table of contents
- Dashboard and quick onboarding
General information about the app. - Sync your images
Sync your images with the app - a required step. - Quick setup guide
Follow our quick onboarding guide to get started, or skip it if you're ready to dive right in. - Settings
Specify your settings for compression, file format conversion, resize type, or enable automatic compression to optimize images daily based on your preferences. - Image optimization
Run image compression, resizing, and optimization. - History
View details of image optimization job. - Restore images
If needed, revert images after optimization: - FAQ
LitePix: Bulk Image Optimizer is a Shopify app that compresses images, reducing their weight and speeding up page loading.
After installing LitePix, you'll arrive at the Home page. Here, you can find brief Instructions on how to compress images, view the Changelog, and discover other apps developed by Amasty.

To start compressing your images, first you’ll need to Sync your images on the Dashboard page.
Then, we recommend you go to Settings to set your desired parameters. If you prefer to use Shopify's recommended default settings, you can go directly to the Dashboard, where you can start optimizing images.
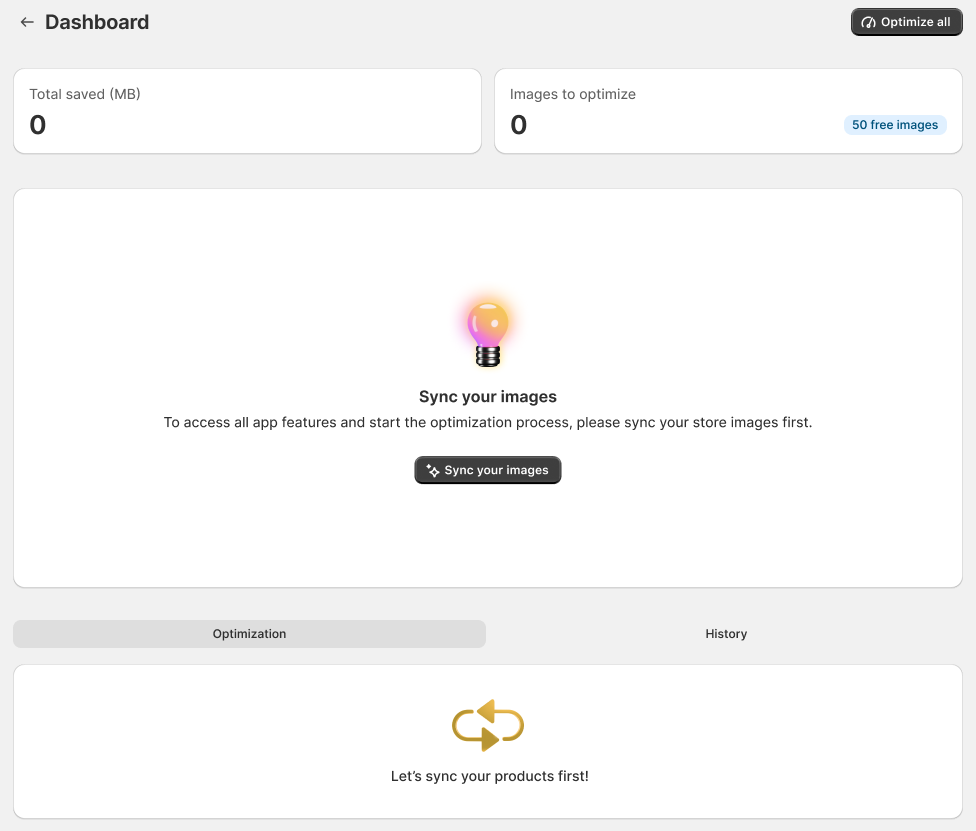
Sync your images
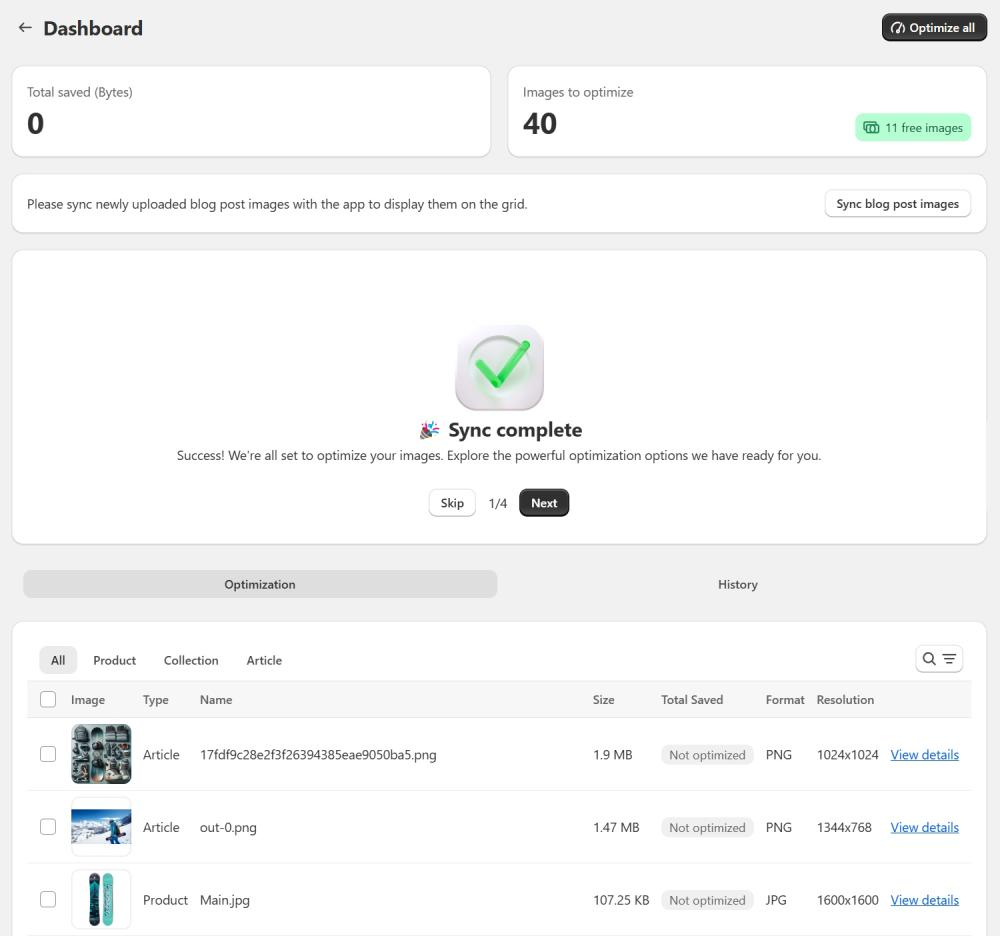
To allow the app to optimize images, start by syncing your images. Open the Dashboard and click the “Sync your images” button.
Note
Syncing is required when setting up the app for the first time. After that, new product and collection images will automatically appear on the Dashboard whenever you open it — no need to sync again. For newly added blog post images, simply click the Sync blog post images button to make them available for optimization.
![]()
Please wait until the sync process is complete. Once synced, your images will appear in the grid.
Quick setup guide
Upon first use, after your products have synced, you'll be guided through a quick setup.
A setup panel appears at the top of the product grid — simply follow the steps to configure how your images will be optimized for the first time, or skip it and go straight to Settings configuration.
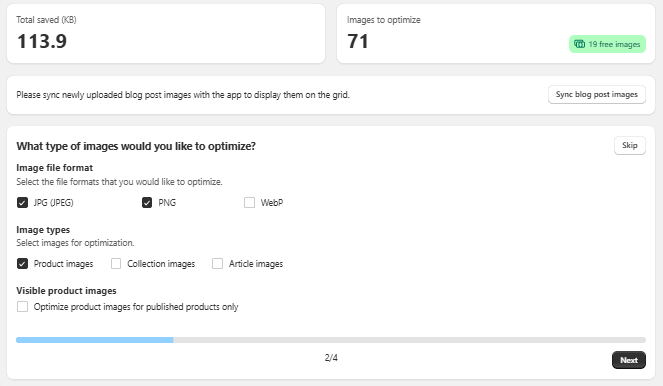
Step 2/4: What type of images would you like to optimize?
- Image File Format: Choose the specific file formats (e.g., JPG, PNG) you want the app to optimize.
- Image Types: Select which types of images (e.g., Product images) the app should process.
- Visible product images: Check this box to optimize images for published products only.
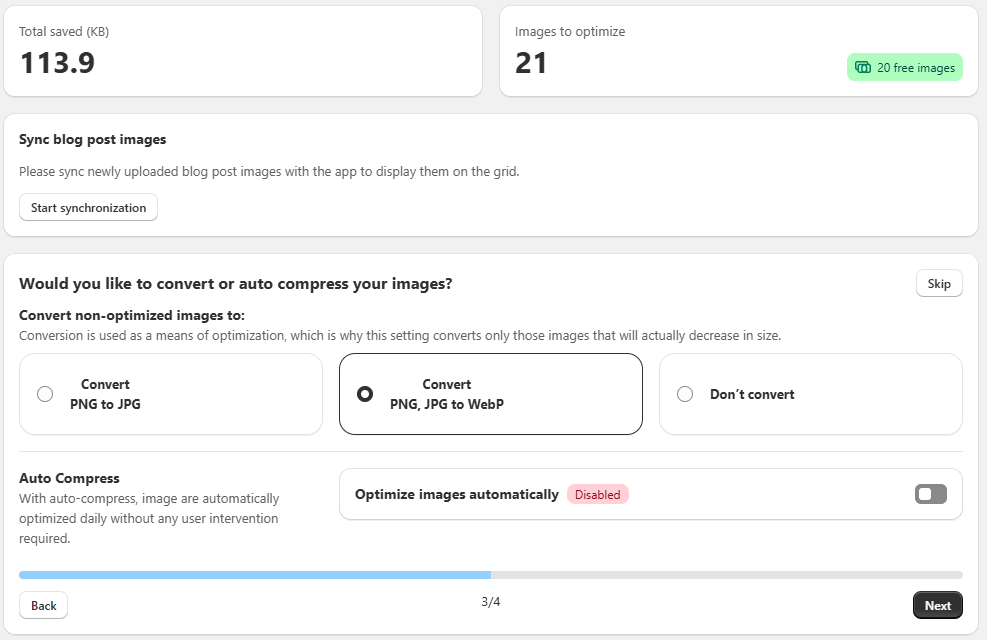
Step 3/4: Would you like to convert or auto compress your images?
- Convert non-optimized images: Choose the preferred file format conversion option (e.g. Convert PNG to JPG).
- Auto Compress: Enable this to automatically optimize new or updated images daily according to your chosen settings without manual intervention.
Step 4/4: Customize image resize options
Choose a resizing method (e.g. Cropping) and click the frame to adjust settings (e.g. Aspect ratio).

Once finished, a summary will show how many images are ready (e.g., '71 Images ready to optimize!').
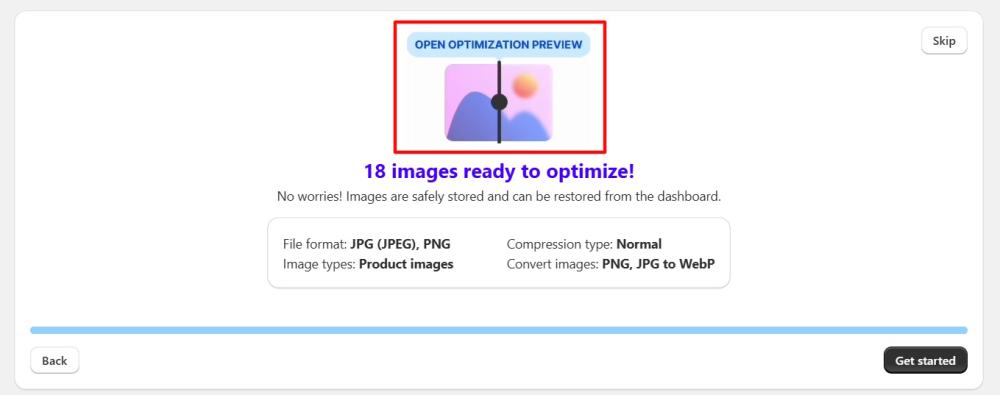
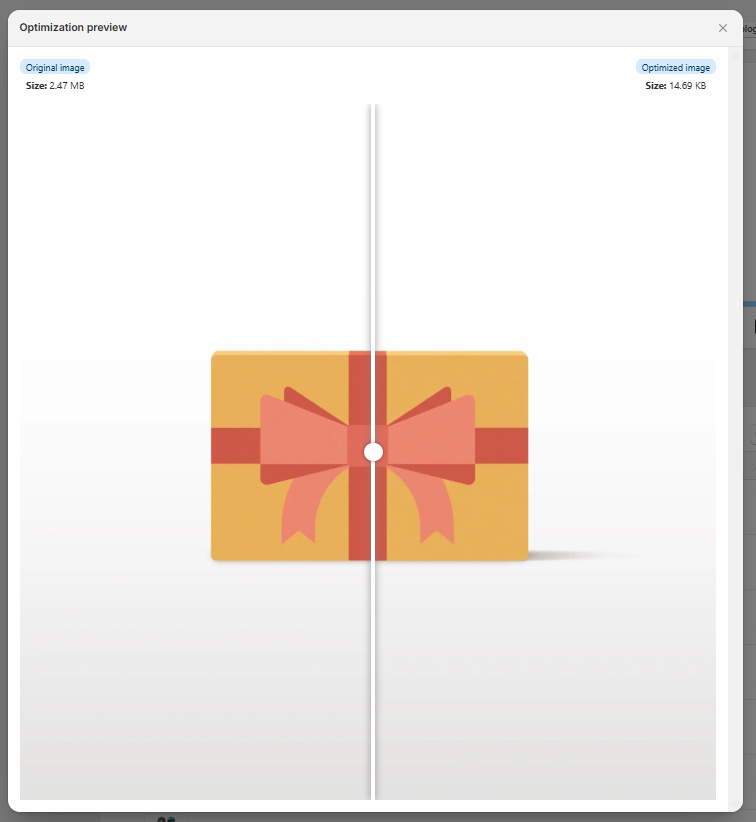
You can click the 'Open optimization preview' illustration to view a sample preview of one image.
To begin the optimization process with these settings, click "Get started".
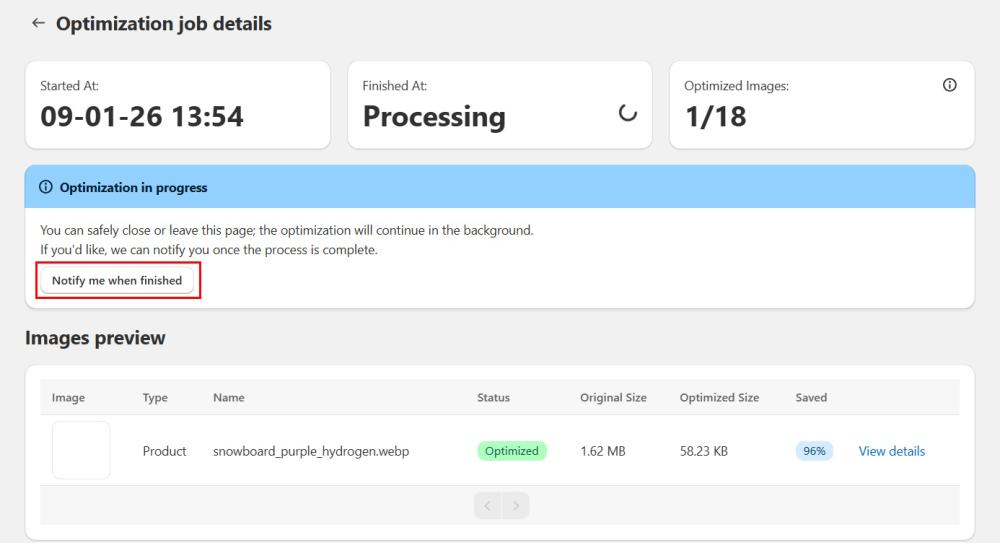
Note: The process runs in the background. You can click 'Notify me when finished' and we will email you once processing is complete.
For more information on optimization results and how the process works for future uploads, see the Image Optimization section.
Settings
On the Settings page, you can specify your parameters for image optimization.
Note
The app optimizes images that meet the criteria specified here.
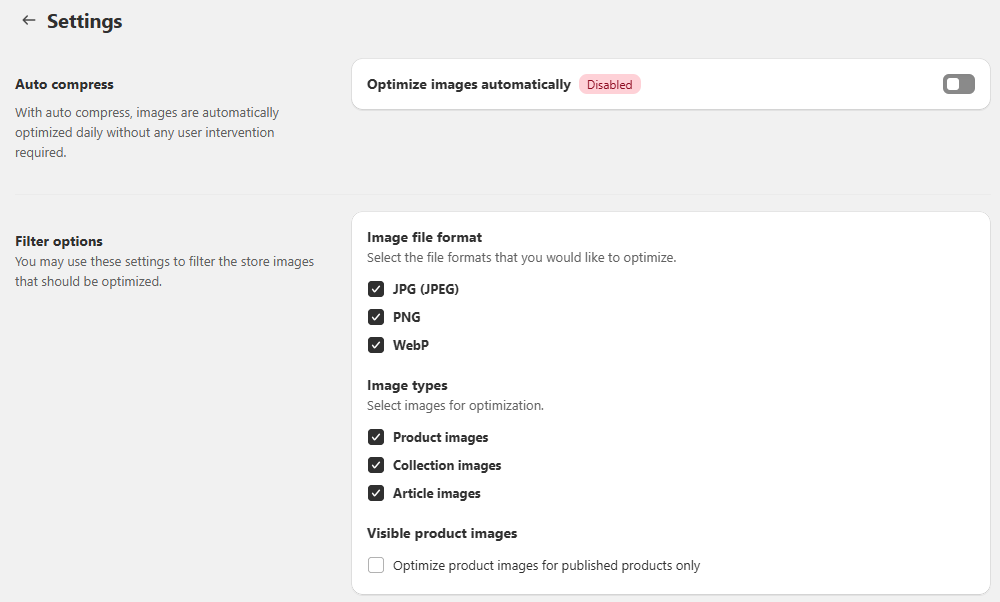
Auto Compress - With Auto Compress enabled, images are automatically optimized daily according to predefined settings. Any new images uploaded to your site will be processed without manual intervention. Enable or disable Auto Compress at any time from the settings panel.
Image file format - choose the file formats you want to optimize.
Image types - select the types of images the app will optimize.
Visible product images - check this option to optimize images for published products only.
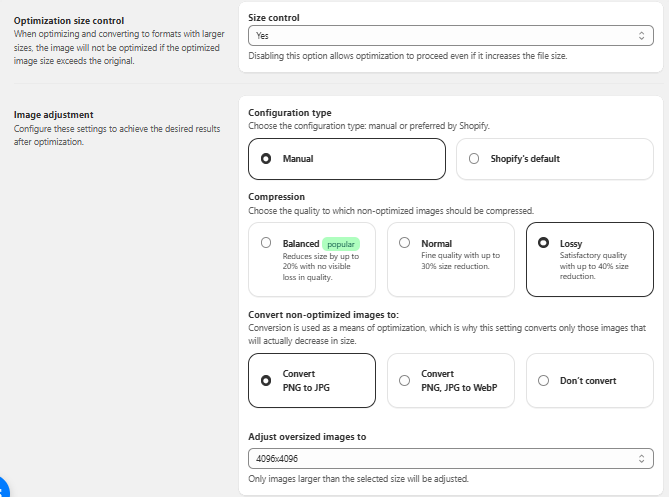
Optimization size control - if enabled, images will only be optimized if the file size gets smaller. If the optimized file ends up larger, it won’t be changed. Disable this option to allow optimization, even if it increases the file size.
Note
The file size may increase if you compress an image and then recompress it with a lower compression ratio (e.g. if you compress an image with lossy compression and then recompress it using normal compression). In this case, the recompressed image can actually become larger than the original.
Configuration type - select Manual to unlock additional compression, conversion and resize options. With Shopify's default type, only Shopify's preferred compression, conversion and resize resolution are available.
Compression - select the level of compression for non-optimized images:
- Balanced compression - good quality with moderate image weight reduction. Reduces image quality by up to 20%, not noticeable to the eye.
- Normal compression - fine quality with a good image weight reduction. Reduces image quality by up to 30%.
- Lossy compression - satisfactory quality with significant image weight reduction. Reduces image quality by up to 40%.
Convert non-optimized images to - choose whether to convert images to more optimized formats:
- Convert PNG to JPG - JPG is a lighter format that preserves size and colors. Recommended for product images.
- Convert PNG, JPG to WebP - WebP is the lightest format, often used by websites. Recommended for collection and blog images.
- Don’t convert - select this option to keep the original image format.
Adjust oversized images to - set the maximum resolution. Only images larger than this will be resized to fit within the limit.
Note
The aspect ratio of the image is preserved. For example, if you specify 2048x2048 and your image is 4096x2048, it will be resized to 2048x1024 to fit within the limits.
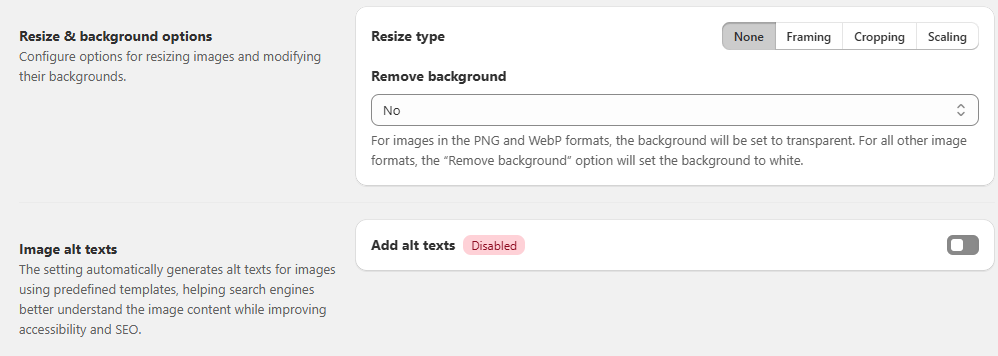
Resize & background options - the app offers three main resizing methods: Framing, Cropping, Scaling and Background options.
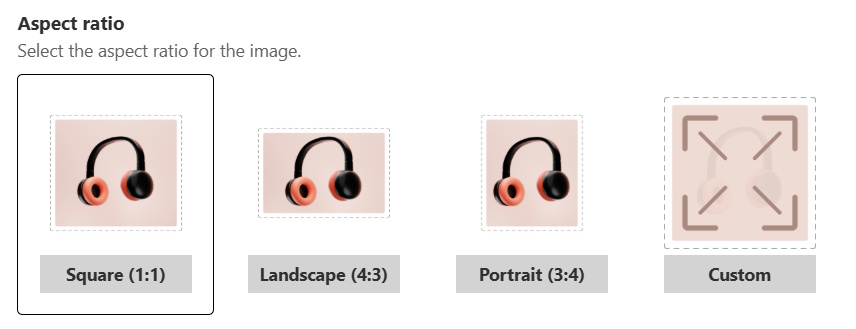
Framing - The aspect ratio changing can result in blank areas (borders) if the original image doesn't perfectly fit the new ratio. The app provides options to fill these areas with a solid color or an AI-generated background. Choose the desired aspect ratio for your image: Square (1:1), Landscape (4:3) or Portrait (3:4), Custom (here you can specify your custom Width and Height).
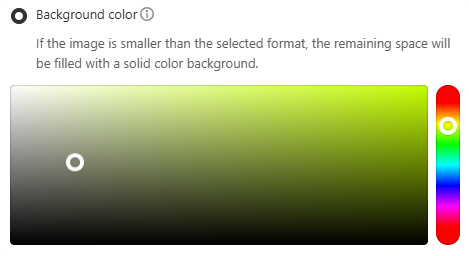
Then use one of the following background treatment options:
- Background Color: Select a solid color to fill the blank areas. Use the color picker to choose your preferred color.
How it works: https://dev-sf-image-optimizer.app.amasty.com/assets/framing-bg-BHNEHaVl.mp4
- AI-generated Fill: The AI will generate a seamless background that complements the image and fills the empty space.
How it works: https://dev-sf-image-optimizer.app.amasty.com/assets/ai-fill-C7KcTKj-.mp4
Cropping - It helps you focus on the most important part of your image. We offer both manual (Fixed Crop) and AI-powered (Smart Crop) options. Choose the desired aspect ratio for your image: Square (1:1), Landscape (4:3) or Portrait (3:4), Custom (here you can specify your custom Width and Height).
And use one of the following cropping methods:
- Fixed Crop: This is a manual cropping mode. You define how the image should be cropped by selecting the area you want to keep. You can choose the alignment point for your crop (Centre, Top, Right, Left, Bottom).
How it works: https://dev-sf-image-optimizer.app.amasty.com/assets/fixed-crop-DhdR2qdk.mp4 - Smart Crop: This automatic mode uses AI to analyze the image and identify the most important content (e.g., the product). It then crops the image to keep this content in focus.
How it works: https://dev-sf-image-optimizer.app.amasty.com/assets/smart-crop-D-FoARxC.mp4
Scaling - Adjust images from minimal resizing to maximum enlargement as needed, choosing the scaling level.
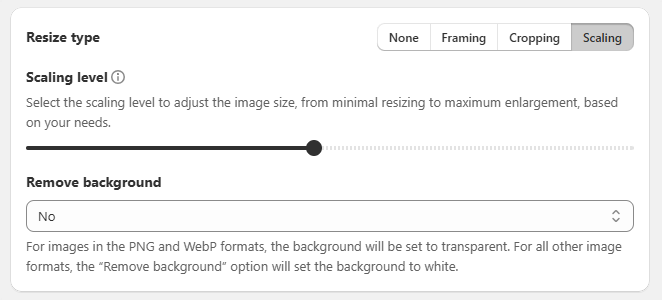
The Remove background option allows you to automatically remove or replace the background of product images. It works independently and is fully compatible with all Resize types: Framing, Cropping, and Scaling.
Available Options:
- None - (default) Images are processed as usual, without background changes.
- Remove background - The image background will be removed.
For PNG and WebP images - the background becomes transparent.
For other image formats - the background is automatically replaced with white.
Note: Transparency is applied only to formats that support it. - Color replace - The image background will be replaced with a selected color.
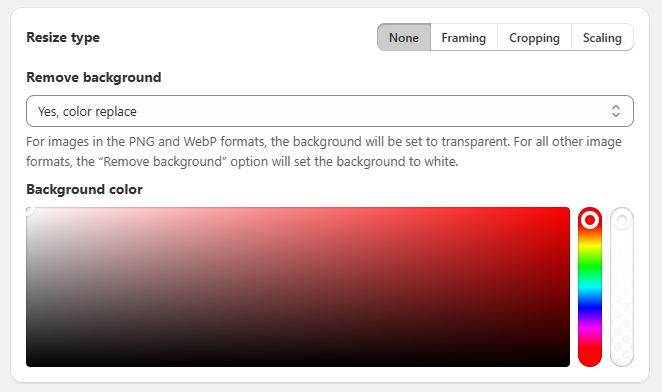
When the color replace option is selected, a color picker setting appears. Choose the color that will replace the image background.
Add Image alt texts - allows you to automatically generate alt texts for images using customizable templates. This helps search engines better understand your images while improving accessibility and SEO.

When you enable the Add alt texts toggle, you can customize templates for three specific areas of your store. Each category allows you to mix dynamic variables with your own custom text (e.g., adding "Buy " or "Official Store" around the variable):
- Products - Defines alt texts for images assigned to products.
Available variables:- Product title
- Product collections - all collections assigned to the product
- Image name - original image file name
- Shop name
- Variant title: If a product has variants, the variant title is used.
If no variants exist, the main product title is used instead.
Note: If one image is assigned to multiple products, the alt text will use the first associated product’s data.
- Collections - Defines alt texts for images assigned to collections.
Available variables:- Collection title
- Shop name
- Blog posts - Defines alt texts for images assigned to blog posts.
Available variables:- Blog title
- Shop name
Note: Each field is required. If a checkbox is disabled, its input field becomes inactive.
Update only empty alt texts
- When ON: We only add text to images that currently have no alt description. This protects any manual SEO work you’ve already done.
- When OFF: We will overwrite all existing alt texts with your new template.
Reviewing Your Changes
Once the optimization run is complete, you can see what changed in the optimization summary:
- New alt text: The template-generated text now assigned to the image.
- Original alt text: What was there before (displays a dash if it was empty).
Note: If the generated alt text is the same as the existing one, the same value will appear in both Original alt text and New alt text.
Image optimization
Prepare for optimization
On the Dashboard page, you can sync and optimize images.
Tip: Use "View" to check expected results or optimize a few test images first. You can restore your originals at any time.
After syncing, all synced images will appear in the grid under the Optimization tab. The number of images requiring optimization is displayed at the top in the Images to optimize section.
Optimization runs based on the parameters set on the Settings page. Alternatively, you can configure these parameters directly on the Dashboard during onboarding.
How to Optimize Images
Note: Don't worry — we store your original images. You can restore them anytime during your plan's restoration period if you aren't happy with the results.
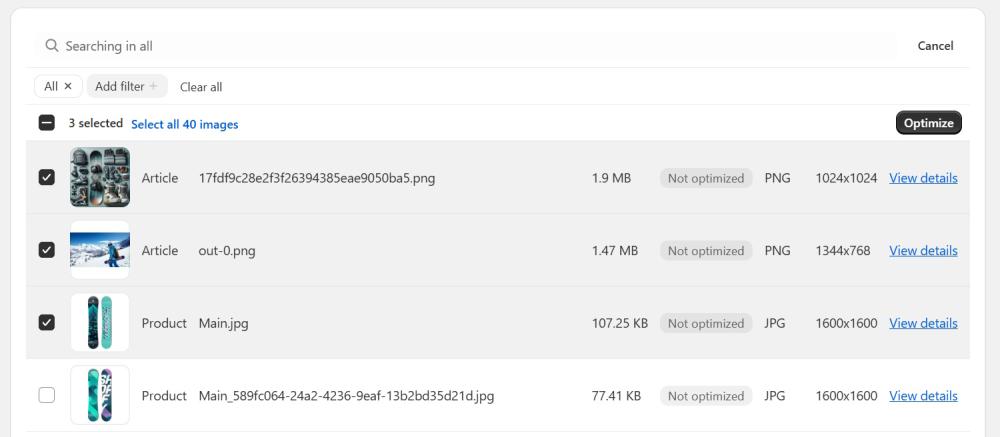
1. Select the images you want to optimize.
Filter by type or collection and use sorting to find images for optimization.
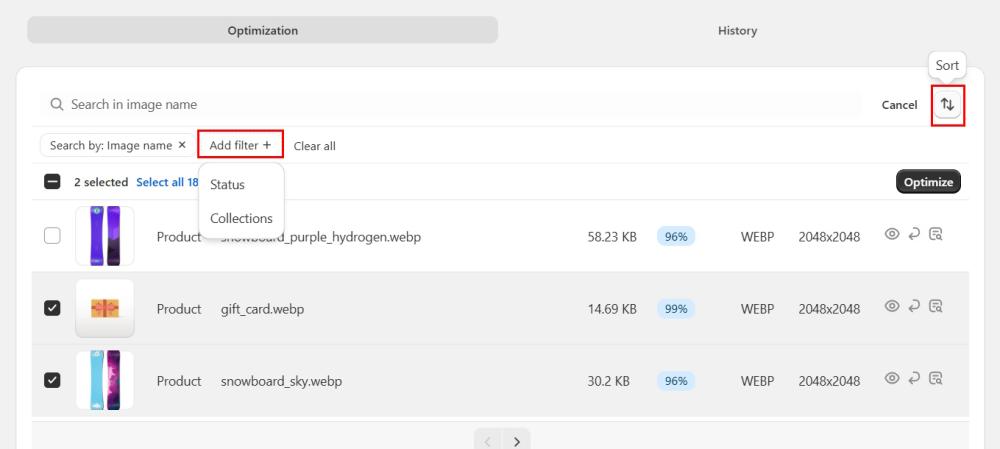
Or use Search by option:
a. Image name – returns results matching the image file name (default behavior).
b. Entity name – returns results matching the name of the product, collection, or article the image belongs to.
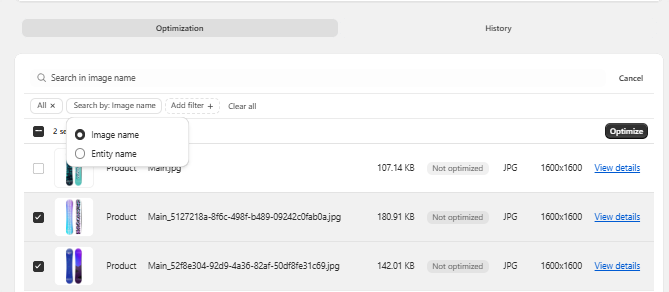
Note: Only one search mode can be active at a time.
2. Click the Optimize button or Optimize all for bulk processing.
3. Optimization runs in the background according to your settings, so you can safely leave the Shopify admin and return later. To stay updated, click 'Notify me when finished' and we’ll email you as soon as the process is complete.
Note
The app performs one task at a time. Please wait for the current process to finish before starting new image optimization.
After optimization, you’ll be redirected to a page showing Optimization job details and an Images preview grid.
Note
If an image's size or parameters remain unchanged after optimization, it means the image already meets your set criteria and doesn’t require further optimization.
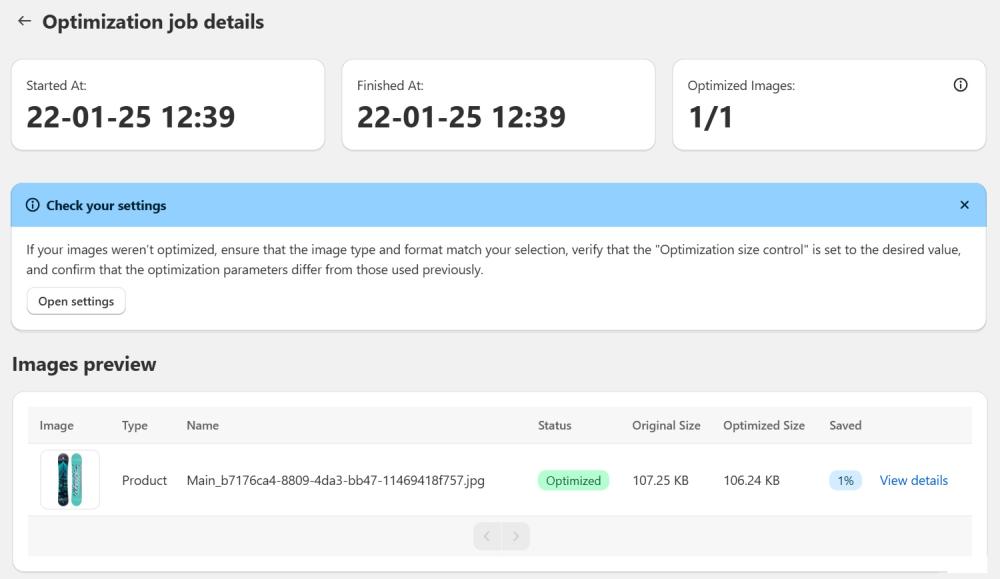
Under the Optimization job details section, you'll find the start and finish times, and the number of images selected and successfully optimized.
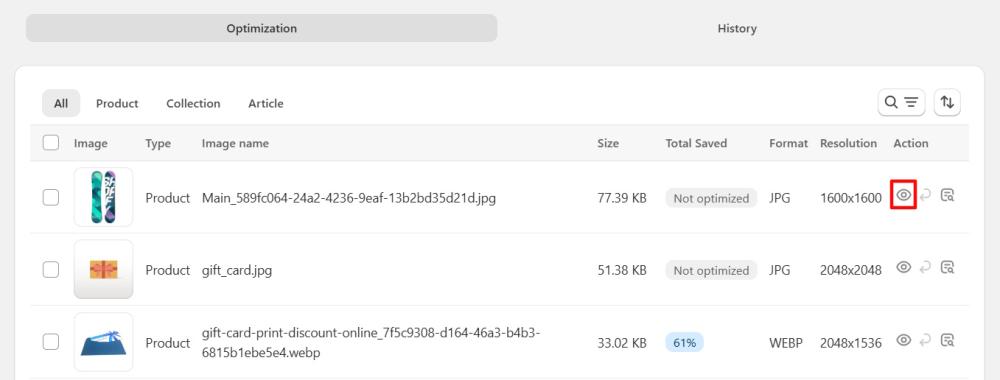
In the Images preview grid, you can see which images were optimized, compare the original and compressed sizes, view the total percentage of weight saved. Click View details link for more information on each image's optimization:

Note
If you are using your images on third-party services like Instagram & Facebook, Google & YouTube, those services will not automatically receive the optimized image files. After optimization, your images might appear blank in those integrations.
To fix this, open each third-party application and manually resync your images there.
If you’re not satisfied with the results, you can restore your images to the previous state.
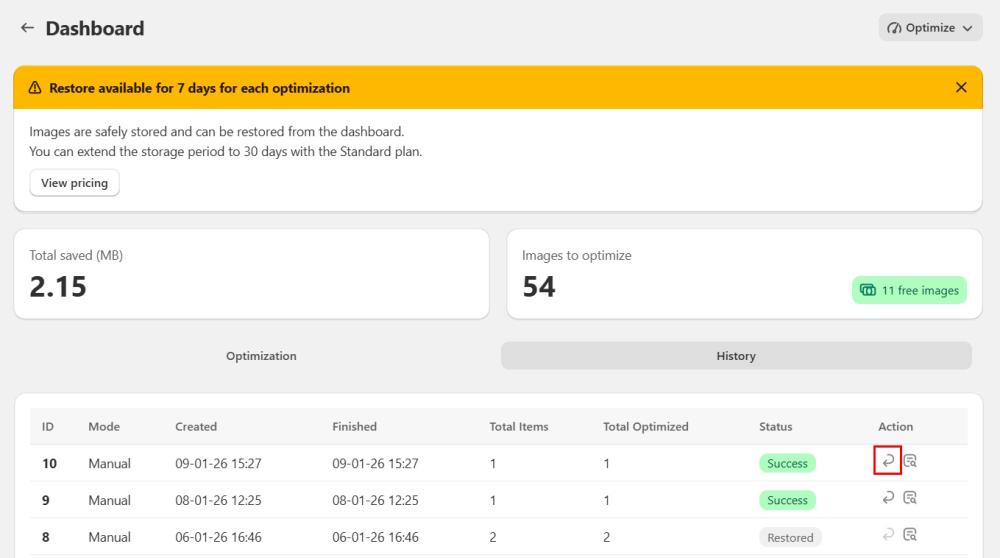
History
You can view the history of all your optimized images in the History section.
To do this, go to the Dashboard and click on the History tab. A grid with all your optimizations will appear.
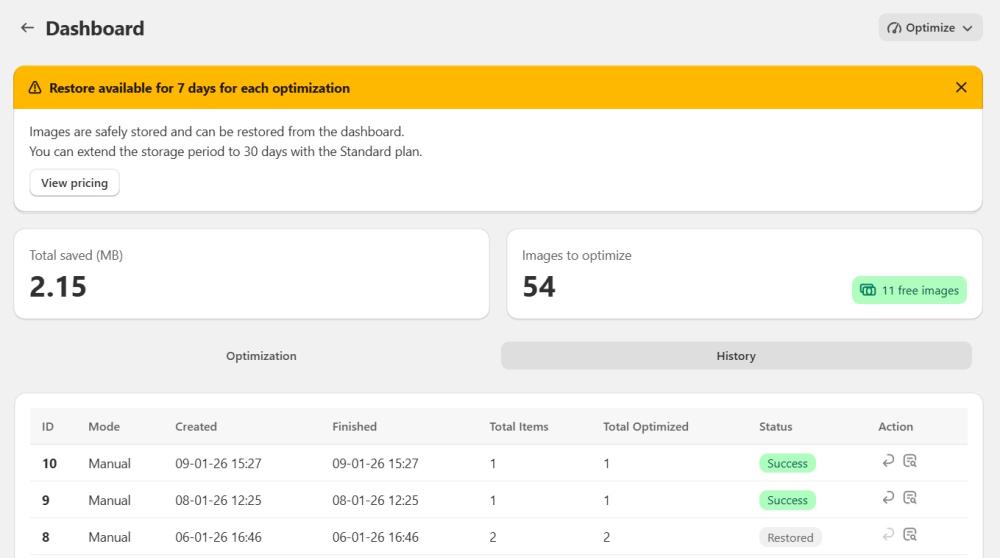
Here you can view all optimization logs, track their status, and review specific details. You can also restore an entire batch of images directly from any optimization log.

Restore images
You can revert optimized images to their original state at any time. You have the flexibility to restore either individual images or an entire batch from a specific optimization.
Note: Original images are only stored for the duration of your plan's backup period. Once this period expires, images can no longer be reverted.
Note: The restoration feature is available only for images optimized after January 13, 2026.
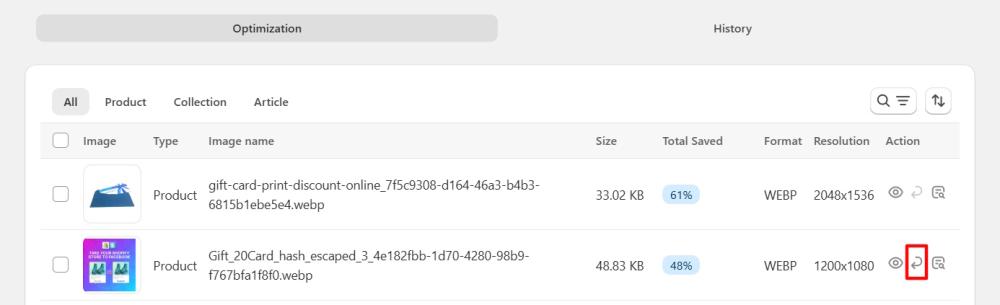
Restore individual images
If you are satisfied with most of your results but want to revert specific images, follow these steps:
- Go to the Dashboard.
- Locate the images you wish to revert.
- Click the Restore icon next to the image.
Restore a batch of images
To revert an entire group of images processed during the same optimization, follow these steps:
- Go to the Dashboard.
- Open the History tab.
- Find the specific optimization log for the images you want to revert.
- Click the Restore icon for that log.