Table of contents
- Getting started with AutoPost
General information about the app. - Connecting your social media accounts
Required step: Connect the app with your social media accounts. - Posts creation (individual)
Create individual social media posts - more manual way. - Automations creation - set & forget
Publish posts about specific products automatically on a schedule or by a trigger: - Posting Calendar
Track and manage all your scheduled posts. - Templates
Explore in-built or create custom templates for your social media posts. - Settings
Specify the language for AI-generated text. - FAQ
Getting started with AutoPost
AutoPost is designed to streamline your social media management by automating the posting process on Instagram, Facebook, X (formerly Twitter) and Pinterest.
To ensure a smooth setup and optimal use of AutoPost, we recommend configuring the app in the following order:
- Connect your social media accounts.
- Create posts:
Connecting your social media accounts
To start using AutoPost, first connect the social media accounts where your posts will be published. This is a required step.
|
NOTE The app supports one account per social media platform. If you connect another account to a platform with an existing connection, the current account will be replaced. |
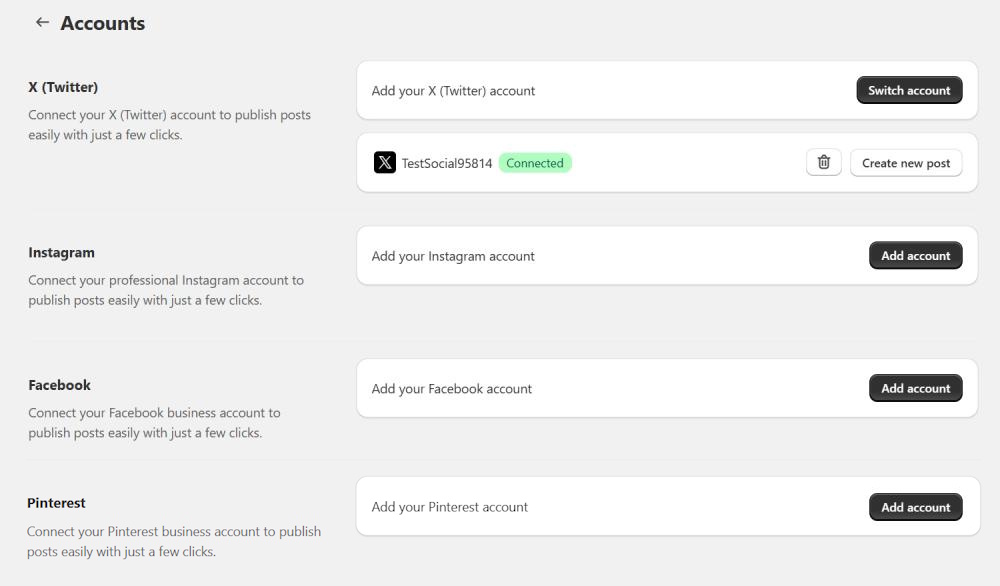
1. Open AutoPost and go to Accounts.
2. Click Add account next to the social media platform you want to post to.
3. Log in using your social media credentials.
|
NOTE For Meta platforms and Pinterest, AutoPost only works with business accounts. Be sure to connect your Facebook Business account and Instagram Professional and/or Pinterest Business account. If you attempt to connect a personal account, you will receive an error message. |
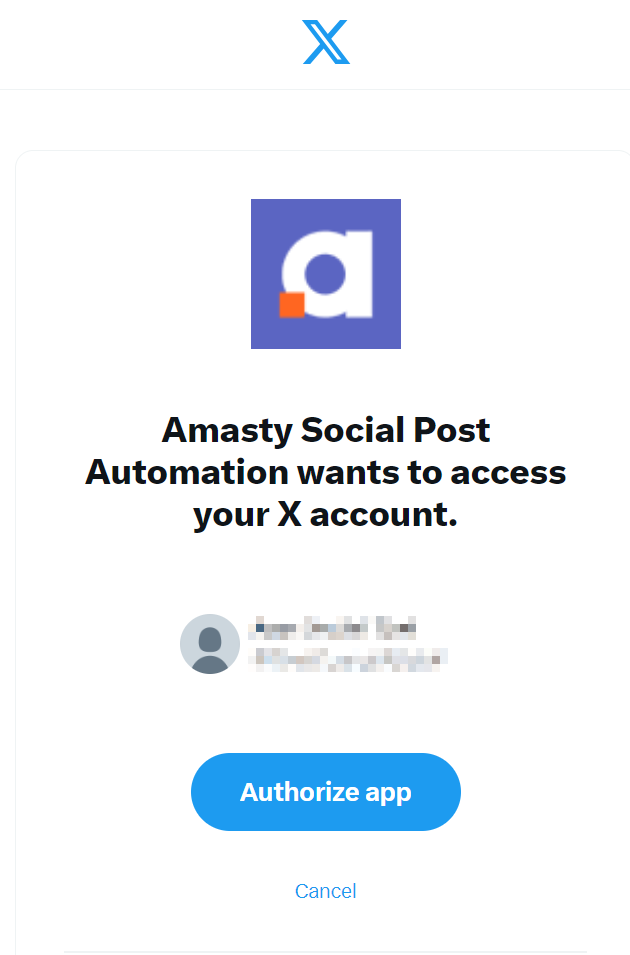
4. Click Authorize app to grant AutoPost permission to manage your account. It's necessary for publishing posts on your account.
5. (Facebook only) Select which pages your posts will appear on:
- Allow for existing pages only – choose from existing pages; reconnect your account to access newly created pages.
- Allow for both existing and future pages – enable posting to both existing and future pages.
|
NOTE The Facebook account you connect must have ‘Full Control’ permissions on your Facebook page. |
Your connected account will appear in the Accounts section on the home page and under the corresponding social media platform on the Accounts page.
Once connected, you can proceed with individual post or automations configuration.
Individual posts creation
In AutoPost, you can create and publish individual posts or set up automations, which usually include multiple posts for one or several products.
To create an individual post, follow these steps:
1. Open the Posts page.
2. Use the tabs with your connected social media accounts to switch to the platform where you want to create or manage posts.
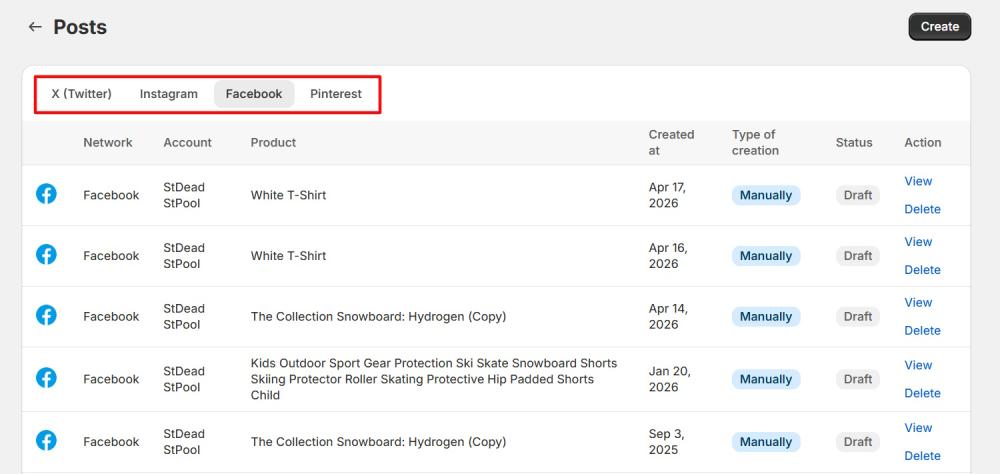
3. Click Create.
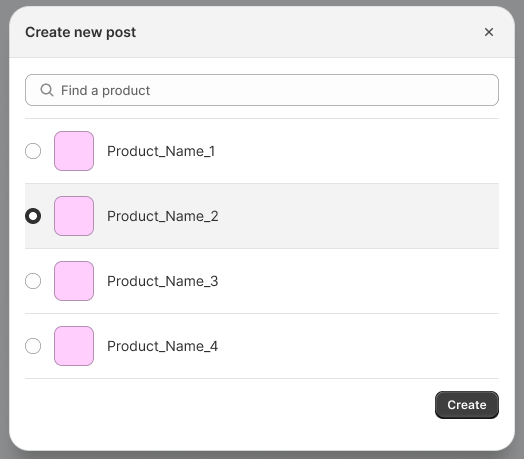
4. In the dialog window, select the product you want to feature in your post and click Create.
|
NOTE You can select one product per post. To create a sequence of posts for multiple products, use Automations. |
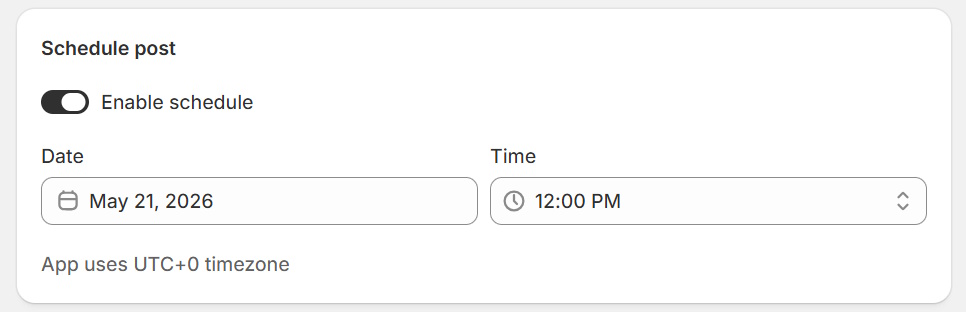
5. Enable post scheduling if needed.
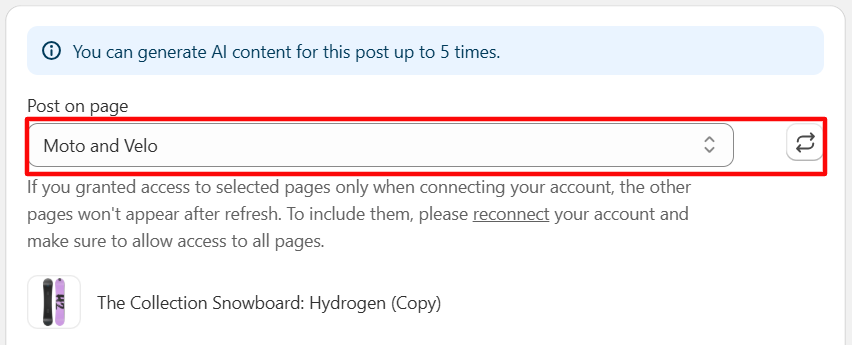
6. Select a page (Facebook) or a public board (Pinterest) from the dropdown.
|
NOTE If you can’t find the page you need, click the Refresh icon and check the dropdown again. If the page still doesn’t appear, check your Accounts settings. Pinterest allows publishing only to public boards; private boards cannot be used. |
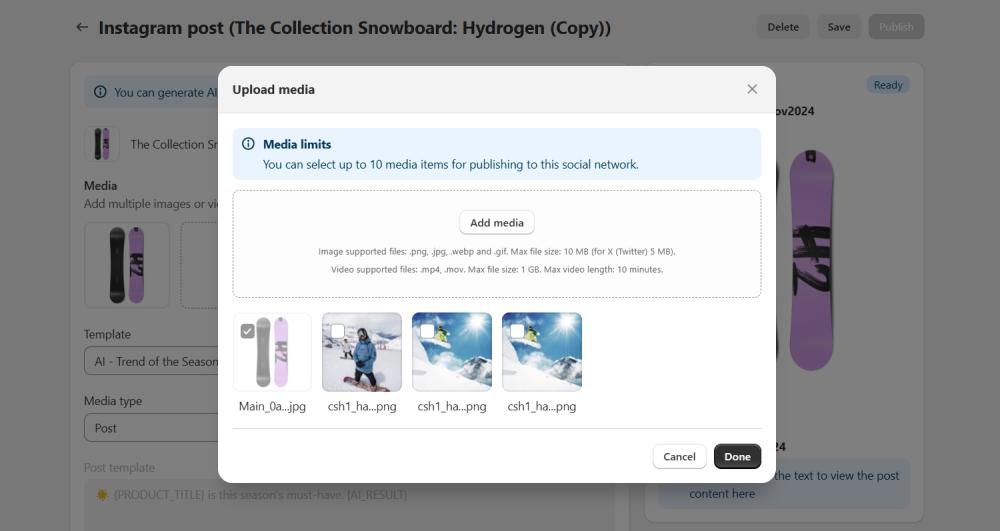
7. Specify the media for your post. By default, the main product media is added. You can Upload a new image/video or Select existing media from the product gallery. Uncheck any media you don’t want to include. To rearrange images, drag and drop them.
|
NOTE
Number of files: Up to 10 media (both images and videos) per post. Supported file formats: .png, .jpg, .webp, .gif, .mp4, .mov. Max file size: 10 MB for images, 1 GB for videos. Max video length: 10 minutes for Reels and 90 seconds for carousel videos.
Number of files: Up to 50 images or 1 video per post. Supported file formats: .png, .jpg, .webp, .gif, .mp4, .mov. Max file size: 10 MB for images, 1 GB for videos. Max video length: 10 minutes.
Number of files: Up to 4 images or 1 video per post. Supported file formats: .png, .jpg, .webp, .gif, .mp4, .mov. Max file size: 5 MB for images, 1 GB for videos. Max video length: 2 minutes.
Number of files: One image or one video per post. Supported file formats: .png, .jpg, .webp, .gif, .mp4, .mov. Max file size: 10 MB for images, 1 GB for videos. Max video length: 10 minutes. |
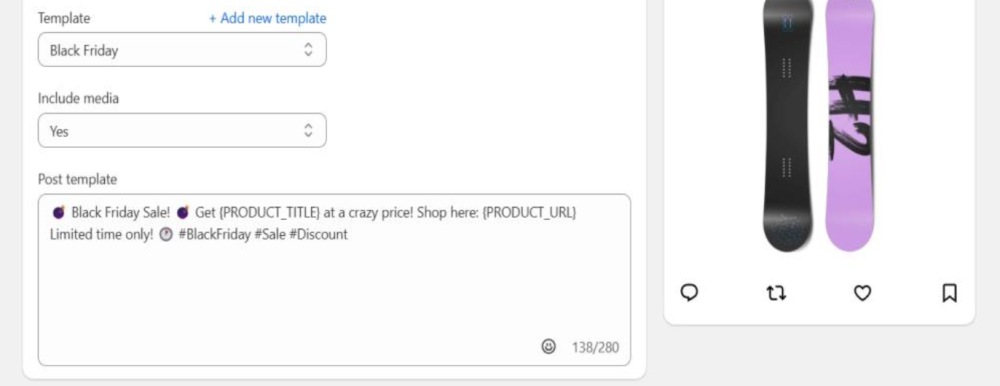
8. Select the Template you want to use for this social media post from the dropdown. Templates can be:
- Standard — fixed text with variables
- AI — includes AI-generated text and is recommended for more diverse posts
9. For AI templates, choose Template Flexibility:
- Strictly according to template — AI follows the template structure exactly
- Flexible variable-aware generation — AI uses the same variables but can change their order and phrasing
10. (For X, Facebook) Choose whether to include a product image or video in the post.
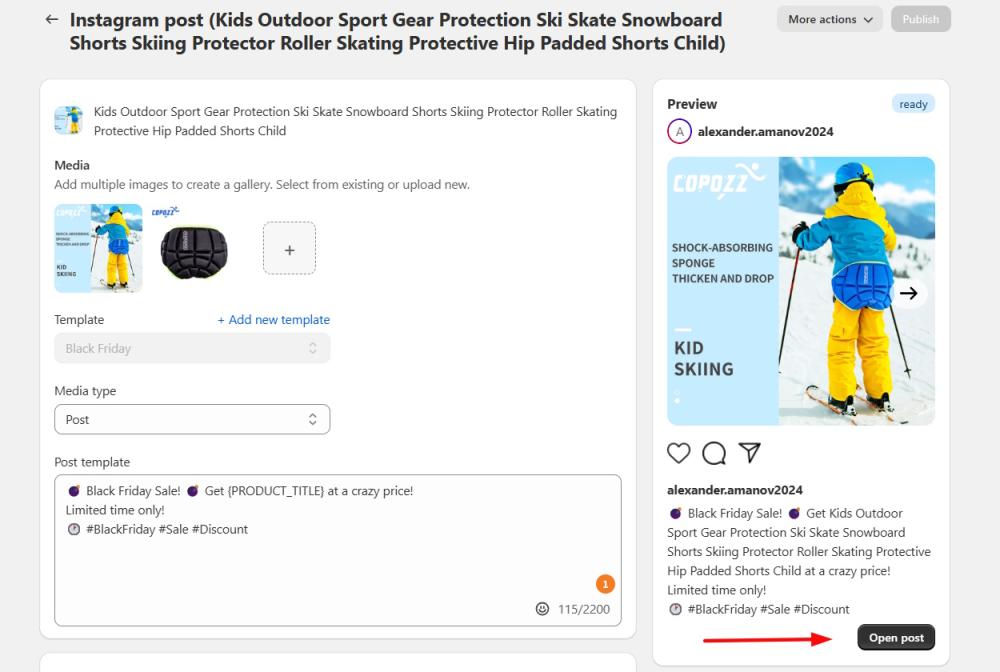
11. (For Instagram) In the Media type field, choose whether to create an Instagram post or story. If you select Story, text fields will be disabled, and only the image/video will be displayed.
12. Configure post caption:
- For Standard templates: you can edit the text in the Post template section and adjust variables for this specific post.
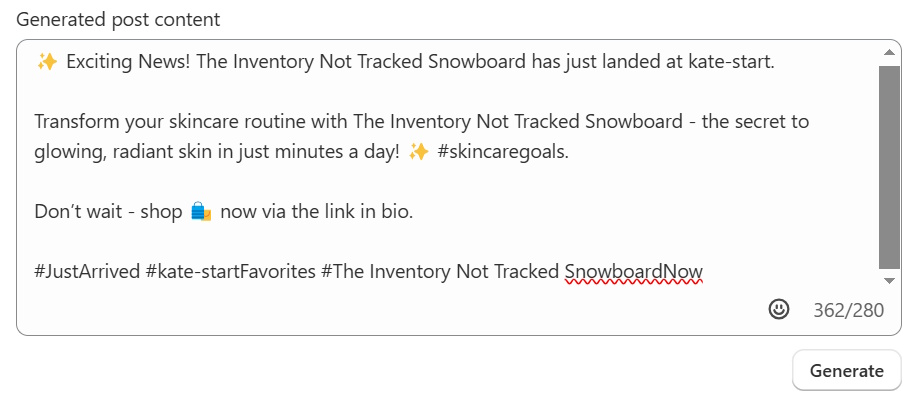
- For AI templates: Generate and edit the text in the Generated post content section. The Post template section is not editable.
|
NOTE At the top, you'll see a notice showing how many times you can generate or regenerate AI content. Typically, you can generate AI content for one post up to 5 times. |
| NOTE You can specify the language for AI-generated text in the Settings section. |
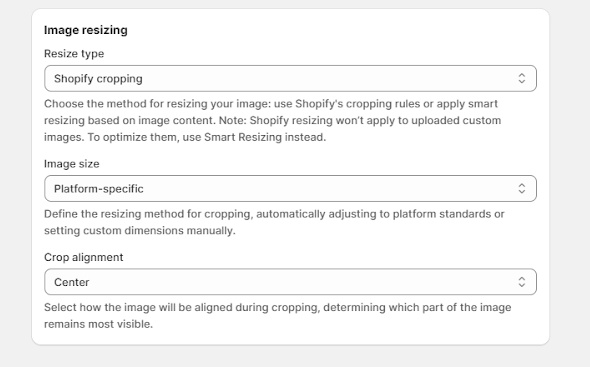
13. Resize your images to make sure they look good on the selected social media platform:
- Resize type:
- Shopify cropping - use a default Shopify resizer that automatically crops and downscales images to fit the platform's recommended layout or your custom specifications.
- Smart resizing - use an AI-powered tool that detects the main objects in the image and automatically crops it to your custom specifications to maintain the same alignment as the original image, ensuring the subject stays properly framed.
- Image size:
- Platform-specific - automatically resize images according to the platform's recommendations.
- Custom - specify the width and height for resizing, and adjust the Crop alignment.
|
NOTE Shopify resizing won’t apply to uploaded custom images. To optimize them, use Smart resizing instead. |
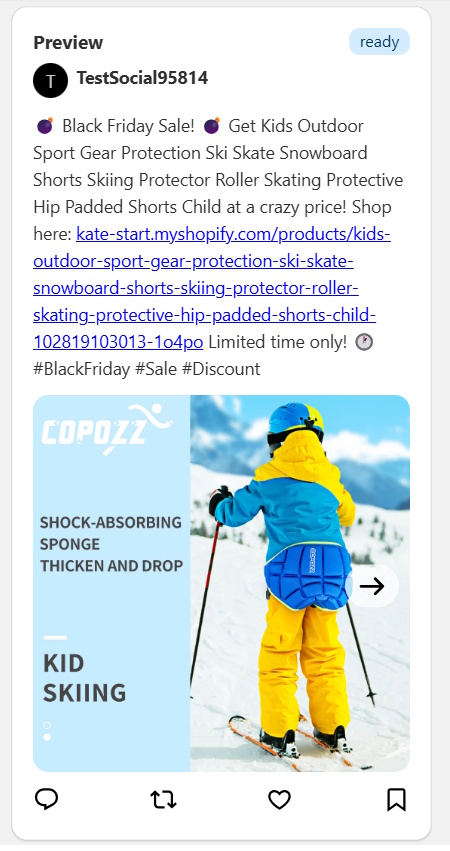
14. Preview how the post will look in the section on the right.
15. Click Publish now to publish the post immediately, or Save to publish it later.
After publishing, you can open the post from the post configuration page by clicking Open post, view it in the Calendar, or view it directly on your social media profile.
Automations creation
To publish posts automatically on a schedule or when a trigger occurs, set up automation rules — configure them once and they will run automatically.
|
NOTE The Automations section is available on paid plans only. |
Create a new automation
1. Open Automations page.
2. Using the tabs with your connected social media accounts, switch to the platform where you want to create or manage posts.
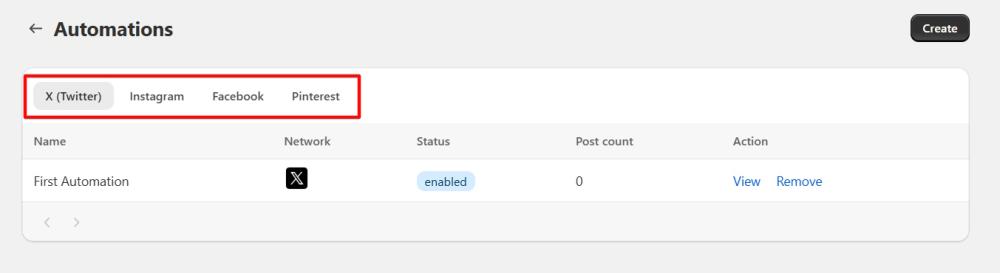
3. Click Create.
4. Select a page (Facebook) / public board (Pinterest) for your post from the dropdown menu.
|
NOTE Facebook: If you can’t find the page you need, click the Refresh icon and check the dropdown again. If it still doesn’t appear:
If you need assistance, contact us at help-center@amasty.com. Pinterest: Pinterest only allows publishing to public boards; private boards cannot be used. |
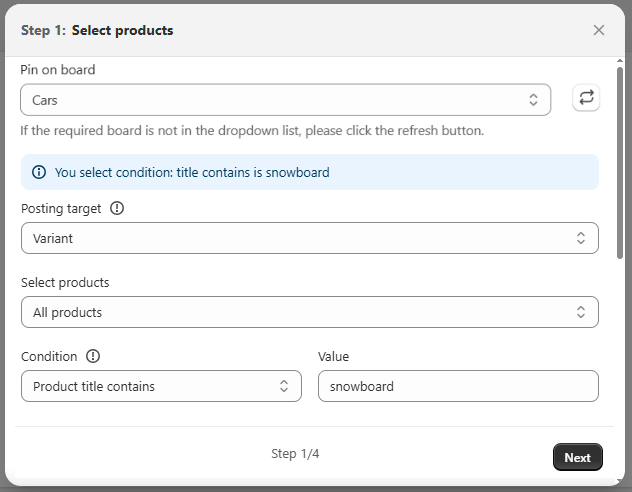
5. Specify whether to feature a specific product variant or the parent product in your automation.
|
NOTE
|
6. Select products for your automation:
- All products: Products are chosen at random from your store. You can optionally narrow this down by setting conditions.
- Specific products: Select one or more products manually using the product picker. No additional conditions are available for this option.
- Specific collections: Choose collections whose products will be used in the automation. You can refine your selection with conditions.
7. Specify the condition to refine your selection (available when ‘All products’ or ‘Specific collections’ options selected):
- Any product. Posts will use any product from your store.
- Product creation time (within the last x hours)
- Product update time (within the last x hours)
- Product title contains (enter text)
- Product status (active / draft / archived)
- Sales channel (includes all connected sales channels). Note: Shopify checks sales channel assignment by the parent product, so variants may be used if their parent product matches the selected channel.
|
NOTE
|
8. Click Next.
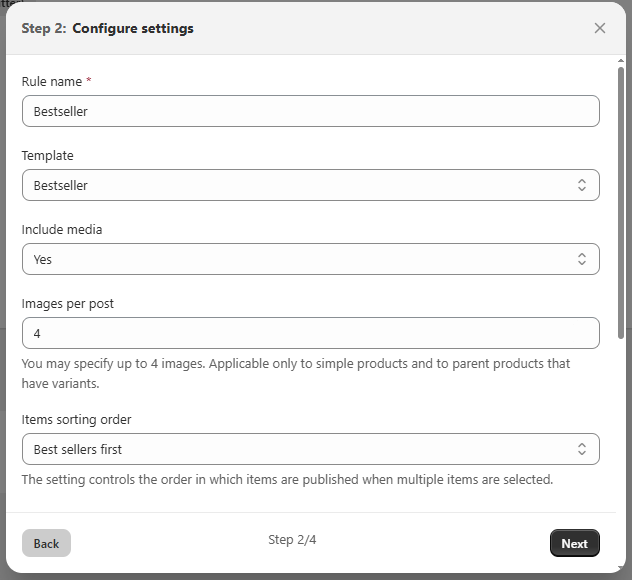
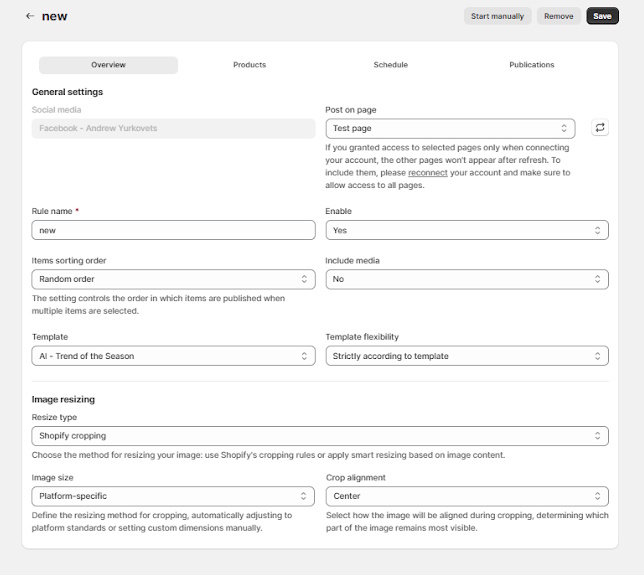
9. Set the rule name.
10. Choose a template for all posts created through automation.
11. (For X, Facebook) Decide whether to include a product image or video in the post.
12. (For Instagram) In the Media type field, choose whether to create an Instagram post or story. If you select Story, text won’t be generated, and only the image/video will be displayed.
13. In the Images per post field, specify the maximum number of product images to include in a single post. This allows you to automatically create posts featuring a gallery of images.
|
INFO Social Network Limits: Instagram: Max 20 images per post X (Twitter): Max 4 images per post Facebook: Max 50 images per post Pinterest: Max 1 image |
|
NOTE Automations currently support images only; video support for automated posts is coming soon! Applies only to simple and parent products. Variants are always posted with a single image. Images are taken in order, starting with the main product image. If the product has fewer images than the selected number, the post will include only the available images. |
14. Specify the order in which products appear in your posts when multiple products selected by the rule: Random order, Newest first, Oldest first or Best sellers first.
15. Click Next.
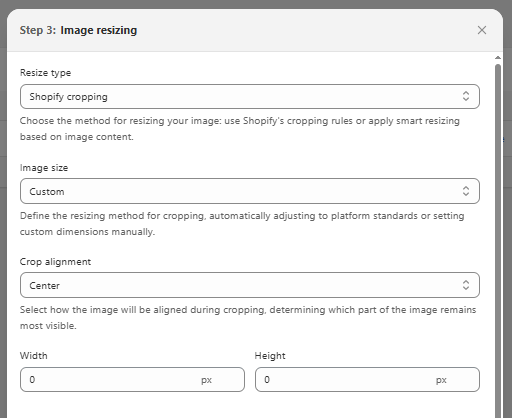
16. Choose the resizing method for your images:
- Shopify cropping - use a default Shopify resizer that automatically crops and downscales images to fit the platform's recommended layout or your custom specifications.
- Smart resizing - use an AI-powered tool that detects the main objects in the image and automatically crops it to your custom specifications to maintain the same alignment as the original image, ensuring the subject stays properly framed.
17. Choose the image size:
- Platform-specific - automatically resize images according to the platform's recommendations.
- Custom - specify the width and height for resizing, and adjust the Crop alignment (available only for Shopify cropping).
18. Click Next.

19. Decide how and when your posts will be published using the dropdown:
- On schedule - select the publishing days, number of posts per day, posting frequency if multiple posts are published daily, and the start time for the first post. Note: UTC+0 timezone.
- Immediately by trigger - posts are published as soon as a specific trigger is met.
20. (For ‘Immediately by trigger’ option) Choose a trigger:
- Product on sale - posts when a product with a previously set “compare at price” goes on sale.
- New product creation - posts when a new product is added to your store. Note: Available only for condition-based selections: specifically "Any product" or "Product title contains" (check Step 7).
- Low stock - posts when a product's inventory drops to a specific quantity. You’ll need to specify the quantity (required field). Note: Applies only to products with inventory tracking enabled.
- Back in stock - posts when a previously out-of-stock product becomes available again.

|
NOTE If multiple products meet a trigger condition simultaneously (e.g., several products in a single order going out of stock, or multiple new products created at once), only one of the qualifying products will be randomly selected to generate a post. This ensures your social media feed isn't overwhelmed by too many posts at once. |
21. (For ‘On schedule’ option) Define what happens after all eligible posts are published:
- Disable automation - automation stops after each product in the queue is published once.
- Keep posting on schedule - matching products will be continuously published based on your schedule until the automation is disabled.
- Post once, then skip - each matching product will be published one time. Once all current products have been posted, the rule will pause. If new products that meet your conditions appear later, the rule will automatically reactivate and publish them (each new product once). Previously published products will not be posted again.
- Post twice, then skip - each product in the queue will be published two times (once in each cycle). After a product has been published twice, it will not be posted again. Once all current products have been posted twice, the rule will pause. If new matching products are added later, they will be published twice.
22. Click Done.
The automation will build a queue based on the selected Automation behavior setting.
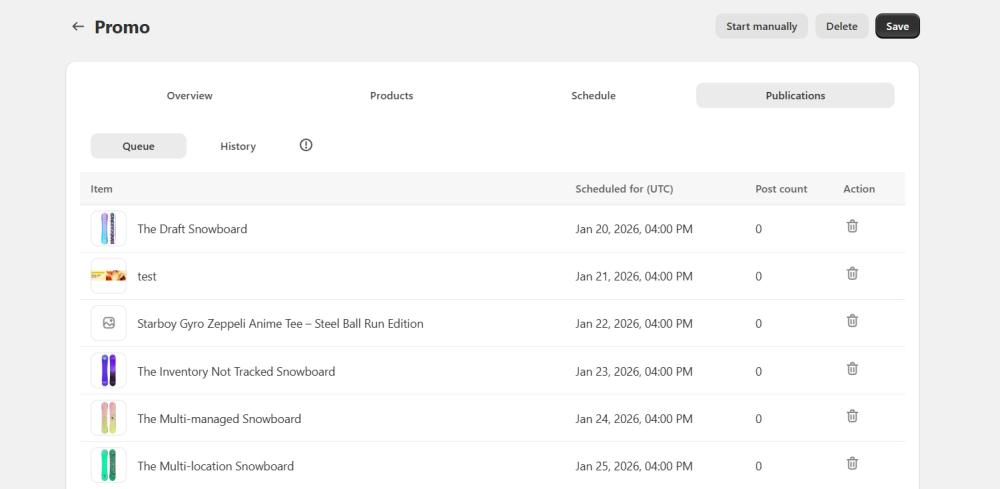
Check publications and the queue in the Automation overview under the Publications tab or in the Posting Calendar.
Automation overview
On the Automation Overview page, you can:
- Edit the automation — update its settings in the Overview tab and click Save.
|
NOTE If you edit and resave the automation settings (for example, if you change the name, Facebook page or Pinboard), the existing product queue will remain as it is. It will only be updated if you make changes to the posting schedule, posting target, media type, product selection, sorting order or the conditions themselves. |
- Disable the automation — click the Remove button.
- Check the product queue — open Publications > Queue.
- Skip a specific product from the queue — click the trash icon in the Queue grid. Once removed, the product is excluded from the current cycle and won’t reappear, even if the queue is refreshed or recompiled.
- Start the automation manually — click the Start manually button instead of waiting for an event to trigger it.
Use cases
We recommend setting up a few different campaigns in AutoPost to fully cover your social media goals. Below is a list of suggested campaigns with recommended configurations. (We’ll focus only on the key fields for each use case, like product selection, template, and schedule — general settings such as media resizing can be adjusted as needed.) Feel free to modify these according to your business needs.
Everyday general posts
Purpose: Increase brand visibility and engagement across all platforms.
Recommended automation configuration:
- Select products: All products
- Template: Choose from AI Trend of the Season, AI Weekly Favorites, AI Problem-Solution Post, AI Minimal Copy, AI Benefit Description, or AI Use Case
- Items sorting order: Random order
- Publishing strategy: On schedule
- Posts per day: 1–3
- Action after publishing all product posts: Keep posting on schedule
Sale promotion activity
Purpose: Promote products on sale to notify followers and drive sales — recommended for all platforms.
Recommended automation configuration:
- Select products: All products or Specific category if you run category promotion
- Template: Choose from AI Special Promotion, AI Special Promo, AI Buy X Get Y
- Items sorting order: Best seller first
- Publishing strategy: Immediately on trigger - Product on Sale
New products promotion
Purpose: Introduce new products to customers — especially effective on Instagram and Facebook.
Recommended automation configuration:
- Select products: All products
- Condition: Product creation time - within the last 48 hours
- Template: AI New Arrival
- Items sorting order: Oldest first
- Publishing strategy: On schedule
- Posts per day: 1–2
- Action after publishing all product posts: Keep posting on schedule
Low stock products
Purpose: Create urgency and help customers make faster buying decisions — recommended for Instagram and Facebook.
Recommended automation configuration:
- Select products: All products
- Template: Create custom AI template for this condition
- Items sorting order: Best sellers first
- Publishing strategy: Immediately on trigger - Low stock - quantity 8.
Back in stock
Purpose: Notify customers when products are back in stock — recommended for X, Instagram, and Facebook.
Recommended automation configuration:
- Select products: All products
- Template: Back In Stock
- Items sorting order: Best sellers first
- Publishing strategy: Immediately on trigger - Back in stock.
Posting Calendar
The Posting Calendar is a central hub where you can create, view, edit, and manage scheduled, published, and failed posts from all your automations and individual posts across all connected social media platforms.
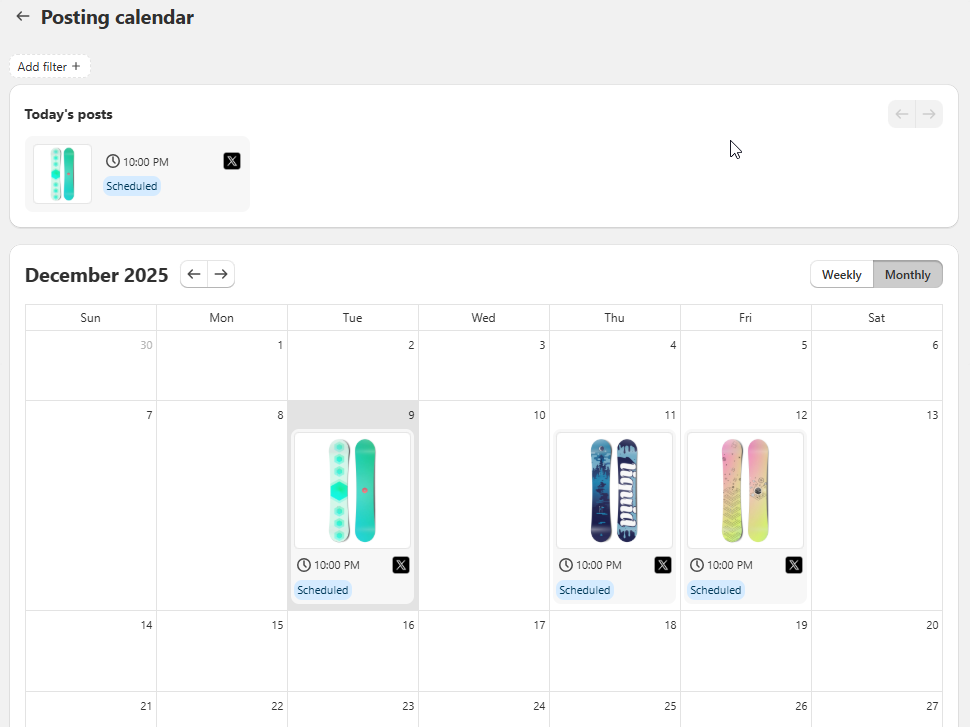
In the Posting Calendar, you can view today’s posts, as well as upcoming and past posts in weekly or monthly format. Click a date to see all posts scheduled for that day.
The Posting Calendar displays posts that already exist in your automation queue (based on Settings configuration):
- If your automation uses At launch time queue creation, new posts will appear in the calendar each time the automation runs and the queue is refreshed.
- If your automation uses Immediately queue creation, posts will appear in the calendar right after the automation is saved, since the queue is created upfront.
|
NOTE If a queue has not yet been generated for an automation, its future posts will not appear in the calendar until the queue is created. |
You can also perform the following actions:
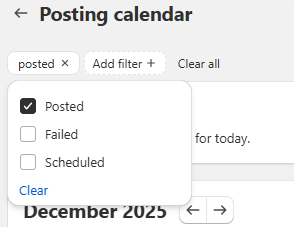
- Filter posts:
Click + Add filter, select a filter category (Status or Social network), and choose one or multiple options.

- Create individual posts:
Click the Create post button, then specify the social media platform and the product you want to promote. You’ll be redirected to the post creation page, where you can configure your post.
- Edit scheduled posts:
Click a post so you can edit its content (generate with AI or edit manually), update images (add, remove and replace) or change the post template.
- Publish post immediately
- Delete post
Failed posts display an error message explaining why publishing was unsuccessful. The error text is taken from your posting history and appears directly in the post details. Failed posts can be deleted using the Delete button. This action cannot be undone.
|
NOTE If you manually edit a scheduled post and later update automation settings, such as posting schedule, posting target, product selection, conditions, or sorting order, those automation changes will override your manual edits while the post is still in the queue. |
The calendar automatically updates when posts are published or deleted.
|
NOTE When you delete a scheduled post, it is also removed from the automation queue. The next scheduled post from your automation will take its place. |
Published posts cannot be edited or deleted.
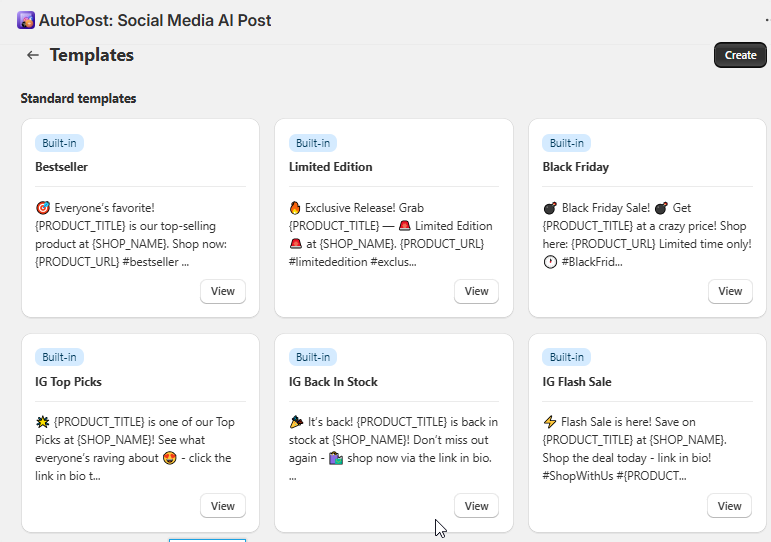
Templates
Social media posts in AutoPost are created using templates. There are two template types:
- Standard templates — fixed text with variables.
- Advanced AI templates — also include a prompt that AI uses to generate post text; recommended for more diverse posts.
You can browse the built-in template library and use any template when creating an individual post or setting up an automation.
Alternatively, you can create your own custom template to match your business needs:
1. Open the Templates page.
2. Click Create.
| NOTE If the Create button is disabled, it means you haven't connected the app to any of your social media accounts. Please, return to the Accounts page and connect your social media account. |
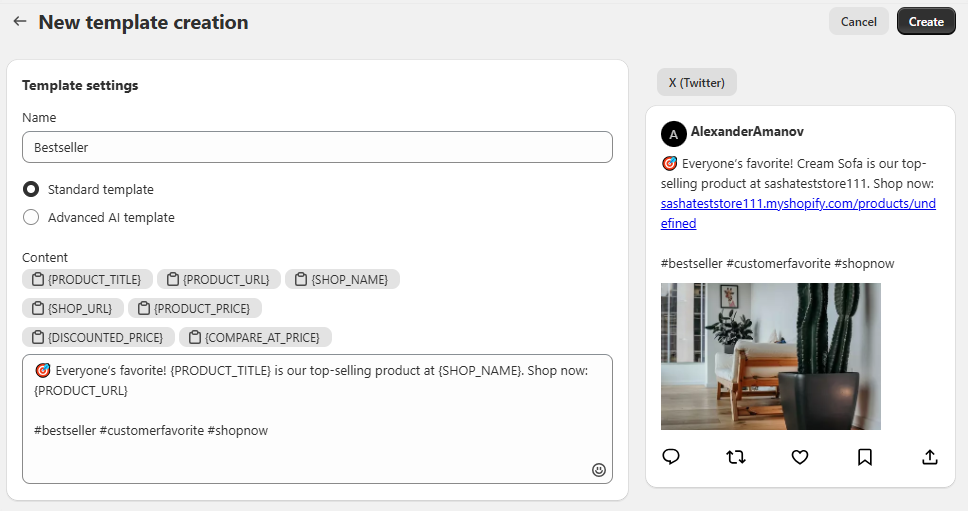
3. Enter the template name and choose the type:
- Standard - a template created with your text and variables.
- Advanced AI - a template created with variables, fixed and AI-generated text (recommended for more diverse posts).
4. Add the template Content and insert variables to display relevant product information.
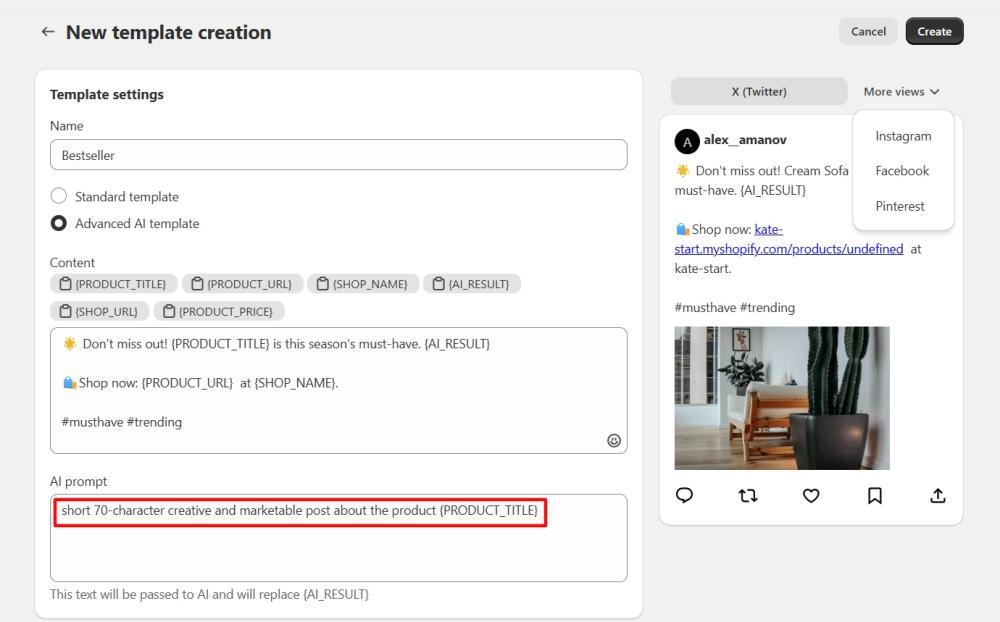
5. (For AI template) Add the {AI_RESULT} variable to the content - this is where the AI-generated text will appear based on your instructions you share in the AI Prompt field.
|
NOTE By default, AI generates in English. You can change the language on the Settings page. |
6. (For AI template) Add your content generation instructions in the AI Prompt field. You can also use variables here, such as PRODUCT_TITLE, etc., which you can copy from the Content section.
7. Click Save.
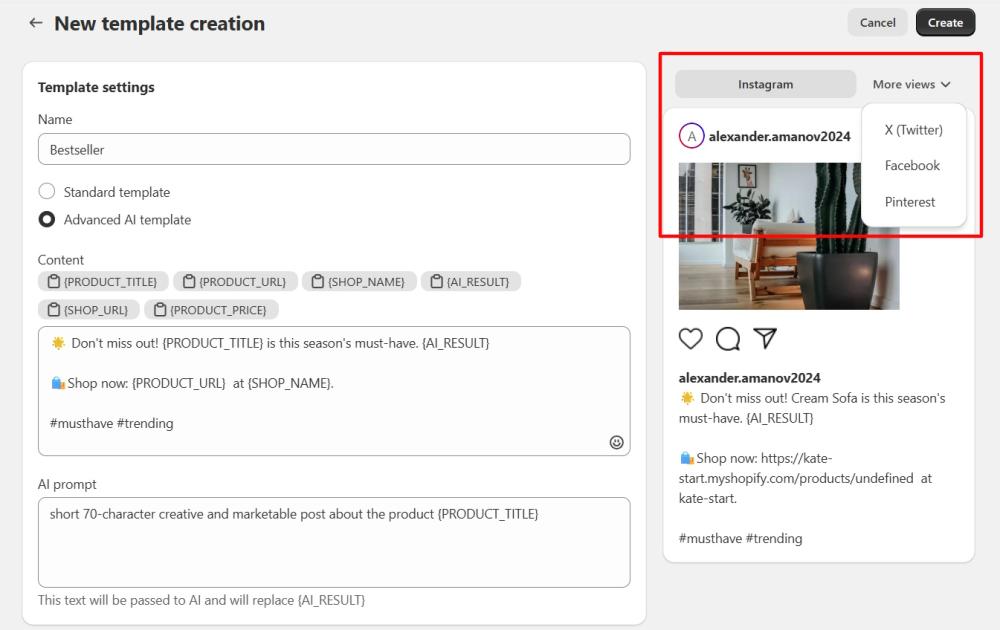
On the right, you can preview a sample post created with your template. Switch between modes to see how it will look on each social media platform.
After that, you’re ready to create posts using your template.
Settings
Before creating posts, we recommend you configuring settings.
1. Open the Settings page.
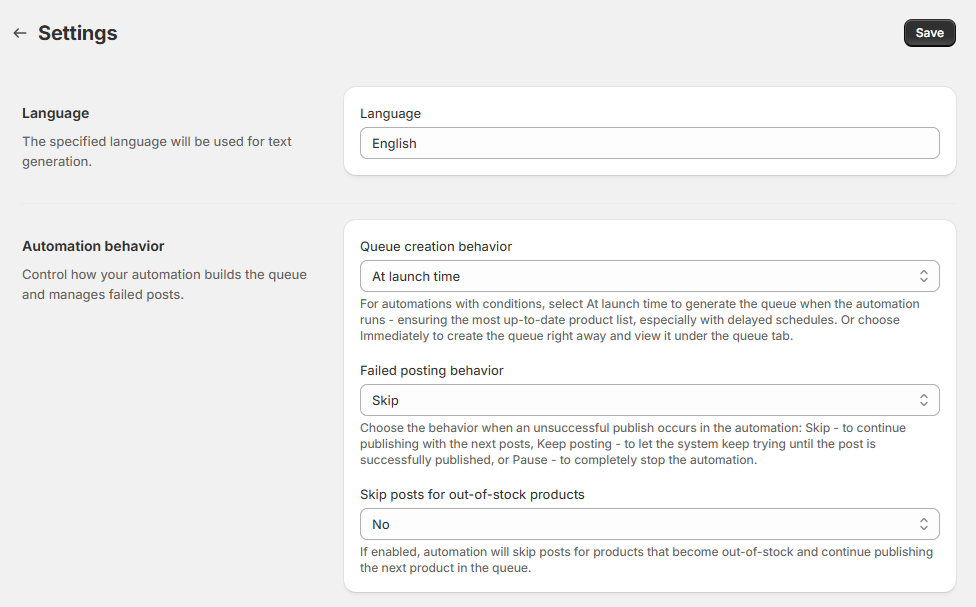
2. Specify the language for AI-generated text.
3. Set Queue creation behavior to choose when the product queue is created:
- At launch time – the queue is generated at each scheduled run, so your posts include the most up-to-date products based on your current rules. Note: This is particularly useful if you have delayed schedules or your product catalog changes frequently.
- Immediately – the queue is created as soon as you set up or save your automation rule. You can then view it in your automation configuration (Publications > Queue) or in the post calendar.
4. Enable skipping out-of-stock products for automations, if needed.
5. Set how the app behaves when a post in an automation fails:
- Skip - the automation moves on to the next product in the queue.
- Keep posting - for scheduled queues: the automation will retry publishing the same product until it succeeds. For trigger-based automated queues: the automation moves on to the next triggered item.
- Pause - the automation stops running and all scheduled posts are removed from the calendar. You can enable email notifications about failed publishing attempts.
6. Click Save.