Table of contents
- Getting started with WritePilot
General information about the app. - Settings
Recommended before content generation. - Products
Generate product descriptions and metadata. - Collections
Generate collections descriptions and metadata. - AI auto-generation
Set rules to automatically generate content for products and collections as they appear in your store. - Blog posts and thumbnails
Generate blog posts and images for them - individually only. - SEO content audit
Analyze and fix missing data on your store. - Custom prompts
Use your own instructions for content generation tailored to your needs. - Restore content
Check content generation history and restore previous version. - Pricing
Learn how pricing is built and how to buy extra credits. - FAQ
When you install WritePilot, the app automatically detects your products, allowing you to generate and publish content directly to the corresponding product pages, collections and blog pages. This guide is organized in the recommended order for setting up the app.
General Settings
On the Settings page, you can adjust the app’s behavior during content generation.
|
NOTE |
Open Settings page and specify the following:
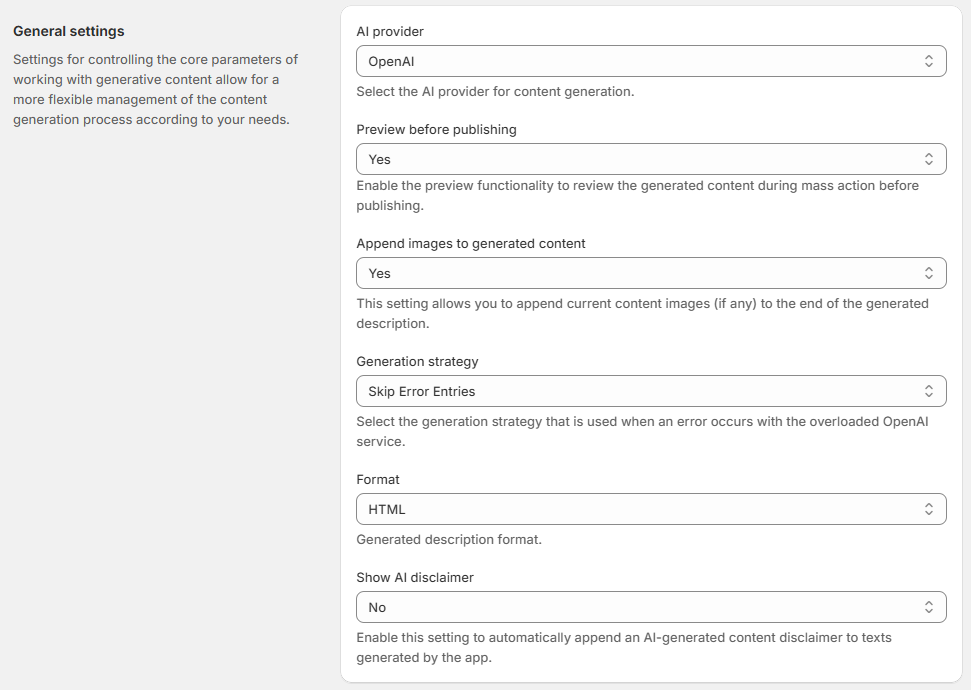
Preview before publishing - enable the preview functionality to review the generated content during mass action before publishing.
Append images to generated content - set Yes to add current content images (if any) to the end of the generated description. The option also works for description refinement - in this case, images remain in their original positions.
Generation strategy - select the generation strategy that is used when an error occurs with the overloaded OpenAI service.
AI provider - The selected provider determines which AI model is used for content generation. All generation features and automation settings work the same way for both providers. Available providers:
- OpenAI (default)
- Gemini
Format - this parameter allows you to select the desired format for the generated content:
- HTML - the content generator will create text that adheres to the HTML markup language. This enables the creation of structured content, including headings, paragraphs, lists, links, images, and other web page elements.
- Plain text - the content generator will produce unformatted text without any styling or markup. This simple text format does not include styles, fonts, or external elements.
Show AI disclaimer - Select 'Yes' to append a disclosure to generated content. Use an additional required Disclaimer text to enter the disclaimer message that should be added to AI-generated content. The disclaimer is added as a new line to the end of Product Descriptions, Collection Descriptions, and Blog Content.
|
NOTE Translations are not automated for disclaimer. If you generate content in Spanish, your disclaimer text must also be written in Spanish. |
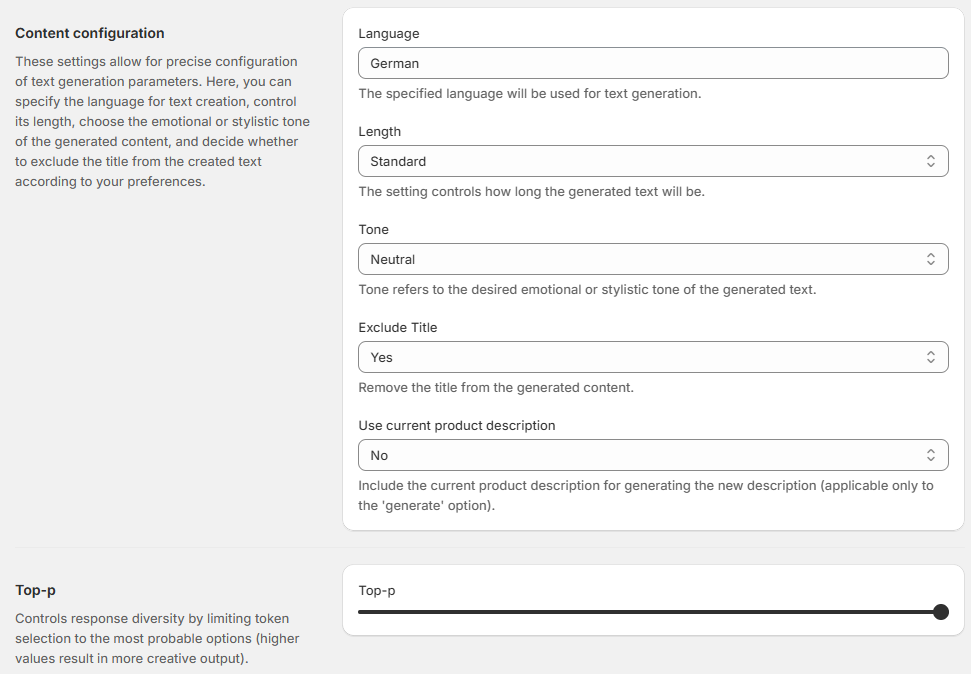
Language - specify the language used for text generation.
Length - choose the size of the generated text. It determines the number of tokens in the output generated by the model:
- Short - choosing the short length option limits the generated text to a maximum of 300 tokens.
- Standard - the standard length option allows the generated text to be up to a maximum of 600 tokens.
- Long - selecting the long length option allows for more extensive and detailed responses, with a maximum of 800 tokens.
Tone - tone refers to the desired emotional or stylistic tone of the generated text.
Exclude Title - remove the title from the generated content. This ensures that the product name doesn't duplicate in both the title and the content.
Use Current Product Description - this setting allows you to include the existing product description when generating a new one using the 'Generate' option. By enabling this feature, the AI will consider the current description as context, potentially leading to more relevant and consistent new descriptions. This is useful when you want to refine or expand upon an existing description rather than starting from scratch.
Top-p (Predictability) - Use the slider to control the randomness of the output.
- Lower Top-P: Results in more predictable, focused, and stable text.
- Higher Top-P: Results in more varied, creative, and diverse text.
- Defaults: OpenAI (1.0), Gemini (0.95).
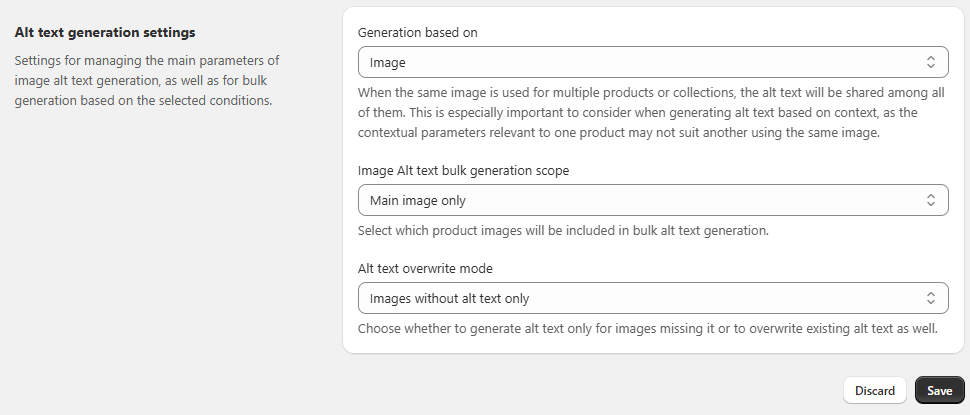
Alt Text Generation Settings - these settings control how image alt texts are created and when they are updated.
1. Generation based on - choose what the system should use for generating alt texts:
- Image (default) – Generates based only on the image content.
- Context – Generates using the product or collection title, description, and (if enabled) variants or keywords.
|
NOTE If the same image is used in multiple products or collections, the generated alt text will be shared between them. Keep this in mind when using the Context option, as it may not always fit all cases. |
2. Image Alt text bulk generation scope - Define which images are included when running bulk generation:
- Main image only (default) – Generates alt text only for the main image.
- All images – Generates alt text for all product or collection images attached.
3. Alt Text Overwrite Mode - Set whether existing alt texts should be replaced during bulk generation:
- Images without alt text only (default) – Generates alt text only where it’s missing.
- All images (overwrite existing) – Replaces any existing alt text with newly generated text.
|
NOTE These settings are the basis for the content generation, both for individual content and multiple content through the 'Generate description'/'Generate SEO' mass action. However, it is important to note that these settings can be individually modified for specific object if custom adjustments are required. |
Save changes. After configuring the settings, switch to the necessary object grid, where you can generate content individually or in bulk.
Products content generation
WritePilot allows you to generate product titles, product descriptions, meta titles, meta descriptions and alt text.
You can create content for each product individually or generate it in bulk.
Generate Product Content in Bulk
1. Open Content generation page.
2. Select the Products tab to generate content for products.
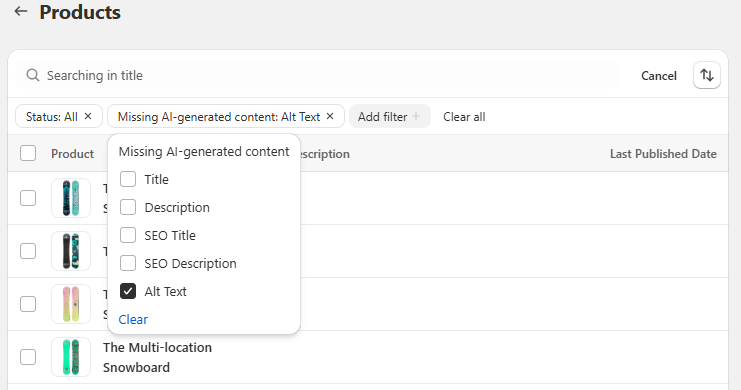
3. (Optional) Use the search, sort, and filter options to find products that need content. You can filter by:
- Product name
- Collection name
- Status
- Missing AI-Generated Content (to show products without content or content not created by the AI generation feature)
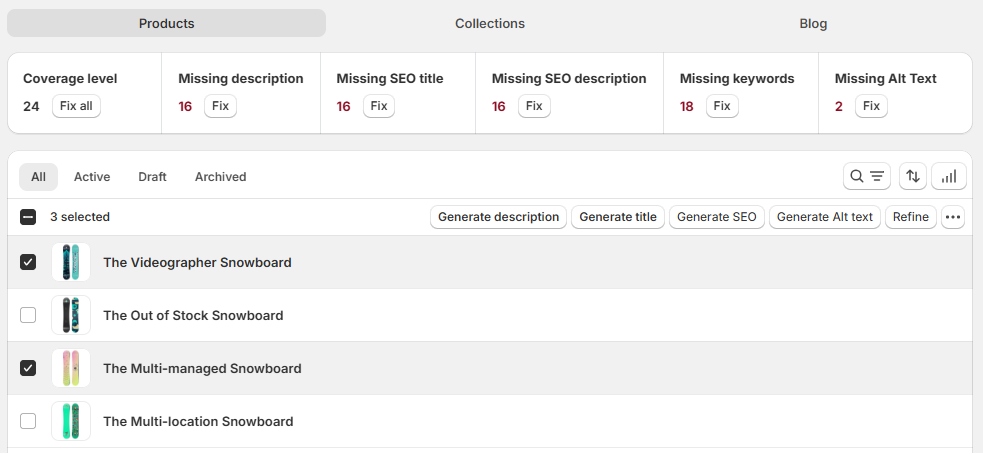
4. (Optional) At the top of the product grid, you'll see a Content Audit bar. This bar gives you an overview of missing content. You can click Fix to generate it in bulk for all applicable products.
5. Select the products you want to generate content for.
6. Choose the action you'd like to take:
- Generate description - create descriptions for selected products with default prompt;
- Generate title - create title for selected products with default prompt;
- Generate SEO - create meta titles and description;
- Generate Alt text - generate alt text for your product images using the default prompt;
- Refine - improve the grammar, syntax, and wording of your existing product descriptions;
- … > Generate title with custom prompt - provide your specific instructions to AI for generating product title. You can either add your own prompt or select a custom prompt template from the dropdown. Note: Make sure to use the all.item.data variable. Learn more.
- … > Generate description with custom prompt - provide your specific instructions to AI for generating product descriptions. You can either add your own prompt or select a custom prompt template from the dropdown. Note: Make sure to use the all.item.data variable. Learn more.
|
NOTE Here’s how credit usage is calculated for generation: 1 product description = 1 credit 1 SEO = 2 credits (1 for SEO title and 1 for SEO description) 1 Image alt text = 1 credit 1 refine = 2 credits |
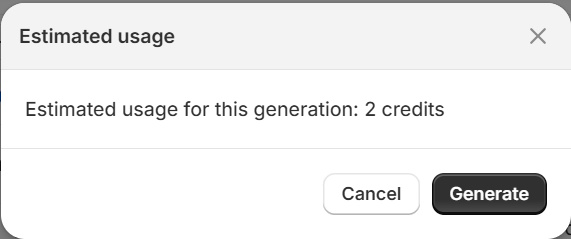
7. Confirm the action and view the estimated credit usage.
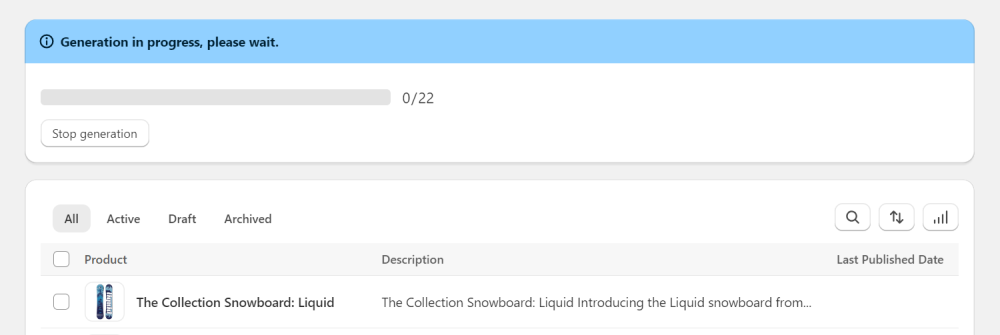
You can Stop generation whenever required.
8. If the Preview before publishing option is enabled in Settings, you can preview the generated content and choose which version to publish.
|
TIP To have content automatically generated for new products as they’re added to your store, set up a rule on the AI auto-generation page. |
Generate Product Content Individually
You can also generate content for each product individually for a more tailored experience.
1. Open Content generation page.
2. Select the Products tab to generate content for products.
3. Find the product you want to generate content for and click on it to enter the product page.
The product page will display fields with data from your product. If a field is empty, it means there is no content for that element yet (e.g., product title, description, SEO title, SEO description, and alt text).
4. Optionally, To the right of the page, you can configure individual settings for each product.
- Add Additional Information
- Add your own keywords or generate new ones to include in the content
- Choose whether to include generated content for product variants
- Include product metafields, allowing the AI to use structured product data in the generation.
- Specify length, tone, language, etc.
|
NOTE These settings will override your General Settings for this specific product. |
5. Optionally, If you want the AI to consider the current product description when generating a new one (only for the ‘Generate Description’ option), enable the label. If you prefer the AI to generate the description from scratch, leave it disabled.
|
INFO This feature works differently from the "Refine" option. When generating a description with a label on, AI uses all the product-specific settings you’ve provided — such as keywords, title, category — and the information from the current description to create a new description. In contrast, the "Refine" option simply improves the grammar, syntax, and wording of your existing description. |
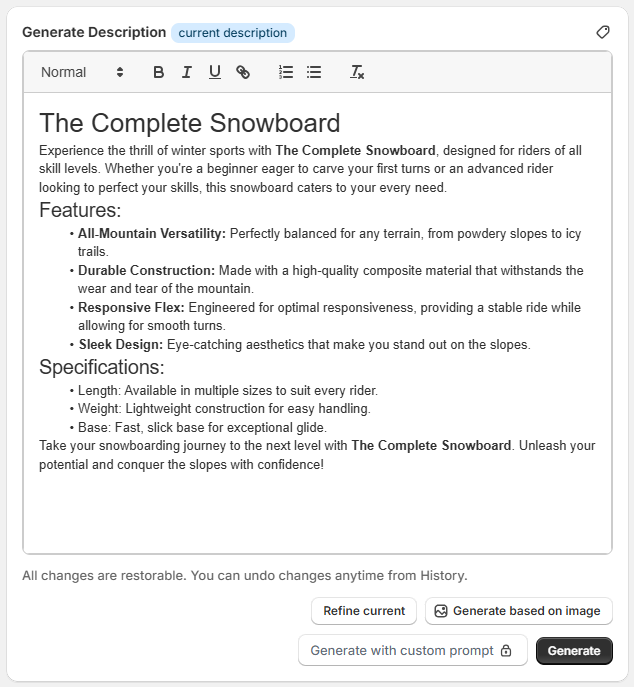
6. For each content field, you can choose one of the following actions:
- Generate - create content with default prompt;
- Generate based on image - select an existing product image or upload a new one to use them as a siurce for content generation. You can upload your own image or switch to another at any time. Note: Each image-based generation costs 5 credits. Supported image formats: .jpg, .webp, .png; Max file size: 5 MB. The image is used only for generation and is not published as part of the product description.
- Generate with custom prompt - create content using your specific instructions to AI. Note: Make sure to use the all.item.data variable. Learn more.
- Refine - (available for existing content) improves the grammar, syntax, and wording of existing content.
- Generate all content - Create content for all fields of the product at once. Note: Using the feature will consume credits based on the total number of content units generated in this single action. This provides a convenient way to quickly populate all essential content fields for a product.

|
NOTE Here’s how credit usage is calculated for generation: 1 product title = 1 credit 1 product description = 1 credit 1 SEO title = 1 credit 1 SEO description = 1 credit 1 image alt text = 1 credit 1 refine = 2 credits |
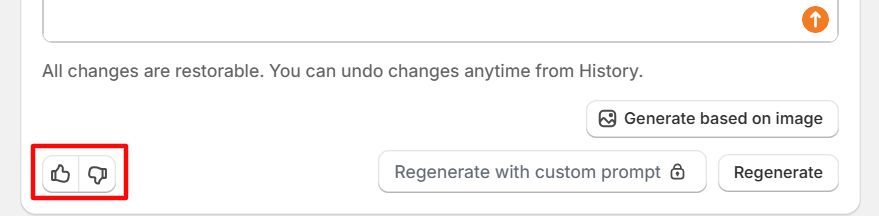
7. Optionally, Rate the quality of generated content to help improve future results. Note: Rating content does not affect your published or saved content. It is used only to improve future generations. Your feedback is more than just a survey - it directly influences how we refine our AI models. You help build a tool that understands your products more deeply.
8. Save changes to publish.
After generation, generated content can be edited anytime. All generations are recorded in History, where you can view or restore previous versions (if available).
|
NOTE All published content remains saved even after uninstalling the app. |
Collections content generation
WritePilot allows you to generate collection descriptions, meta titles, meta descriptions and collection image alt text.
You can create content for each collection individually or generate it in bulk.
Generate Collections Content in Bulk
1. Open Content generation page.
2. Select the Collections tab to generate content for products.
3. (Optional) Use the search, and filter options to find products that need content. You can filter by missing AI-generated content (to show products without content or content not created by the AI generation feature).

4. (Optional) At the top of the collection grid, you'll see a Content Audit bar. This bar gives you an overview of missing content. You can click Fix to generate it in bulk for all applicable collections.
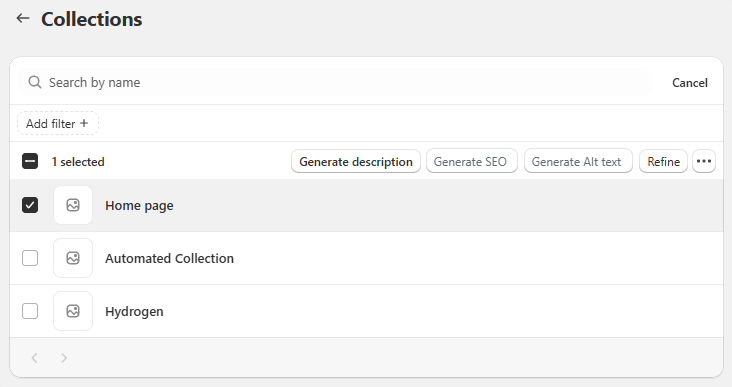
5. Select the collections you want to generate content for.
6. Choose the action you'd like to take:
- Generate description - create descriptions for selected collections with default prompt;
- Generate SEO - create meta titles and description;
- Generate Alt text - generate alt text for your collection images using the default prompt;
- Refine - improve the grammar, syntax, and wording of your existing collection descriptions;
- … > Generate descriptions with custom prompt - provide your specific instructions to AI for generating collection descriptions. You can either add your own prompt or select a custom prompt template from the dropdown. Note: Make sure to use the all.item.data variable. Learn more.
|
NOTE Here’s how credit usage is calculated for generation: 1 collection description = 1 credit 1 SEO = 2 credits (1 for SEO title and 1 for SEO description) 1 Image alt text = 1 credit 1 refine = 2 credits |
7. Confirm the action and view the estimated credit usage.
You can Stop generation whenever required.
8. If the Preview before publishing option is enabled in Settings, you can preview the generated content and choose which version to publish.
|
TIP To have content automatically generated for new collections as they’re added to your store, set up a rule on the AI auto-generation page. |
Generate Collection Content Individually
You can also generate content for each collection individually for a more tailored experience.
1. Open Content generation page.
2. Select the Collections tab to generate content for products.
3. Find the collection you want to generate content for and click on it to enter the collection page.
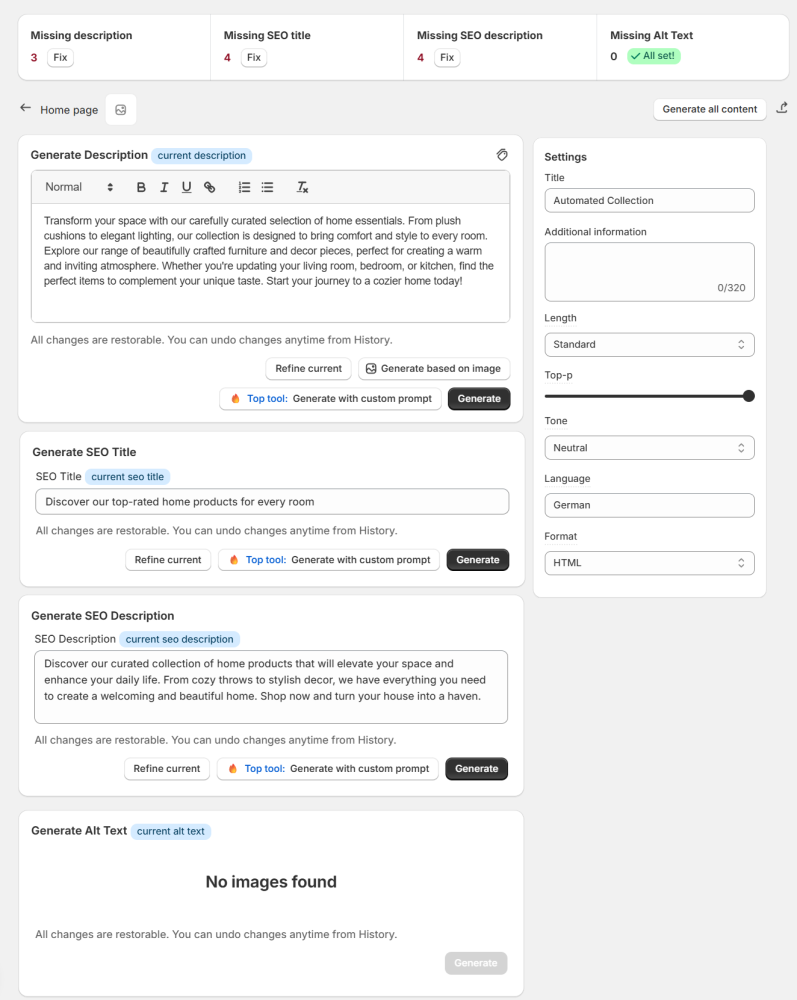
The collection page will display fields with data from your collections. If a field is empty, it means there is no content for that element yet (e.g., collection description, SEO title, SEO description, and alt text).
4. Optionally, To the right of the page, you can configure individual settings for each collection.
- Add Additional Information
- Specify length, tone, language, etc.
|
NOTE These settings will override your General Settings for this specific collection. |
5. Optionally, If you want the AI to consider the current collection description when generating a new one (only for the ‘Generate Description’ option), enable the label. If you prefer the AI to generate the description from scratch, leave it disabled.
|
INFO This feature works differently from the "Refine" option. When generating a description with a label on, AI uses all the product-specific settings you’ve provided — such as keywords, title, category — and the information from the current description to create a new description. In contrast, the "Refine" option simply improves the grammar, syntax, and wording of your existing description. |
6. For each content field, you can choose one of the following actions:
- Generate - create content with default prompt;
- Generate based on image - select an existing collection image or upload a new one to use them as a source for content generation. You can upload your own image or switch to another at any time. Note: Each image-based generation costs 5 credits. Supported image formats: .jpg, .webp, .png; Max file size: 5 MB. The image is used only for generation and is not published as part of the collection description.
- Generate with custom prompt - create content using your specific instructions to AI. Note: Make sure to use the all.item.data variable. Learn more.
- Refine - (available for existing content) improves the grammar, syntax, and wording of existing content.
- Generate all content - Create content for all fields of the product at once. Note: Using the feature will consume credits based on the total number of content units generated in this single action. This provides a convenient way to quickly populate all essential content fields for a product.
|
NOTE Here’s how credit usage is calculated for generation: 1 collection description = 1 credit 1 SEO title = 1 credit 1 SEO description = 1 credit 1 Image alt text = 1 credit 1 refine = 2 credits |
7. Save changes to publish.
After generation, generated content can be edited anytime. All generations are recorded in History, where you can view or restore previous versions (if available).
|
NOTE All published content remains saved even after uninstalling the app. |
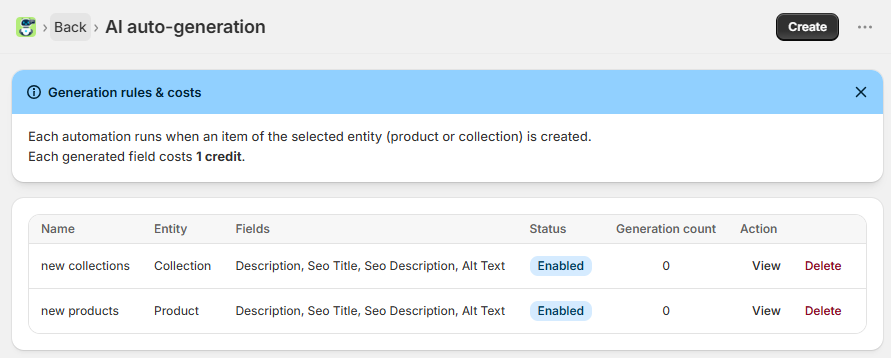
AI auto-generation
The AI auto-generation section allows you to automatically generate content for products and collections as they appear in your store.
Once your rules are set up, content will be generated automatically — no additional action is required on your part.
Create Automation
1. Open AI auto-generation page from the sidebar.
2. Click Create.
3. Configure the automation in three steps:
Step 1: Select Entity
1. Choose the entity type for automatic generation:
- Product
- Collection
2. Then select the fields that should be generated automatically:
- Title (available for products only) - regenerates the existing product title
- Description
- SEO Title
- SEO Description
- Alt Text
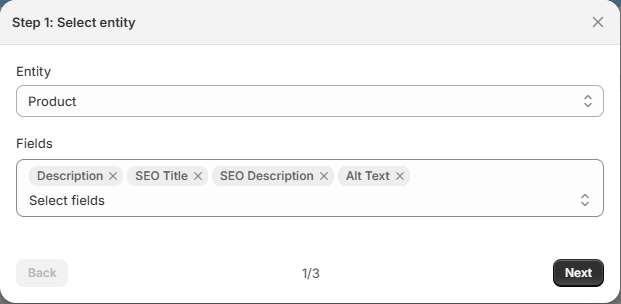
3. Click Next to continue to the next step.
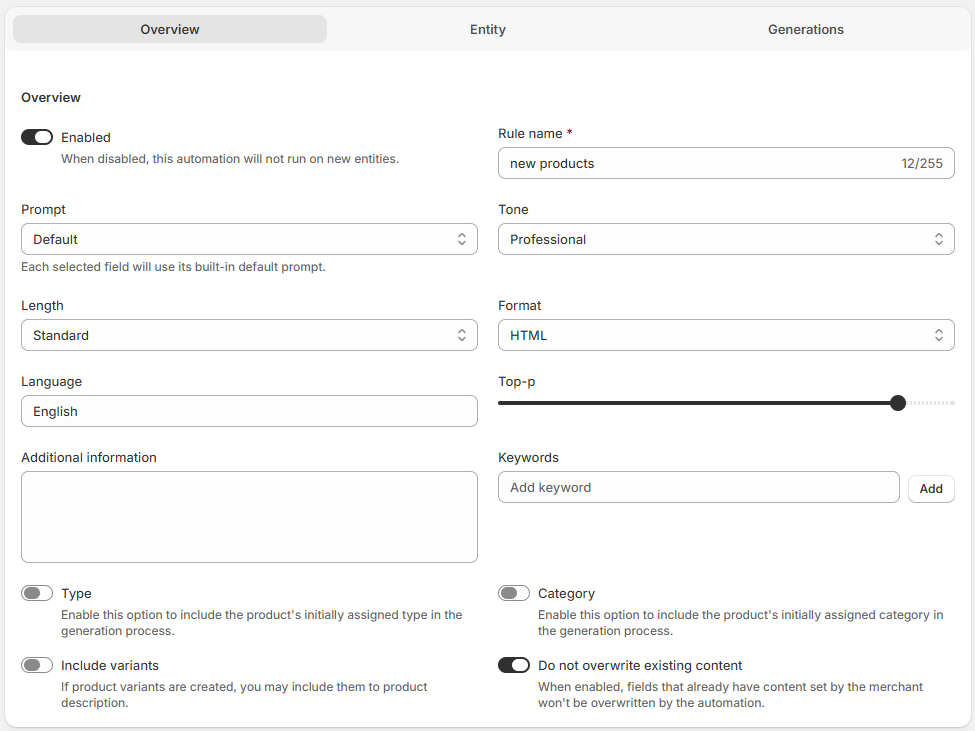
Step 2: Configure Settings
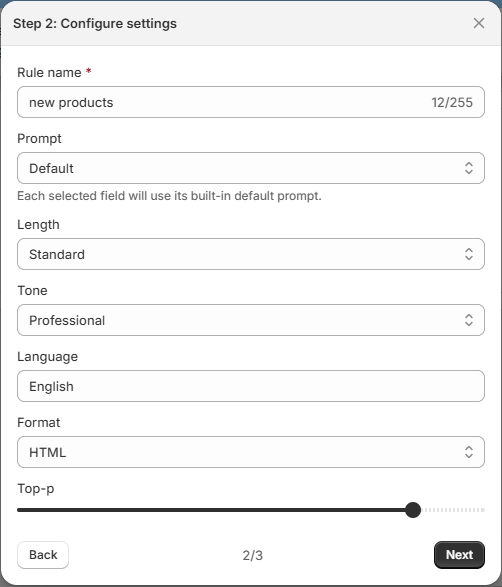
1. Configure the generation settings for the automation:
- Rule name - internal name of the automation
- Prompt - instructions used for AI generation
- Length
- Tone
- Top-P
- Language
- Format
2. Click Next to continue to the next step.
Step 3: Additional Fields
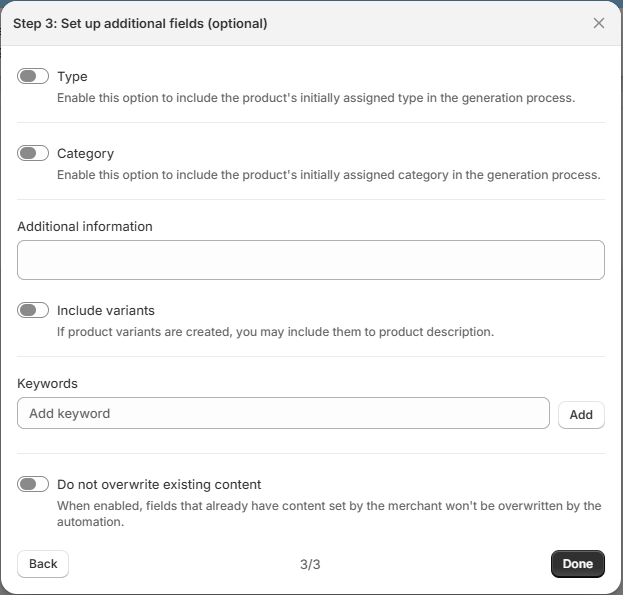
1. Specify additional details AI should consider for content generation:
- Type (available for products only) - if enabled, product's type will be considered by AI during content generation.
- Category (available for products only) - if enabled, product's category will be shared with AI as context for content generation.
- Additional information - add any extra details you want AI to consider.
- Include variants (available for products only) - include product variants in the generated content.
- Keywords - reusable keywords applied to all generated content
- Do not overwrite existing content - enable this option if you want to keep manually entered content unchanged. When enabled:
- AI generates content only for empty selected fields.
- Existing manually added content is preserved.
- Credits are not charged for skipped fields.
Example:
If description and SEO fields are selected for generation:
- Product A already contains a description → only SEO fields are generated.
- Product B has no description → description and SEO fields are generated.
2. Click Done to create the automation.
|
NOTE Content is generated and published the moment you save a new product or post - no manual approval is required. |
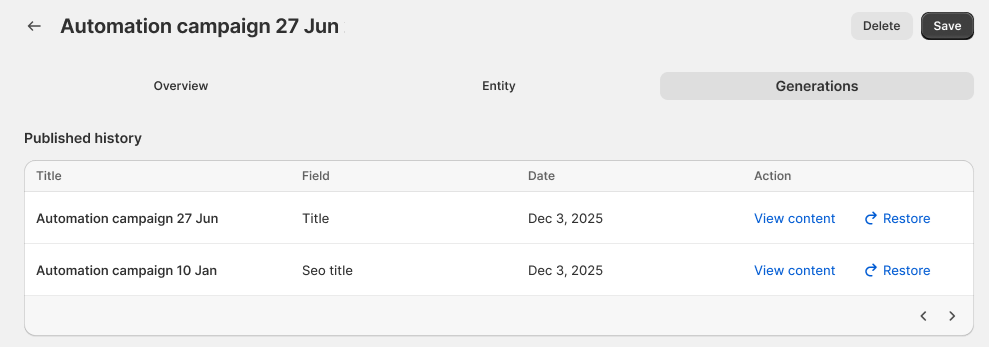
Automation Details
After creating an automation, you’re redirected to the Automation Details page, where you can review and edit its settings if needed.
In the Generations tab, you’ll find the history of all content created by the automation rule. You can filter the content and restore previous versions with a single click.
|
NOTE If you have multiple active rules for the same entity type (e.g., two rules for "Products"), the system will always prioritize and apply the most recently created rule. |
When a product or collection is created:
- AI automatically generates the selected fields.
- Generated content is published immediately.
- No additional confirmation is required.
If multiple active automations exist for the same entity type, the most recently created automation is applied.
|
NOTE Text content generation - 1 credit per field |
Blog content generation
With WritePilot, you can create blog posts on any topic and generate a matching thumbnail.
Set up your blog before generating content
Before generating blog content with WritePilot, first, you need to create a blog page where all your posts will be stored, along with a blank blog post, which will contain a topic for the post that will include a topic for the AI to generate content around.
Create a blog page
If you already have a blog page created in Shopify Admin, you can skip this step.
1. From Shopify Admin, go Content > Blog posts.
2. Click the Manage blog button.
3. Click Add blog.
4. Fill in details about your blog page.
5. Save changes.
Create a blank blog post
This step is required for each new blog post.
1. In Shopify Admin, go Content > Blog posts.
2. Click Add blog post.
3. Add the post title.
4. (Optionally) Specify an excerpt (post summary), SEO details, visibility settings, a featured image, and other options.
5. Save changes.
Generate blog post and featured image
1. Open WritePilot and go to Content generation > Blogs.
2. Select a blog page you already created earlier (from Step 1).
3. Open the blank blog post you created (from Step 2) or create a new post directly from here.
4. (Optionally) On the right side of the page, configure individual settings for the blog post:
- Specify title
- Add additional information
- Set length, tone, language, and format.
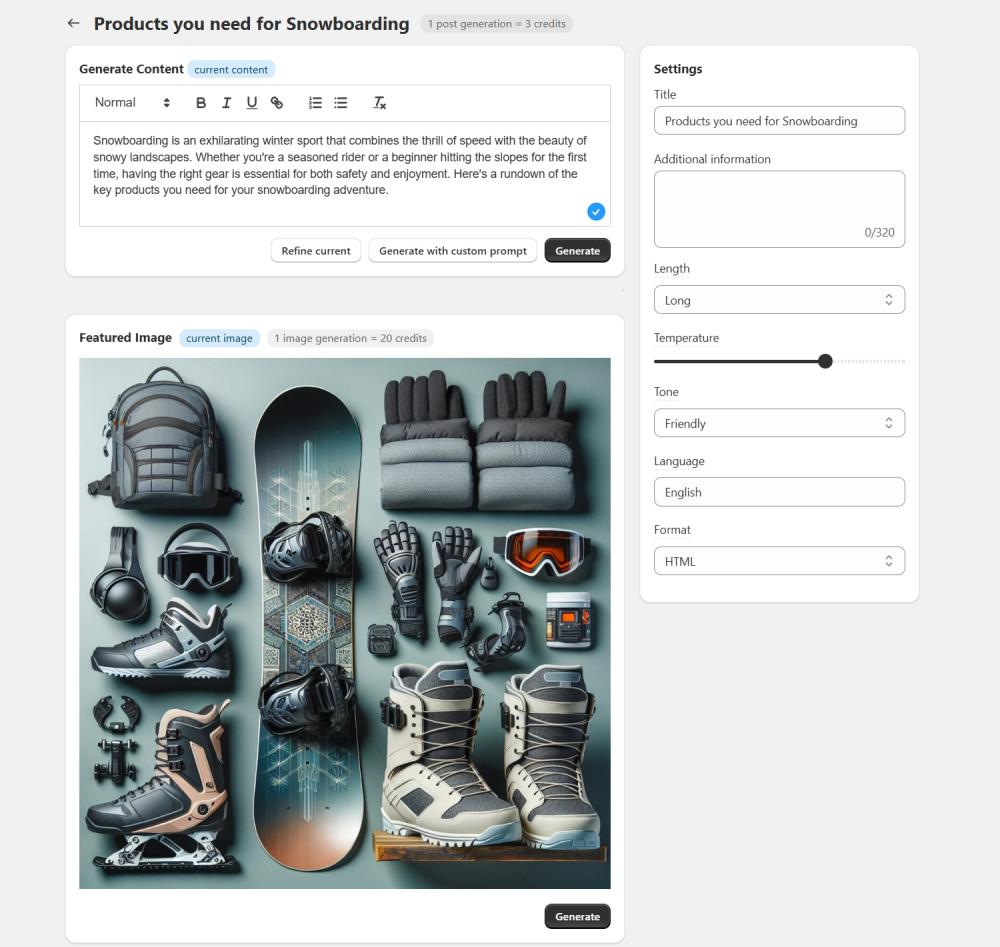
5. For generating blog content, choose one of the following options:
- Generate - create content with default prompt;
- Generate descriptions with custom prompt - create content using your specific instructions to AI. Learn more.
- Refine - (available for existing content) improves the grammar, syntax, and wording of existing content.
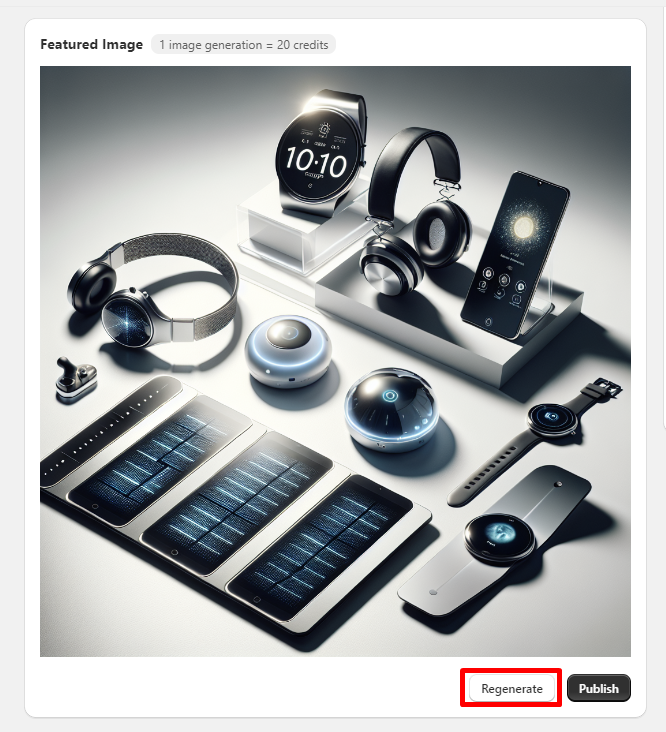
6. (Optionally) Generate featured images for the post.
7. Save changes.
You can edit or Regenerate content any time.

| NOTE Here’s how credit usage is calculated for generation: 1 post generation = 3 credits 1 refine = 6 credits 1 image generation = 20 credits. |
SEO content audit
The SEO Content Audit is an intelligent system that analyzes your store’s missing data and checks coverage by displaying a score.
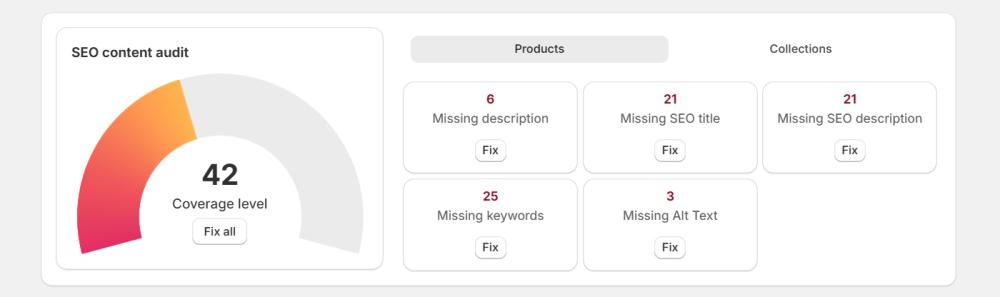
1. Open the WritePilot Home page and scroll to the SEO Content Audit dashboard.
2. Check the Overall Score on the left. This is a high-level indicator showing how complete and optimized your product and collection content is.
3. On the right, you’ll find more detailed information on each object, organized into two tabs:
- Products
- Collections
Each tab contains tiles highlighting missing or incomplete content, such as:
- Missing description
- Missing SEO title
- Missing SEO description
- Missing keywords (Products only)
- Missing Alt Text
|
NOTE The same corresponding tiles can be viewed on the Products and Collections tabs on Content generation page with the Fix action. |
4. For each tile, click the Fix button to automatically generate the missing content in bulk for all relevant items.
If no action is required for a specific item, the tile will display the “All set” status, indicating no missing content.
Custom Prompt Templates
Custom prompts are specific instructions you provide to the AI, ensuring it generates content that meets your needs.
|
INFO While the Generate button uses a default prompt, which may be too general in some cases, the Generate with Custom Prompt action allows for more tailored results. |
You can browse our library of pre-made custom prompt templates that already include necessary variables or create your own.
Generate content with custom prompts or custom prompt template
Content generation with a custom prompt works similarly to generating content with the default prompt, but with the added step of specifying the prompt you want to use:
1. Open Content generation from the sidebar.
2. Select the appropriate tab:
- Products - generate content for products.
- Collections - generate content for collections.
- Blog posts - generate content for blog posts.
3. Select the item(s) you want to work with.
4. Click Generate with custom prompt.
A popup window will appear. You can either:
- Type your custom prompt directly, or
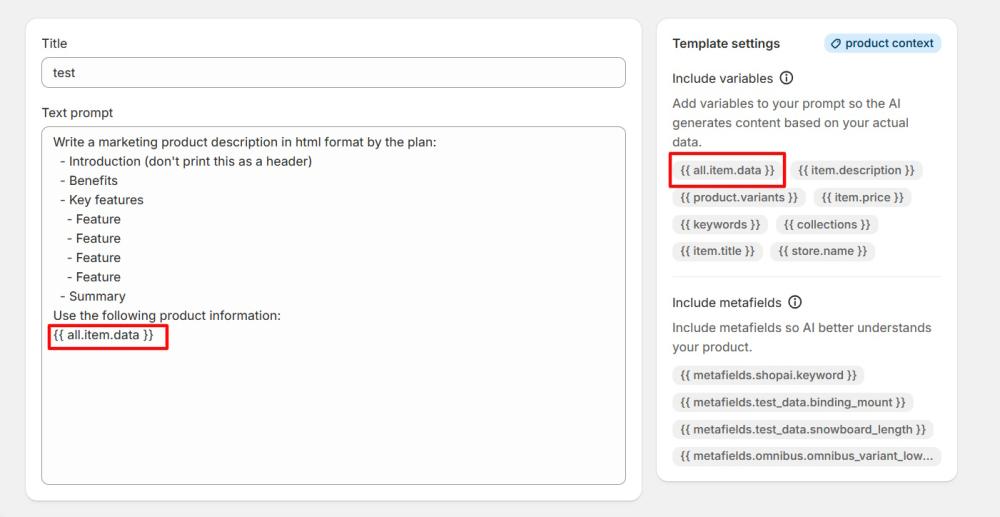
- Click the dropdown under Prompt Template to choose one of built-in or saved custom prompt templates.
|
NOTE Be sure to use the all.item.data variable — it pulls information about your product directly from your product settings. |
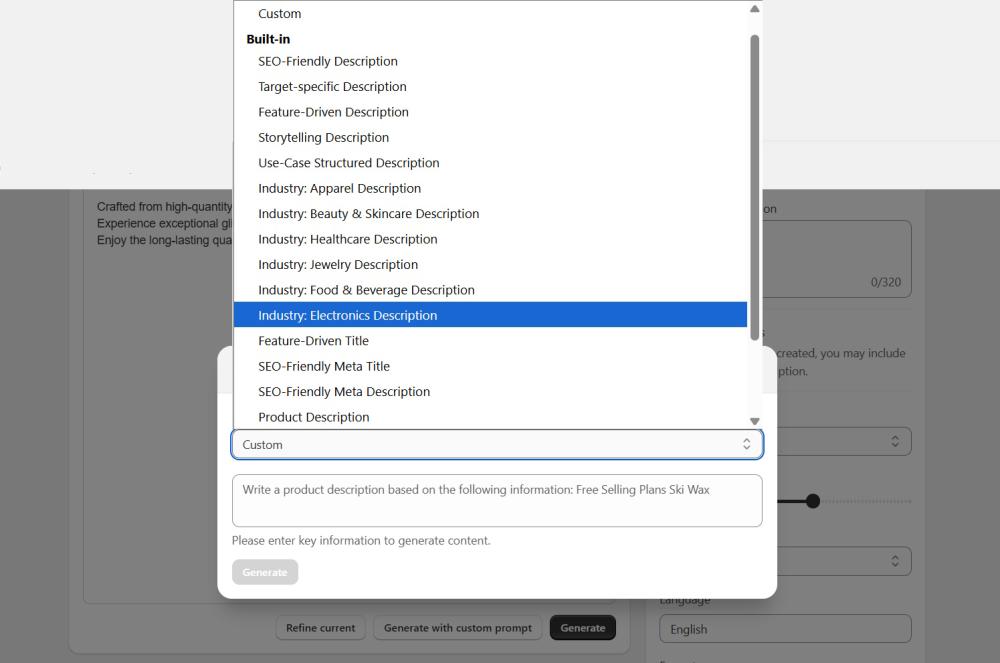
4. Once ready, click the Generate button to create the content.
Create New Custom Prompt Template
If you prefer using custom prompts for content generation, you can save frequently used prompts as templates to easily reuse them or use built-in ones. To create a new template follow these steps:
1. Open Prompts.
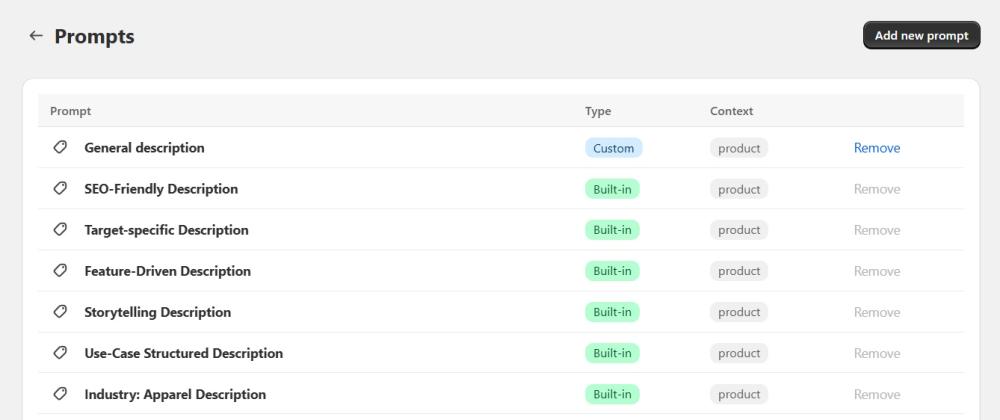
2. Click the Add new prompt button.
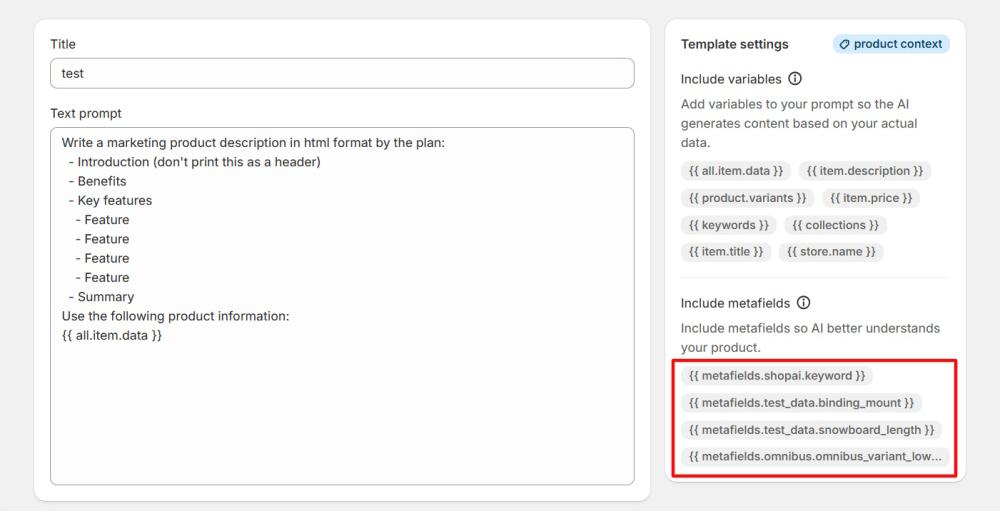
3. Fill in the details, and write your prompt. You can specify the text structure, the type of content you want, key information to include, and any other details you want the AI to consider.
|
NOTE Be sure to use the all.item.data variable — it pulls information about your product directly from your product settings. |
You can also use additional variables to make your prompt more specific (not all of these variables are available on all instances):
- item.description – includes context from your current product description (first 400 characters).
- product.variants – adds information about product variants.
- item.title – provides the product title for the AI to incorporate.
- store.name – includes your store’s name in the prompt.
- item.price – adds the product’s price to the context.
- keywords – helps AI generate and use relevant, popular keywords.
- collections – adds information about the collection the product belongs to.
You can use Metafields as variables in custom prompts to generate more accurate, attribute-based content. This helps create richer descriptions that highlight details like material, fabric, or product features.
|
NOTE Metafield prompt variables are currently supported for products only. |
For best results, combine Metafield variables with other data points such as item.description or keywords.
If you use Metafields for bulk generation, at least one standard variable (such as Title or Description) must also be included to maintain content quality.
4. Save your prompt.
5. Use it during content generation through action Generate with custom prompt.
|
NOTE Built-in prompt templates are not editable. To make changes, use the Duplicate function to create a new template and edit it as needed. |
Restore content
If you want to restore the original content or revert to a previous version, you can easily do so on the History page.
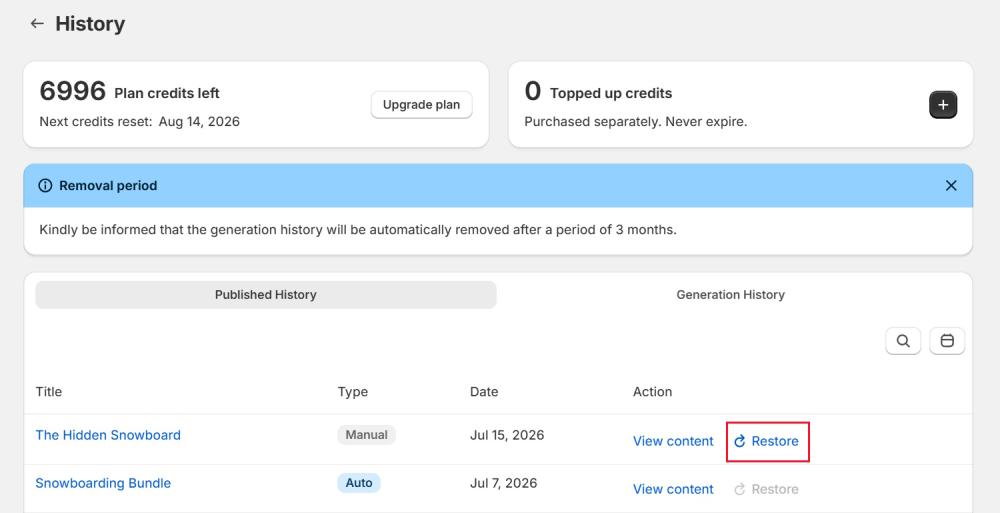
1. Open the History page. If you don’t see History in the navigation menu, click View More.
2. Find the content generation log you’d like to revert to in the Published History tab. You can filter by date or use search by object name for quicker access.
3. Find the version you want to return to using the View Content action.
4. Click Restore to revert to that version.
|
NOTE The generation history is automatically removed after a 3 month period. |
Pricing
Understanding pricing
Each pricing plan differs by the number of credits and the availability of some advanced features (e.g., custom prompts).
Credits are our internal currency used for content generation. Each type of content requires a specific number of credits:
- 1 description generation = 1 credit
- 1 title generation = 1 credit
- 1 meta description generation = 1 credit
- 1 meta title generation = 1 credit
- For bulk SEO generation, 1 SEO = 2 credits (1 for the SEO title and 1 for the SEO description)
- 1 image alt text = 1 credit
- 1 refinement = 2 credits
- 1 blog post generation = 3 credits
- 1 blog post refinement = 6 credits
- 1 image generation = 20 credits
Check detailed pricing on the WritePilot Pricing page. If you don’t see Pricing in the navigation, click View More > Pricing.
Buy extra credits for content generation
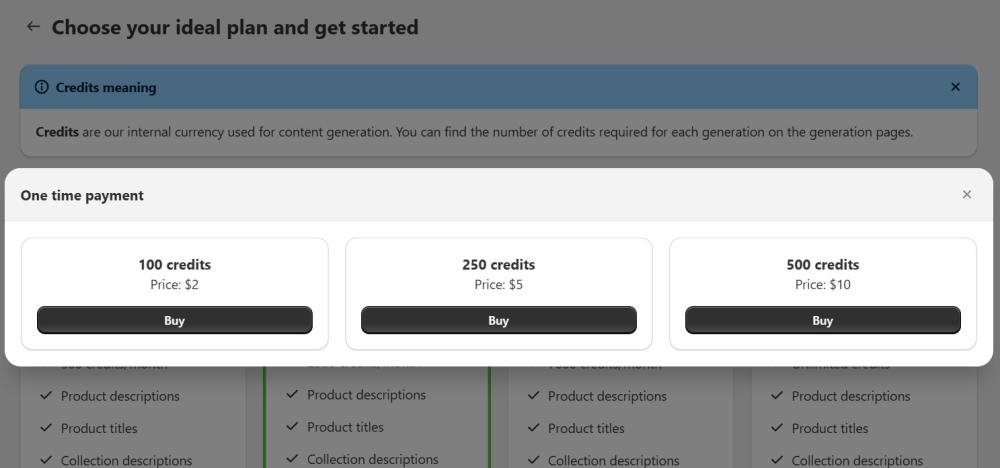
If you need more credits to create content beyond your current plan, you can easily purchase extra credits in the app.
1. Go to Pricing.
2. Click the link to top up 100 credits for just $2 in your pricing plan tab.
3. Choose from 100, 250, or 500 credits based on your needs, and click the Buy button.